Set up email in the Mail app for Windows 10
Work anywhere from any device with Microsoft 365
Upgrade to Microsoft 365 to work anywhere with the latest features and updates.
If you log on to Windows 10 using a Microsoft account with an Outlook.com, Live, Hotmail, or MSN address, that account is added to the Mail and Calendar apps. You can add that and many other email accounts to the Mail and Calendar apps to start sending and receiving email and creating and managing events.
Seeing a message that your account is out of date? You probably need to update your account settings. See Fixing an out-of-date account for more information.
Did you set up your email, but you don’t see your messages? Change your mailbox sync settings.
Add a new email account
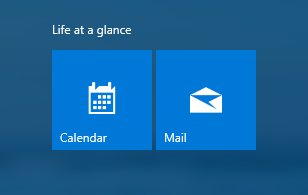
Open the Mail app by clicking the Windows Start menu and choosing Mail.

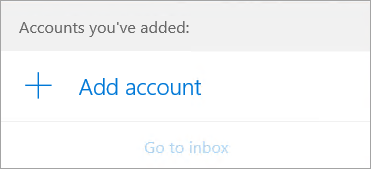
If this is the first time you’ve opened the Mail app, you’ll see a Welcome page. Select Add account to get started.
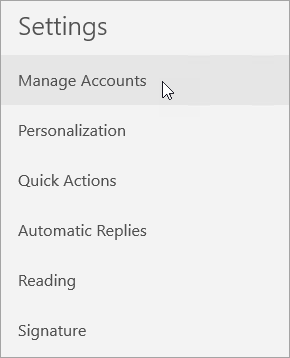
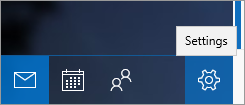
If you’ve used the Mail app before, at the bottom of the left navigation pane, select Settings  , and then choose Manage Accounts.
Note: On a phone or tablet, tap the three dots at the bottom of the page to access Settings.
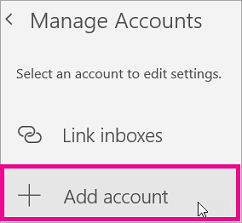
Select Add account.
Choose the type of the account you want to add.
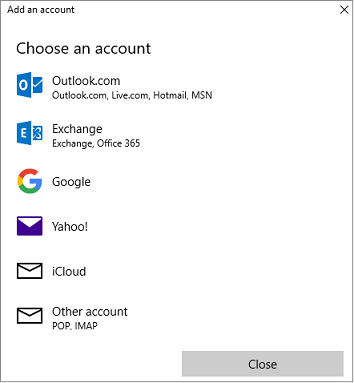
You may need to scroll down the Add an account dialog box to view all options.
If you choose Google, you’ll need to sign in to your Google account, enter your 2-step verification code if you’ve enabled that security feature, and give Windows permission to access your information. Click Allow and your account will be created.
If you choose another email account, you’ll need to follow the special instructions under Special instructions for other accounts below.
Enter the required information and click Sign in. For most accounts, this is your email address, password, and the account name. The account name is what you’ll see in both the left pane of Mail for Windows 10 as well as the Manage Accounts pane.
Note: If you receive the message “We couldn’t find info for that account. Make sure that the email address is correct and then try again,” you’ll need to click Try again three times before the button changes to Advanced. Click Advanced and follow the steps in the next section to add your account.
Click Done. Your data will start syncing as soon as your account is set up.
Note: It may take a few minutes for your account to synchronize. During this time, you may see «Not synced yet» in the message pane. If this message persists, see Resolve sync issues in Mail and Calendar apps in Windows 10.
Add an account using advanced setup
There are two ways you can access the Advanced setup options for your email account.
Click Advanced setup if your automatic email setup fails in Step 3 above.
Click Advanced setup from the Choose an account window in Step 2 above. The Advanced setup option is the last option on the list, and you may have to scroll to see it.
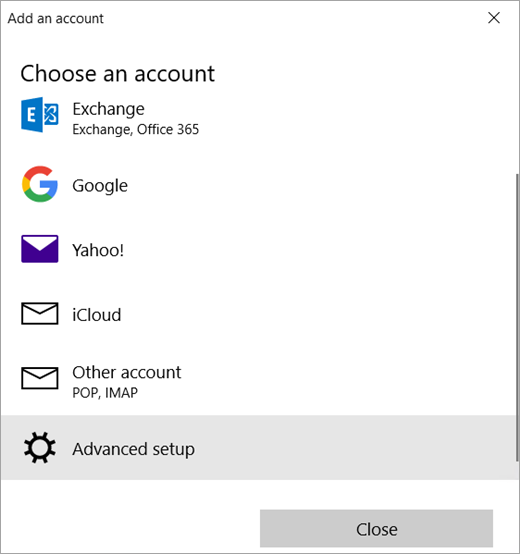
You can choose an Exchange ActiveSync account or an Internet email account. Unless your administrator has instructed you to use Exchange ActiveSync, click Internet email.
Enter the following information in the Advanced setup window.
Email address This is the name you’ll see in the left pane of the Mail app.
User name This is your full email address.
Password Enter your email account password.
Account name This is the name that you’ll see in the left pane of Mail for Windows 10, as well as in the Manage Accounts pane. You can choose any name you want.
Send your messages using this name Enter the name you want recipients to see when they receive your message.
Incoming email server You can get this information from your ISP or administrator. Usually, an incoming mail server address is in the format of mail.contoso.com or imap.google.com . For many email accounts, you can find this information in our POP and IMAP server name reference.
Account type Choose POP3 or IMAP4. Most email accounts use IMAP4. If you don’t know which one to choose, contact your ISP.
Outgoing (SMTP) email server You can get this information from your ISP or administrator. Usually, an outgoing email server address is in the format of mail.contoso.com or smtp.contoso.com .
By default, all four checkboxes at the bottom of the window will be selected. Most email accounts don’t require any changes to these options.
Your email provider can give you the settings you need to fill in the Advanced setup but you can also go to the POP and IMAP server name reference we’ve provided for the most popular email providers.
After you’ve entered the required information, click Sign in > Done.
Note: If you’re adding an account other than Gmail, see Special instructions for other accounts.
Troubleshooting
If you’re having problems setting up your account, try the following.
If you upgraded to Windows 10, you will need to re-add your accounts to Mail for Windows 10.
Make sure your email address and password are correct. Passwords are case-sensitive.
If you see your most recent messages but no older messages, you probably need to change your email sync duration.
If you see a message that your account is out-of-date, you probably need to either update your password, your incoming or outgoing servers, or your SSL settings. See Fixing an out-of-date account for more information.
Special instructions for other accounts
If you’ve enabled two-factor authentication on your iCloud account, you’ll need to generate an app-specific password to add your iCloud account to the Mail app.
Select Generate Password below App-Specific Passwords.
Follow the instructions on your screen.
Microsoft has added OAuth support for Yahoo! accounts in the Windows 10 Creators update. To install the Creators Update now, go to the software download site, and select Update now. For more information about the update, see Windows 10 Creators Update is here.
If you have a Japanese Yahoo! email account you will need to do the following:
You’ll need to add your Yahoo! account as an IMAP account. To do this, follow the steps in Add an account using advanced setup using imap.mail.yahoo.co.jp for your incoming mail server and smtp.mail.yahoo.co.jp for your outgoing mail server.
To sync your QQ mailbox with the Mail and Calendar apps, you need to enable IMAP on QQ.
Sign in to your QQ account.
Select Settings > Account > POP3/IMAP/SMTP/Exchange/CardDAV/CalDAV Service > Find IMAP/SMTP Service > Open.
You might need to send a text message to enable this service. After you select Open in step 2, a dialog might appear prompting you to use your phone to send a message to the displayed phone number.
After the text message is sent, QQ will open a new dialog with an authorization code. Copy the authorization code as you’ll need this to add your QQ mail account in the Mail and Calendar apps.
In the Mail and Calendar apps, remove your QQ account and add it again using the authorization code.
Your QQ account should now sync automatically.
When you try to connect your GMX.de or WEB.de account to the Mail and Calendar apps, you’ll receive an email in your GMX.de or WEB.de mailbox with instructions about how to enable access.
In a web browser, sign in to your GMX.de or WEB.de account.
Find the email message with instructions about how to connect your account to the Mail and Calendar apps, and follow the instructions.
Your account should now sync with the Mail and Calendar apps automatically.
Set up email and calendar
Windows 10 has built-in Mail and Calendar apps. To open them, search for Mail or Calendar on the taskbar, and select the icons from the search results.
Introduce yourself to Mail and Calendar
You’ve found the apps, now make them useful by adding your accounts. If this is the first time you’re opening either Mail or Calendar, follow the instructions on the Welcome page. Otherwise, do the following:
In the Mail or Calendar app, select Settings at the lower left.
Select Manage accounts > Add account, then choose an account, and follow the instructions.
Your mail and calendar will automatically start syncing. To add more accounts, return to Settings .
A few more handy things:
No need to add the same account twice—when you add it to one app, the other app automatically connects to the same account.
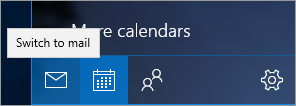
Switch between Mail and Calendar by selecting Switch to mail or Switch to calendar on the lower-left side of the window.
To see the contacts associated with your accounts, select Switch to People to open the People app.
Delete an account at any time by going to Settings > Manage accounts. Choose the account you want to delete, and then select Delete account. If you’ve signed in to your PC with a Microsoft account, that account is added automatically to the Mail and Calendar apps and can’t be deleted. But you can remove any others you added yourself.
For more info about how to use the apps, including troubleshooting help, select Settings > Help.
Best Email Apps for Windows 10 in 2020
Best Email Apps for Windows 10 Windows Central 2020
The flow of email headed your way never abates, and you need a robust and easy-to-use Windows 10 app to help you manage it all. The Mail app that comes with Windows 10 is more than enough for a lot of people, but there are hundreds of other email apps vying for your attention. If you’ve recently moved to a work from home situation, having a proper email app is no doubt more important than ever. To help you decide which is best suited for you, we rounded up a bunch of the best out there that work with Windows 10.
![]()
Free Email : Thunderbird
Thunderbird is a free, open-source email client from Mozilla, most famous for its Firefox web browser. It’s full of features that make it easy to navigate and use, and there are a ton of add-ons available for specialized needs. At its core, you’re getting a powerful mail tool with a tab system, built-in web search bar, smart folders, real-time contact chat, one-click address book, and more.
![]()
Part of Office 365 : Outlook
Although Outlook comes bundled in most Office 365 plans, it can also be purchased separately. Outlook supports practically every email service, allowing you to keep track of all your addresses in one spot. Along with calendar and task integration, Outlook has a load of adjustable inbox rules to help keep you in the know.
![]()
Lightweight Client : Mailbird
Mailbird is a lightweight client that won’t bog down your PC, but it can be fully customized to have it look exactly how you want. You can sync all of your accounts into one manageable inbox, and you can create your own quick replies, drag and drop attachments, and even search for messages just by clicking a user’s profile picture. A free trial is available, as well as monthly or lifetime subscriptions.
![]()
Lots of Customization : eM Client
With plenty of customization options — including those for behavior and appearance — and support for popular email services, you can easily make it feel like you’ve been using eM Client for years. An update added PGP encryption support for anyone who needs to send encrypted emails, plus live backup will now run while you continue working within the app. A free version without all features is available, though the Pro version is a one-time buy.
![]()
Simple User Interface : Claws Mail
Veteran Windows users will be immediately reminded of the old days when they see the Claws Mail user interface. Don’t let its simplicity fool you; this is an able app geared toward advanced users who don’t mind setting things up on their own, and it works well on older PCs thanks to low system requirements. The retro vibe (and everything else) is completely free.
![]()
Have a Conversation : Spike
Dealing with traditional email might be starting to feel a bit antiquated, especially in the face of instant messaging apps, but Spike attempts to bridge the gap. It displays email as more of a conversation, with read and send receipts, avatars, and smart organization. Apps are available for Windows 10, macOS, iOS, and Android, and you can give it a shot for free for a personal account, with Pro accounts starting at $6 per month.
If we’re making some suggestions
If you’re struggling to handle your flow of email in your current app, any of these options will surely help. As far as free options go, Thunderbird is an outstanding open-source app full of features that many can’t leave behind. It’s lightweight so it won’t bog down your system, it’s secure, and it’s stocked with the tools needed to get a handle on incoming and outgoing messages.
As for a paid app, Outlook has been treating us well for years. It’s the app many of us know and love, thanks to wide email service support, calendar and task integration, and many more features that work with you rather than against you.
Considering you can buy Outlook as a separate purchase or as part of an Office 365 subscription, you can get your hands on the full suite of Office software for one basic price that includes 1TB of OneDrive storage. Quite the deal.
We may earn a commission for purchases using our links. Learn more.
![]()
Make the most of your Surface Pen and Slim Pen with these awesome apps
To really maximize the ability of the Surface Pen and Slim Pen, there are some essential apps you should check out. We’ve rounded up the best right here for a variety of purposes.
![]()
The NFL is back! Check out these must-have Windows apps for football fans
After months of waiting through a unique offseason and no preseason games, the NFL is finally back this week. With these Windows 10 apps, you won’t miss a snap of the NFL action.
![]()
Need to view and edit PDFs? Check out these valuable Windows apps.
PDFs are one of the most common document types on PCs but can be tricky to view and edit if you don’t have the correct software.

Cale Hunt
Cale Hunt is a staff writer at Windows Central. He focuses mainly on PC, laptop, and accessory coverage, as well as the emerging world of VR. He is an avid PC gamer and multi-platform user, and spends most of his time either tinkering with or writing about tech.