How to change your screen resolution in Windows 10 to customize your display

- You can change your screen resolution in Windows 10 at any time via the Display Settings menu.
- Windows 10 offers more than a dozen different screen options to choose from.
- Visit Business Insider’s homepage for more stories.
Whether you’re playing a game, visiting a website that looks better in a certain resolution, or you simply prefer your computer screen to have a particular layout, Windows 10 allows you to customize your screen resolution to your liking.
While the standard and recommended screen resolution is 1920 x 1080 pixels, there are actually 16 resolutions to choose from based on your personal preference.
Changing your screen resolution in Windows 10 can be done via the Display Settings option on your computer. From there, you can try out each of the offered resolutions to see which one best suits your needs, and you can follow the same steps again at any time to change it back.
Here’s how to do it.
Check out the products mentioned in this article:
Windows 10 (From $139.99 at Best Buy)
Lenovo IdeaPad 130 (From $299.99 at Best Buy)
How to change your screen resolution in Windows 10
1. Click the Windows button in the lower-left hand side of your screen.
2. In the search box, type «display.»
3. Click «Display settings» to open the app.
4. In the Display screen, scroll down to the «Scale and layout» section.
5. Click the box under «Display resolution» to see your available options.
6. Click on the screen resolution you want, then either click «Revert» or «Keep changes.»
It should also be noted that you can change your screen layout from landscape to portrait or vice versa under the same «Scale and layout» section depending on your needs or preferences.
These options may only be available on certain machines, so if certain resolutions or layout options do not appear, this is because they’re not compatible with your device.
Related coverage from How To Do Everything: Tech:
How to manually check for updates on a Windows 10 computer and install them
How to change the refresh rate on a Windows 10 computer, to improve your viewing or gaming experience
How to record audio on Windows 10 using the Microsoft Voice Recorder app
How to turn off the mouse acceleration feature on a Windows 10 computer, to get more accuracy with your mouse
How to turn off sleep mode on your Windows 10 device, or adjust the time it takes for it to turn on
Insider Inc. receives a commission when you buy through our links.
How To Change Screen Resolution In Windows 10
Last Updated on July 14, 2020 by admin 16 Comments
The display resolution or screen resolution is generally responsible for the clarity of texts and images displayed on the screen. At lower resolutions, texts and images appear larger, but fewer items fit on display. Likewise, at higher resolutions, images and texts look sharper, but more items fit on the screen as they appear smaller.
When you install the Windows operating system and install your graphics driver, the driver automatically sets the recommended resolution. Most users will never need to change the recommended or default screen resolution. However, at times, while playing a game or running software, the game or software might automatically adjust the screen resolution, forcing you to restore the original screen resolution manually.
Last evening, while writing how to set a custom resolution on Windows 10 PC, I noticed that the Screen resolution option is missing from Windows 10’s desktop context menu. As you likely know, in earlier Windows versions, the Screen resolution option would appear when you right-click on the desktop.
In Windows 10, Microsoft has renamed the Screen resolution option in the desktop context menu to Display settings. In other words, when you right-click on the desktop, you’ll see the Display settings option instead of the Screen resolution option. This is because Microsoft has moved most of the settings to the new Settings app to make changing Windows settings easier both on traditional PCs as well as touch-based devices. And because screen resolution settings have been moved, changing screen resolution in Windows 10 is not as easy it was before.
While right-clicking on Windows 10 desktop and clicking Display setting opens Display settings in the Settings app, first-time users will find it challenging to locate the option and change screen resolution in Windows 10.
Change display resolution in Windows 10
Complete the given below instructions to view and change Screen resolution in Windows 10.
Tip: If you want to know your current screen resolution quickly and easily, open whatsmyscreenresolution.com address in your web browser to know your display resolution.
Method 1 of 2
Step 1: Right-click on desktop and then click Display settings to open the same.

Step 2: To change the current screen resolution, click on the drop-down box located under the Display resolution section (see picture) to view all supported resolutions, and click on one of the listed resolutions to select it.

And if you have two or more screens connected to your PC, please select the display (on the same page) before changing the resolution. For more details on the external monitor screen resolution, refer to our how to change external monitor screen resolution in Windows 10 guide.

We recommend you select the recommended screen resolution unless you want to run a game or software at a lower or higher resolution.
Step 4: You’ll see the following screen with fifteen seconds to confirm the new resolution. To set the new resolution, click the Keep changes button. And if you find that the new resolution isn’t perfect, click the Revert button to restore the previous screen resolution.

And if you want to select a custom resolution, check out our how to set custom screen resolution in Windows 10 guide. Good luck!
NOTE: If you are running an older version of Windows 10, click the option titled Advanced display settings to view your current screen resolution and change it.
Method 2 of 2
Another way to change resolution in Windows 10
For NVIDIA and Intel graphics only
Step 1: Right-click on desktop and then click NVIDIA Control Panel. If you have Intel graphics, you’ll see Graphics Properties option.


Step 2: Once NVIDIA Control Panel is launched, in the left-pane (see picture), click Change resolution to view your current resolution as well as available resolutions. Select an available resolution and then click the Apply button.

If you are on Intel, after launching Intel HD Graphics Control Panel, click Display tile to view resolution settings, select a resolution, and then click Apply button.
Windows how to change screen resolution
It is very important to have the correct screen resolution settings on your Windows PC as it facilitates a better display of content and the clarity of images. Higher is the resolution, the sharper are the images and contents on your PC. While, Windows, however, has its own set default scaling settings and colors for each display in your PC, which are usually the best for your system, you can always adjust it according to your own preferences.
Change Screen Resolution on Windows 10
In this post, we will learn about how to how to change the Screen Resolution, Color calibration, ClearType Text, Display Adapter, Text sizing, and other Display settings in Windows 10. Adjusting the screen resolution is easy, and you can get to the Screen Resolution settings via Display Settings:
- Open Settings
- Click on System settings
- Select Display from the left side
- Scroll down till you see Display resolution
- From the drop-down select the screen resolution you want.
Let us see this in more detail.
Go to your Desktop, right-click your mouse and go to Display Settings.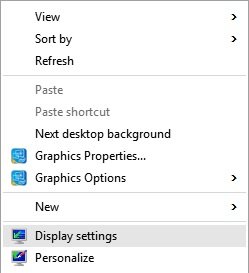
The following panel will open. Here you can adjust the size of text, apps, and other items and also change the orientation. To change the resolution settings, scroll down this window and select the drop-down menu for Display resolution.
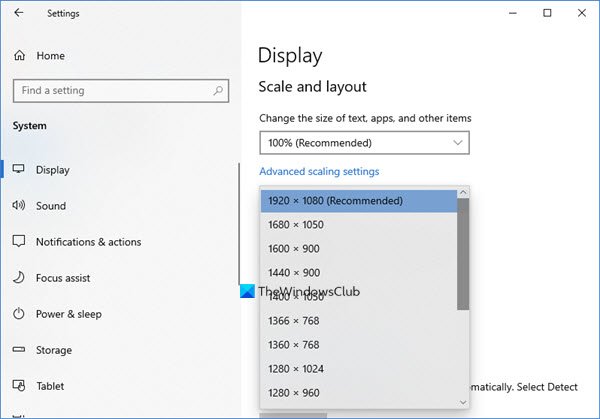
1920 X 1080 is the recommended screen resolution for my PC. It may be different for you.
However, you may want to modify if you want the items in your PC to appear larger. Please note that the lower is the resolution, the larger is the content displayed on your screen. From the available options in the drop-down menu, select the one you want and click Apply.
If it is not the optimal setting for your system, you will see an Optimal Resolution Notification like this.
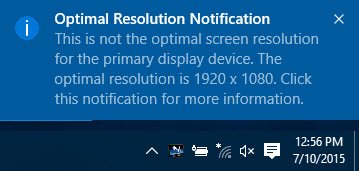
You may ignore the notification and confirm your Screen Resolution changes by clicking on Keep The Changes. or you may select another screen resolution. You will get just 15 seconds to confirm the changes or else it will revert to the default display settings.
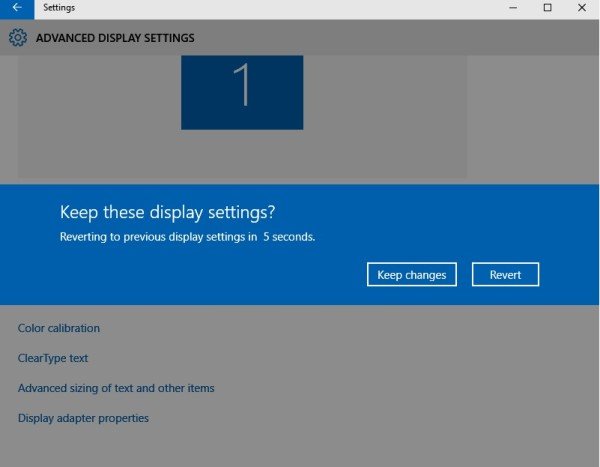
While here in the Advanced Display settings panel, you can also change the following settings:
Change Color Calibration in Windows 10
You can also calibrate your display. Search for Color Calibration in the search bar of Settings and click in the Calibrate display color option.
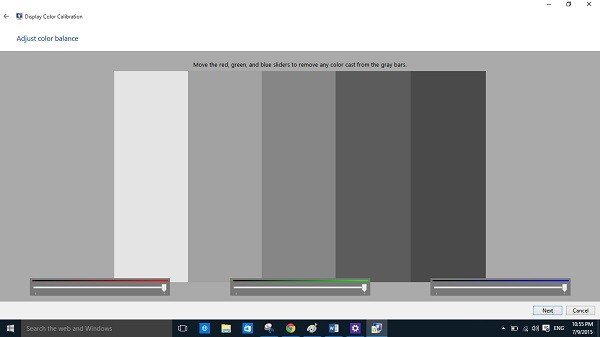
This will open the color calibration wizard where you just have to follow the instructions and adjust the settings. You will then reach a window shown below where you can adjust how the colors appear on your screen by moving the red, blue, and green sliders.
Calibrate ClearType Text in Windows 10
Make the text on your PC clearer by checking this small box under the Clear Type Text section.
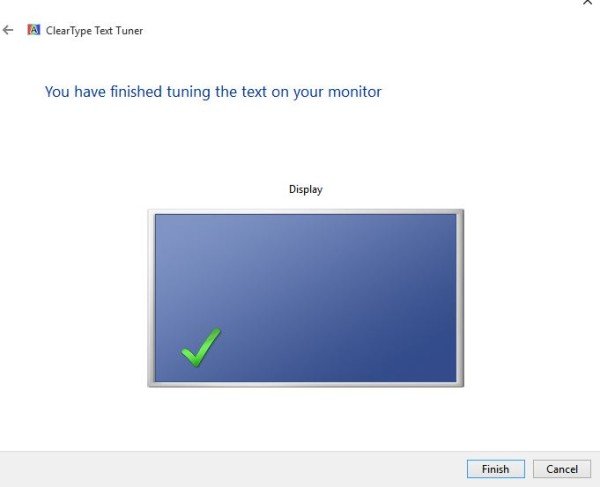
Search for ClearType text in the search bar of Settings and click in the Adjust ClearType text option.
This will open the Text Tuner where you have to follow the instructions and keep clicking on ‘Next’ button to tune the text on your monitor.