Fix: Ethernet Unidentified Network on Windows 10
The Ethernet ‘Unidentified Network’ problem often occurs due to the incorrect settings of the IP configuration or if the network settings are incorrectly set. Upon the emergence of this issue, users are not able to use their internet on their systems even if they have a working internet connection. The users are presented with a yellow exclamation mark on the network icon which delivers the ‘No network access’ message.
We use the internet in our everyday lives and when it comes to internet-related issues, they are tried to be dealt with quickly. The solutions for the given problem can be different depending on your computer system, however, we have selected the most effective ones that will surely get you back on the sites.
What causes the Ethernet Unidentified Network Problem on Windows 10?
Well, depending on different scenarios, the factors that cause this issue can vary. Nonetheless, this is mostly due to the following reasons —
- Incorrect IP configuration. When your system connects to a network, an address is assigned to the computer called IP address. If your IP address configuration is incorrect, it can cause the issue.
- Network settings. The settings of your network on your system can cause the issue to occur.
- Third-party software. Third-party applications that you are using on your system can also usually cause the issue — antiviruses mostly.
- Network card drivers. The drivers installed on your system for your network card can also be potentially the cause.
As we mentioned earlier, the solutions may vary depending on the systems. Therefore, to ensure a workaround, make sure you go through all the solutions given below. Also, before we proceed to the solutions, make sure that the Airplane mode is turned off.
Solution 1: Running the Network Troubleshooter
When trying to resolve a network issue, we always recommend running the Network Troubleshooter first. You might just be lucky enough that the troubleshooter will find the problem and fix it. Here’s how to do it:
- Press Windows Key + I to open Settings.
- Go to Network and Internet.
- Click on ‘Network troubleshooter’ to execute the troubleshooter.
 Network Troubleshooter
 - Wait for it to finish.
 Network Troubleshooter
Solution 2: Renew IP address
Your IP address configuration can be the cause of the problem as we have mentioned above. In such a case, you will have to release your current IP and renew the IP address configuration. To do this, follow the given instructions:
- Press Windows Key + X and select Command Prompt (Admin) from the list to open an elevated command prompt.
- Type in the following commands: Renewing IP
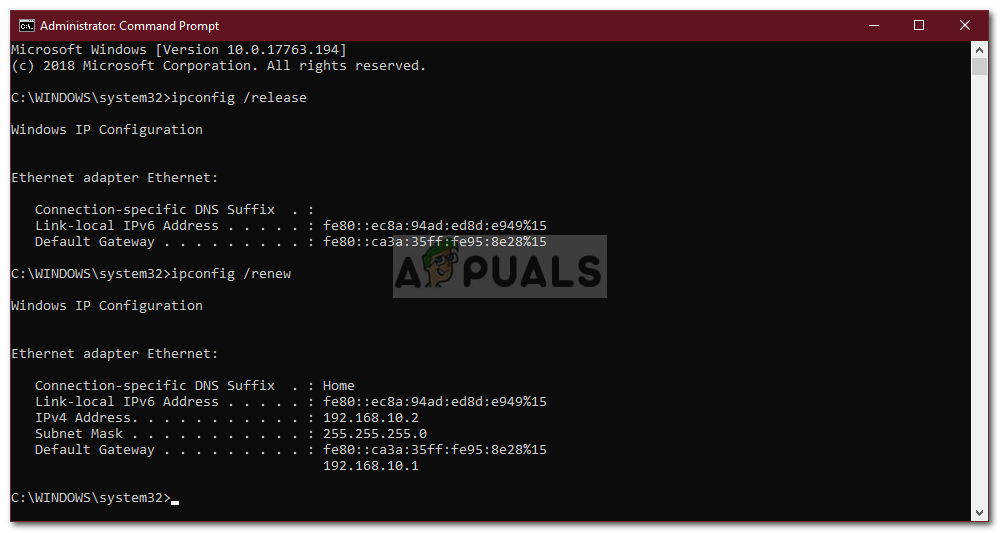 Renewing IP
You can also try to flush your DNS to see if it has an effect, here’s how to do it:
- In the command prompt, type in the following: Flushing DNS
- Once done, exit the command prompt and see if it fixed your issue.
 Flushing DNS
Solution 3: Reset TCP/IP
You can also try to solve the issue by resetting your system’s TCP settings. TCP is the media which defines how a computer sends data to another system by working with IP. To reset TCP/IP, do the following:
- Open an elevated command prompt as shown above.
- Type in the following commands: Resetting TCP
- Exit the command prompt.
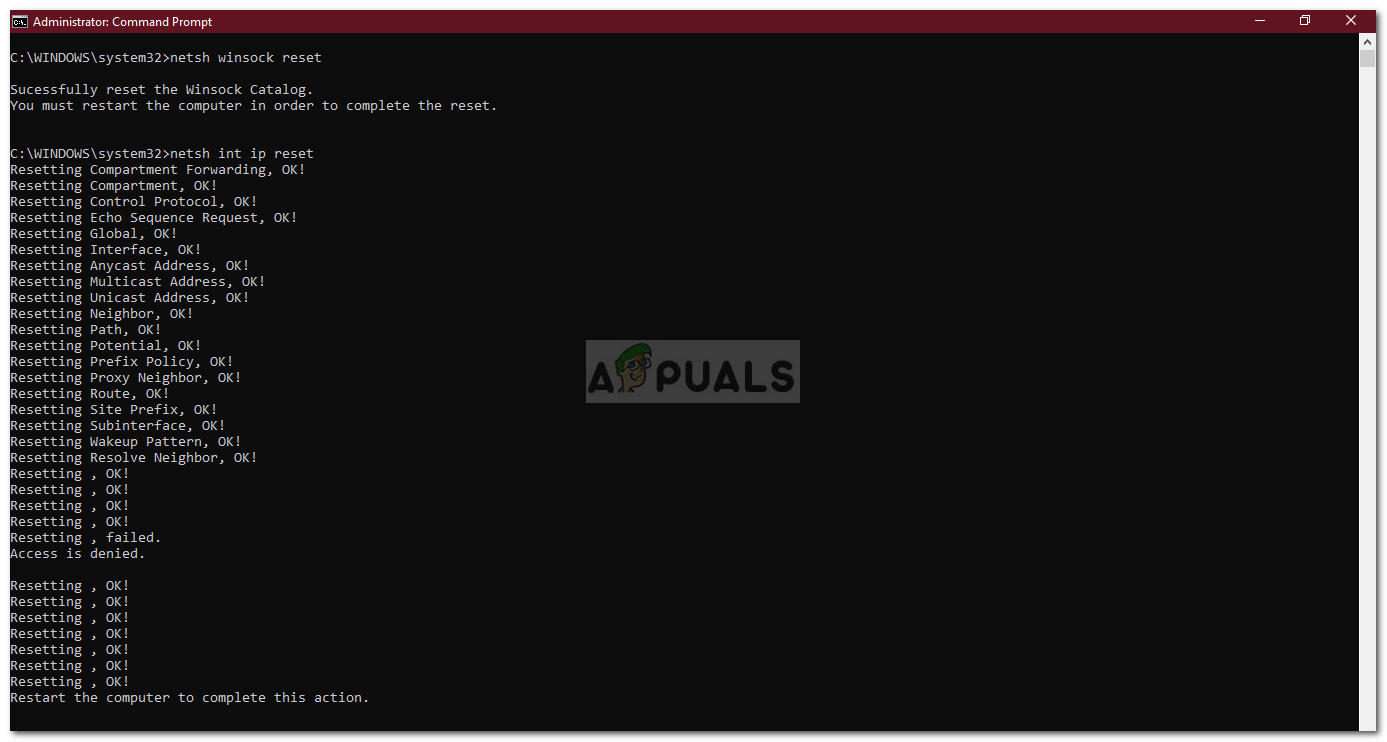 Resetting TCP
Solution 4: Turn off your Antivirus
In some cases, the third-party antivirus that you are using on your system can be the guilty party. Antiviruses are known to keep your system secure but, at times, they cause certain issues as well. Therefore, try disabling your antivirus and see if it helps.
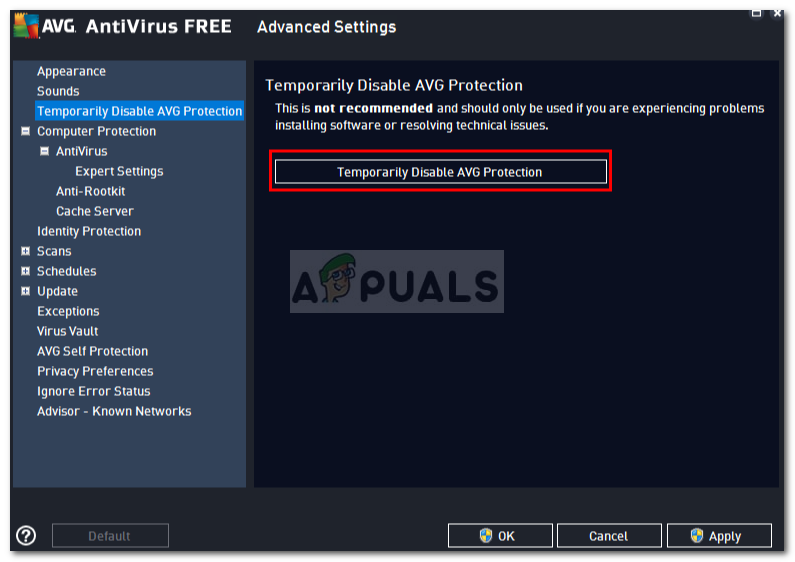 Disabling Antivirus
Solution 5: Turn off Windows Firewall Temporarily
The Windows Defender Firewall is a Microsoft built-in security application that manages and filters your network transmissions. Sometimes, the security application can be the root of the problem, therefore, to eliminate such a possibility, make sure to turn off the Windows Defender Firewall temporarily. Here’s how:
- Press Windows Key + I to open up Settings.
- Search for ‘Windows Defender Firewall’ and then select ‘Windows Defender Firewall’.
- On the left-hand side, click on ‘Turn Windows Defender Firewall on or off’.
- Check the ‘Turn off Windows Defender Firewall’ boxes under both the settings. Turning Off Windows Firewall
- Check if it fixes your issue.
 Turning Off Windows Firewall
Solution 6: Update Network Adapter Driver
Another way of fixing your issue would be to update your network adapter driver. The obsolete drivers might be malfunctioning which can potentially cause the issue, therefore, you will have to update them. Here’s how to do it:
- Press Windows Key + X and select Device Manager.
- Expand the Network adapters list.
- Right-click on your network adapter and select ‘Update driver’.
- Click ‘Search automatically for updated driver software’. Updating Network Driver
- Wait for it to finish and then restart your system.
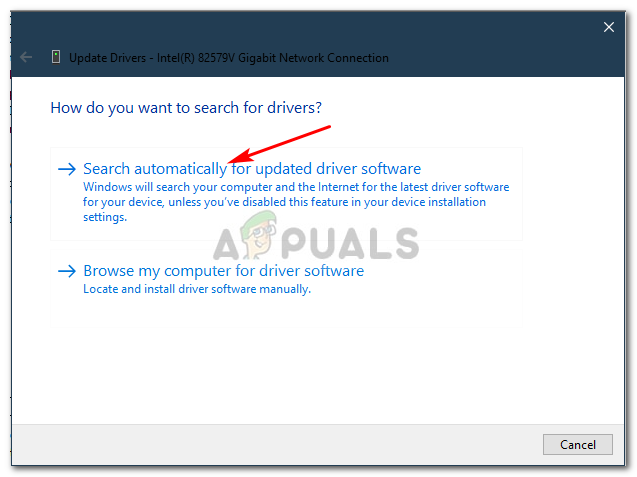 Updating Network Driver
Solution 7: Reinstalling your Network Adapter Driver
Sometimes, the system doesn’t find an update for your driver due to which the error persists. In such a case, you will have to uninstall your Network adapter driver and then reinstall it. Here’s how to do it:
- Open up the Device Manager.
- Expand the Network adapters list.
- Right-click on your network adapter and select ‘Uninstall device’. Uninstalling Network Driver
- Once the driver has been uninstalled, reboot your system so that the driver can be installed again.
- Check if it fixes the issue.
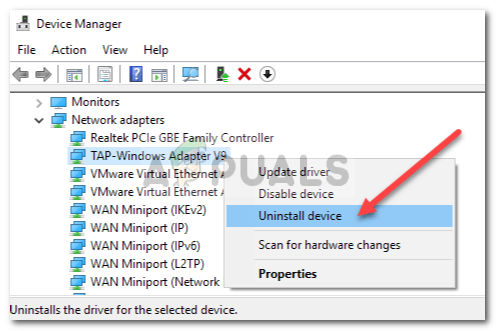 Uninstalling Network Driver
Windows 10 unidentified network
At times, you may face an issue with the network connectivity when trying to connect to the network, where the error says “Unidentified network“. While no sure shot solution is available for this, we have compiled an exhaustive list of troubleshooting steps that could help. Please go through the entire list first and then decide which of them may apply in your case.
Unidentified Network in Windows 10

To fix the issue of Unidentified Network in Windows 10/8/7, the following suggestions could be carried out.
- Turn off the Airplane mode
- Update the Network Card drivers
- Disable the security software temporarily
- Switch off the Fast Startup feature
- Change your DNS servers
- Run these commands
- Diagnose the network
- Change the Ethernet cable
- Set a static IP address
- Use an external Network Adapter
- Restart your modem and router
- Upgrade the router firmware
- Disable Virtual Network Adapters
- Run the built-in Network troubleshooters.
Let us see these methods in detail. Go through entire list first and see what may applt in your case.
1: Turn off the Airplane mode
Windows 10 supports the Airplane mode. You have to ensure that it is turned off. This could be done as follows:
1] Press Windows key + A. This opens the ‘Action Center’. —>
2] Check if Airplane mode is ON. If yes, change it to OFF and check if the internet connects.
2: Update the Network Card drivers
Sometimes the issue might be with the Network drivers. Update them and see if this helps.
1] Press Windows + X or right-click on the Start button.
2] Click on Device Manager to open it. —>
3] Find ‘Network Adapters’ and click on the forward-pointing arrow to expand the list. Right-click on all the Network drivers and update them one by one.
3: Disable the security software temporarily
Many at times, anti-virus or firewall software interferes with the network connectivity or causes other issues. It is understandable that the anti-virus software is crucial for the system, but to isolate the issue, it could be disabled to check if the network connectivity issues resolve in its absence. Right-click on its system tray icon and see if you get an option to disable it. Once disabled, see if you can connect. If you use Windows Firewall, you may want to reset Windows Firewall settings to default and check. If you are using a VPN software, disable it and try.
4: Switch off the Fast Startup feature
All of us have noticed that the later versions of Windows boot considerably faster than the previous versions. This is because of a feature called Fast Startup. Sometimes, this mode causes issues. To disable the feature, use the following steps:
1] Search for ‘Power Options’ in the Windows search bar. Open the Power Options window and among the tabs on the left, click on Choose what the power button does. —>
2] Click on ‘Change settings that are currently unavailable’.
3] Uncheck ‘Turn on fast startup’. Shut down the system and reboot after 30 seconds.
5: Change your DNS servers
1] Press Windows + X or right-click on the start button.
2] Click on ‘Network Connections’.
3] Right-click on your network connection (Ethernet or Wifi) and click on properties. It might prompt for administrator credentials.
4] Double-click on Internet Protocol Version 4.
5] Select ‘Use the following DNS server addresses’ and set but the preferred and alternate DNS server address as follows to use Google Public DNS:
6: Run these commands
Open ‘command prompt’ by searching it in the Windows search bar. Try the following command one by one and restart the system. Basically these commands – renew the IP address, reset Winsock, Flush DNS cache, and reset TCP/IP.
7: Diagnose the network
1] Press Windows + X or right-click on the start button. —>
2] Click on ‘Network Connections’.
3] Right-click on your network connection (Ethernet or Wifi) and click on ‘Diagnose‘. It will start an automatic troubleshooter.
8: Change the Ethernet cable
At times, the fault might be with the Ethernet cable. You could try changing it to isolate the issue. Or else, try connecting to a Wifi network (if available) and check if it works.
9: Set a static IP address
1] Press Windows + X or right-click on the start button.
2] Click on ‘Network Connections’.
3] Right-click on your network connection (Ethernet or Wifi) and click on properties. It might prompt for administrator credentials.
4] Double-click on Internet Protocol Version 4.
5] Select the radio button at ‘Use the following IP address’.
6] Check the IP address settings for others using the same network as yours and change your settings to the same.
7] Click OK to save the settings and exit.
10: Use an external Network Adapter
To isolate if the issue is with the network adapter, try an external adapter and check if it resolves the problem.
11: Restart your modem and router
1] Switch off both your modem and router, keeping them physically connected.
2] Start the modem. Wait for 30 seconds after all the lights turn green.
3] Start the router.
This is called power-cycling.
12: Upgrade the router firmware
If all devices connected to the router are facing network issues, you might need to contact the router’s tech support to help with upgrading the firmware of the device.
13: Disable Virtual Network Adapters
Once again open the Devices Manager and expand the Network Adapters section. In case Virtual Adapters are present, right-click and disable them.
14: Run the built-in Network troubleshooters
To open Internet Connections Troubleshooter:
To open the Incoming Connections Troubleshooter
To open the Network Adapter Troubleshooter:
This post offers more suggestions to fix Network & Internet connection problems. See this post if Ethernet connection is not working in Windows 10.