Winaero
At the edge of tweaking
How to Share File or Folder in Windows 10
As you may already know, Windows 10 doesn’t include the HomeGroup feature starting in version 1803. For many users, HomeGroup was a convenient way to share files and folders over a network. Today, we will see how to share files and folders without using HomeGroup. Instead, we will configure the built-in SMB sharing feature which is there since the earliest versions of Windows NT.
It is easy to share a folder over a network in Windows 10 using the built-in file sharing feature. No third-party apps required. You need to prepare the OS to get the feature working correctly.
Preparation
There are a number of options you need to revise before starting file and folder sharing. First of all, read the article (and its comments) Network Computers are Not Visible in Windows 10 Version 1803. Ensure that you have the services Function Discovery Resource Publication and Function Discovery Provider Host enabled (their startup type is set to automatic) and running. This needs to be done on each Windows 10 PC you want to set up for file and folder sharing.
Now, go through the following check list.
- Ensure that all computers in your network have unique names.
- Ensure that the network is set as a Private network.
- Ensure that the Network Discovery feature is enabled.
- Enable File and Printer sharing.
- You may want to enable Public Folder sharing optionally.
- For your own home network, you may want to disable Password Protected sharing (called Simple File Sharing in earlier versions of Windows) although for better security and fine-grained advanced permissions, we recommend that you enable password-protected sharing.
- Set the File Sharing Encryption level if you have devices which require 40- or 56-bit encryption.
- If you have PCs running versions of Windows earlier than Windows Vista, you might need to enable SMB v1 from Programs and Features — Turn Windows features on or off.
To share a file or folder in Windows 10, do the following.
- Open File Explorer.
- Navigate to a file or a folder which you want to share.
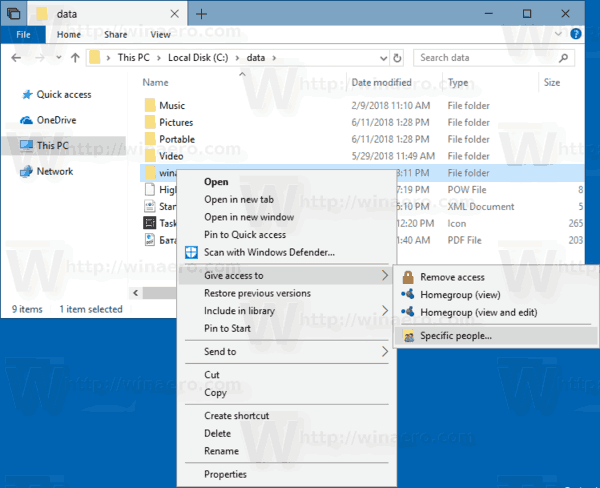
- Right-click on it and select Give access to from the context menu.

- Select «Specific people» from the submenu.
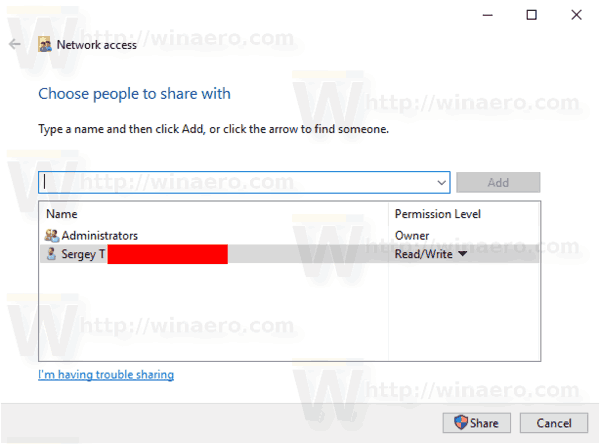
- You will see the list of user accounts that you are currently sharing the file or folder with. By default, you’ll see only the item owner in the list.
- From the drop down list, select the desired user account or the «Everyone» item to make the file or folder available to every user on your network.
- Click on the Add button.
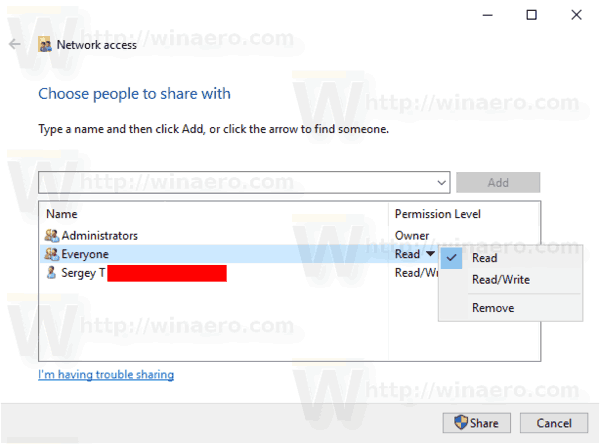
- In the Permission level column, select «Read» or «Read/Write» according to what you want. By selecting «Remove», you will stop sharing your data with the selected user account.
- To start sharing, click on the Share button.
You are done. Tip: To quickly stop sharing, right-click on the same file or folder and select Give access to->Remove access from the context menu.
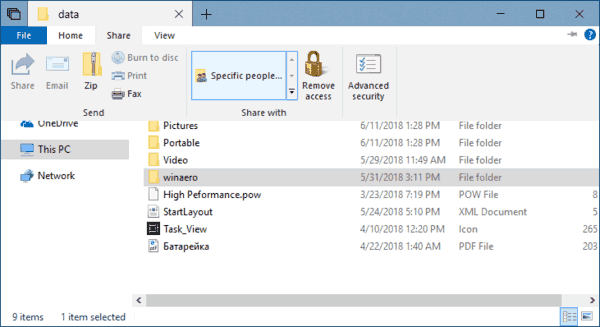
There are a number of alternative ways to start file or folder sharing with a user account. You can use either the Share tab of the Ribbon or the Sharing tab of the File Properties dialog.
Ribbon UI -> Share Tab
File Properties -> Sharing tab
Both options will allow configuring sharing as described above.
Note that Windows calls this feature the Sharing Wizard. It might be disabled in File Explorer Options (Folder Options) -> View tab. When you change Share permissions using the Sharing Wizard, Windows also shares or isolates the data from local user accounts besides network user accounts. The file system permissions change as well as network sharing permissions. In contrast, when you use Advanced Sharing (described below), you can change only the network sharing permissions without affecting NTFS file system permissions for a particular folder.
Advanced Sharing
The Advanced sharing dialog is another classic option for sharing your data over a network. Here is how to use it.
- Open File Explorer and go to the folder you want to share.
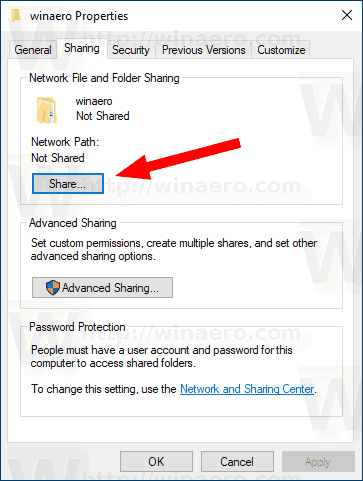
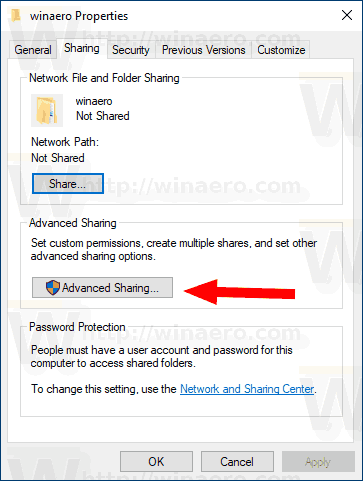
- Right-click on it and open Properties from the context menu.
- On the Sharing tab, click on the Advanced Sharing button.
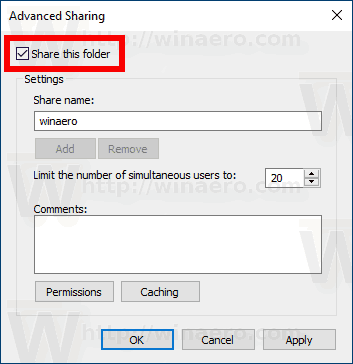
- In the next dialog, enable the option Share this folder.
- Specify the share name that other users will see.
- Also, you can limit the number of simultaneous users and add a comment.
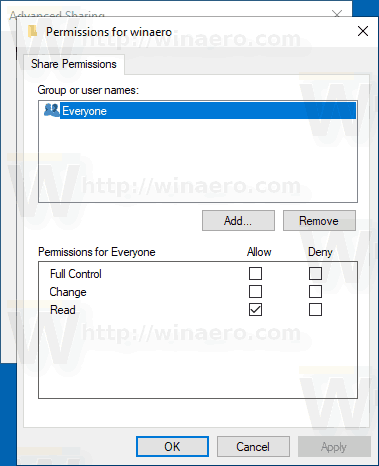
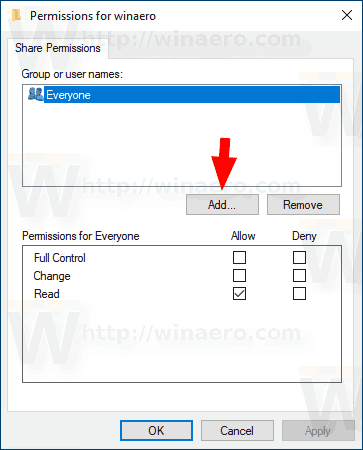
- Click on the Permissions button and set the required permissions.
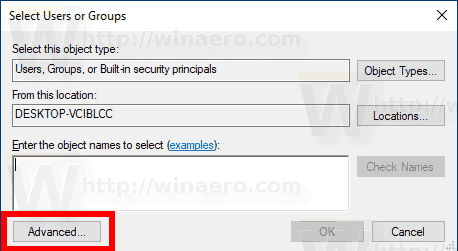
- If you don’t see the required user account, click on the Add button.
- In the Select Users or Groups dialog click on the Advanced. button.
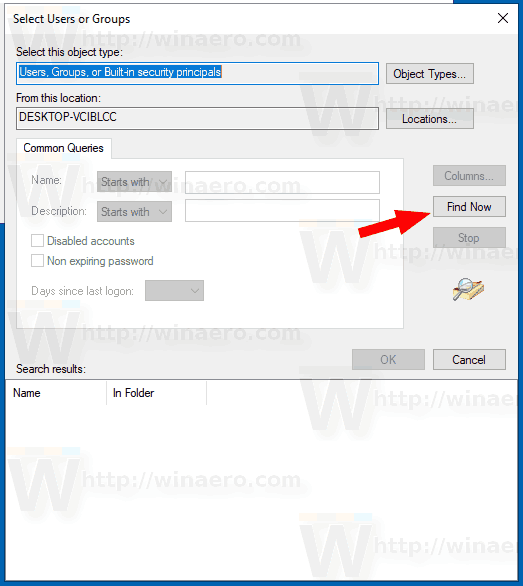
- Click on the Find now button.
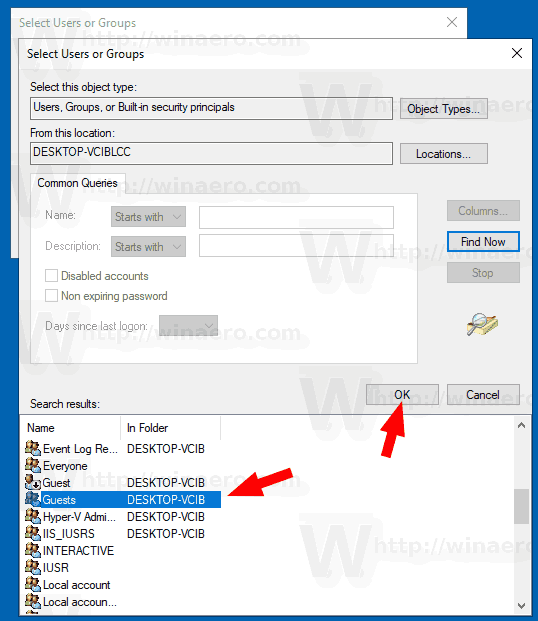
- Select the user account or group and click on the OK button.
- Now configure the required permissions.
- Use the Remove button to stop folder sharing with the select user account.

To quickly stop folder sharing with all users, open Properties -> Advanced sharing and untick the check box Share this folder.
A note about permissions for advanced sharing: There are many user accounts or groups you can choose from for Advanced Sharing, however the commonly used are
- Administrators group: Selecting this will share the folder with all network user accounts who have administrative rights.
- Authenticated Users: This causes Windows to show a dialog prompting for the user account name and password. This is the best option to select. If you want to be prompted every time you connect to a network share, select to share with Authenticated Users and don’t save the password. If you save the password, it will be stored in Windows Credential Manager Control Panel.
- Everyone: This option shares the folder with all user accounts without being prompted for credentials.
Shared Folders MMC Snap-in
Before proceeding, ensure that your user account has administrative privileges. Now, follow the instructions below.
- Press the Win + R keys on the keyboard.
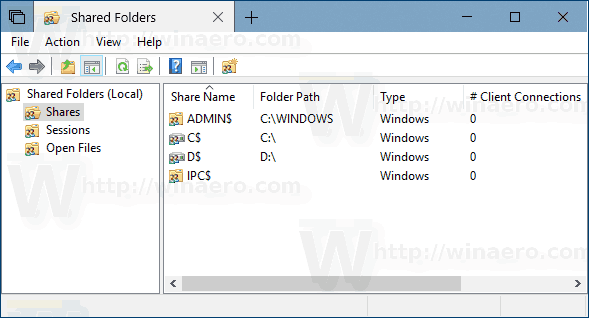
- Type fsmgmt.msc into the Run box.
- You will see the list of shares, sessions and files open over a network, including administrative shares (C$, IPC$, etc).
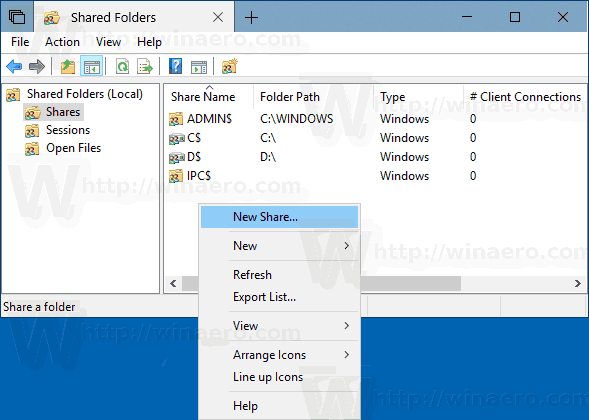
- On the left, click on Shares.
- Right-click on the empty space and select New share. from the context menu.
- This will bring you the same «Advanced sharing» dialog with options you are familiar with from the File Explorer Properties dialog.
- Finally, you can right-click on a shared folder and select «Stop sharing» to terminate the folder sharing with other user accounts over your network.


Note: Give access to and Advanced sharing are two distinct methods of sharing but as mentioned above, the former changes local and network permissions whereas the latter option only changes network permissions. If you use both or combine both, they may cause conflicts or confusion over permissions. Due to permissions being set differently by both methods, in most cases you cannot stop Advanced sharing by choosing Give access to -> Remove access from the context menu and vice versa. Keep this in mind.
Winaero greatly relies on your support. You can help the site keep bringing you interesting and useful content and software by using these options:
File sharing over a network in Windows 10
In Windows 10, some features of file and folder sharing over a network have changed, including the removal of HomeGroup. Read on for answers to common questions about other changes to file and folder sharing in Windows 10.
To share a file or folder in File Explorer, do one of the following:
Right-click or press a file, select Give access to > Specific people.

Select a file, select the Share tab at the top of File Explorer, and then in the Share with section select Specific people.

If you select multiple files at once, you can share them all in the same way. It works for folders, too—share a folder, and all files in it will be shared.
To stop sharing in File Explorer, do one of the following:
Right-click or press a file or folder, then select Give access to > Remove access.

Select a file or folder, select the Share tab at the top of File Explorer, and then in the Share with section select Remove access.

File Explorer shows the «Remove access» option («Stop sharing» in older versions of Windows 10) for all files, even those that aren’t being shared over a network.
Open File Explorer, then type \\localhost into the address bar.
Note: When you’ve shared a file from a folder in your user profile and you go to \\localhost, you’ll see your user profile and all its files there. This doesn’t mean that all of your files are shared—just that you have access to all your own files.
If you open File Explorer, go to Network, and see an error message («Network discovery is turned off….»), you’ll need to turn on Network discovery to see devices on the network that are sharing files. To turn it on, select the Network discovery is turned off banner, then select Turn on network discovery and file sharing.

To troubleshoot problems with sharing files or folders, follow the steps below on all computers from which you’re trying to share.
Make sure the computers are on the same network. For example, if your computers connect to the internet through a wireless router, make sure they all connect through the same wireless router.
If you’re on a Wi-Fi network, set it to Private. To find out how, read Make a Wi-Fi network public or private in Windows 10.
Turn on network discovery and file and printer sharing, and turn off password protected sharing.
Select the Start button, then select Settings > Network & Internet , and on the right side, select Sharing options.
Under Private, select Turn on Network discovery and Turn on file and printer sharing.
Under All Networks, select Turn off password protected sharing.
Make sharing services start automatically.
Press the Windows logo key + R.
In the Run dialog box, type services.msc, and then select OK.
Right-click each of the following services, select Properties, if they’re not running, select Start, and next to Startup type, select Automatic:
File sharing over a network in Windows 10
In Windows 10, some features of file and folder sharing over a network have changed, including the removal of HomeGroup. Read on for answers to common questions about other changes to file and folder sharing in Windows 10.
To share a file or folder in File Explorer, do one of the following:
Right-click or press a file, select Give access to > Specific people.
Select a file, select the Share tab at the top of File Explorer, and then in the Share with section select Specific people.
If you select multiple files at once, you can share them all in the same way. It works for folders, too—share a folder, and all files in it will be shared.
To stop sharing in File Explorer, do one of the following:
Right-click or press a file or folder, then select Give access to > Remove access.
Select a file or folder, select the Share tab at the top of File Explorer, and then in the Share with section select Remove access.
File Explorer shows the «Remove access» option («Stop sharing» in older versions of Windows 10) for all files, even those that aren’t being shared over a network.
Open File Explorer, then type \\localhost into the address bar.
Note: When you’ve shared a file from a folder in your user profile and you go to \\localhost, you’ll see your user profile and all its files there. This doesn’t mean that all of your files are shared—just that you have access to all your own files.
If you open File Explorer, go to Network, and see an error message («Network discovery is turned off….»), you’ll need to turn on Network discovery to see devices on the network that are sharing files. To turn it on, select the Network discovery is turned off banner, then select Turn on network discovery and file sharing.
To troubleshoot problems with sharing files or folders, follow the steps below on all computers from which you’re trying to share.
Make sure the computers are on the same network. For example, if your computers connect to the internet through a wireless router, make sure they all connect through the same wireless router.
If you’re on a Wi-Fi network, set it to Private. To find out how, read Make a Wi-Fi network public or private in Windows 10.
Turn on network discovery and file and printer sharing, and turn off password protected sharing.
Select the Start button, then select Settings > Network & Internet , and on the right side, select Sharing options.
Under Private, select Turn on Network discovery and Turn on file and printer sharing.
Under All Networks, select Turn off password protected sharing.
Make sharing services start automatically.
Press the Windows logo key + R.
In the Run dialog box, type services.msc, and then select OK.
Right-click each of the following services, select Properties, if they’re not running, select Start, and next to Startup type, select Automatic: