How to Map a Network Drive using Windows 10

If you have access to multiple computers on a network, connecting them to share data improves productivity. Here’s how to map a drive in Windows 10.
If you have access to multiple computers on a network, big or small, connecting to these resources can be critical to your productivity. For instance, in a large enterprise environment, users are often required and recommended to save data to a Mapped Network drive so co-workers can access the files. A network drive is usually a shared folder or computer that is available on a network that makes it easy to access using File Explorer, just like a regular hard disk.
This is done so everyone has consistent access to resources no matter the device or location. Admins can also regulate who has access to directories in a network share to keep data safe. Even if you are not in a complex network environment (your home network), you can also use Mapped Network drives to store, access, and retrieve data on another computer, home server, or a Network Attached Storage (NAS) device.
Map a Network Drive in Windows 10
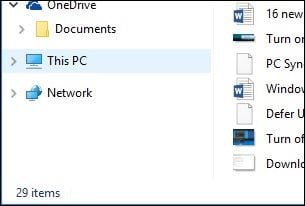
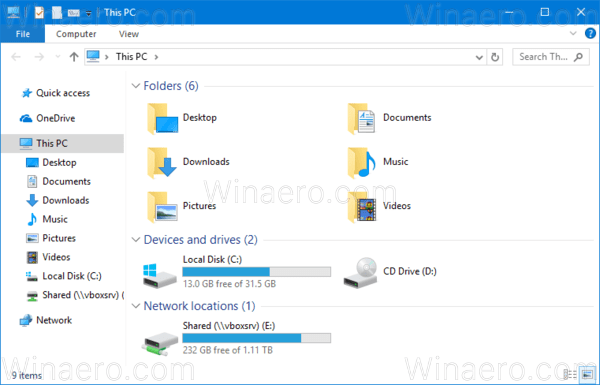
Launch File Explorer on the Taskbar or Start menu, and select This PC (formerly My Computer) in the Navigation Pane.
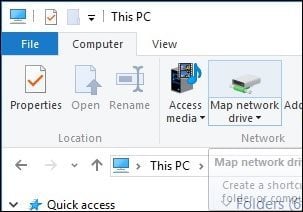
Next select Map Network Drive under Computer tab on the Ribbon.
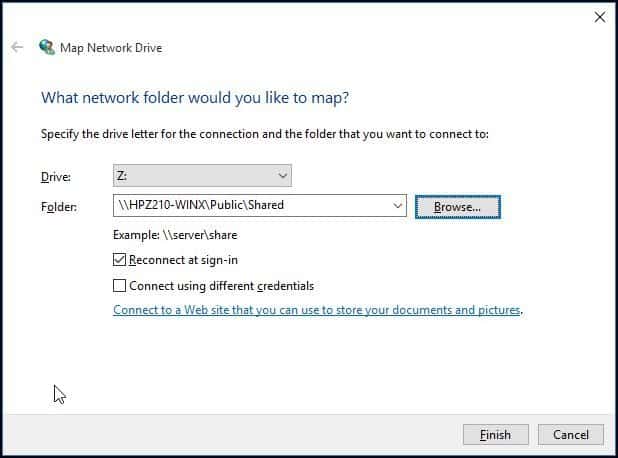
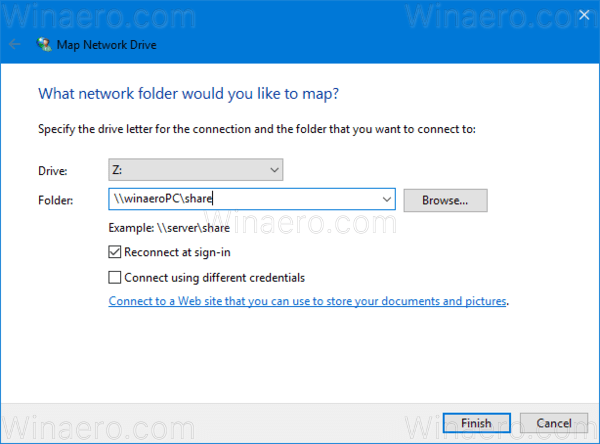
This will launch the Map Network Drive wizard. Here you will see a list of options, which includes assigning an available drive letter (I go with the default.) You can then type the path to the Network Share, or you can browse to it.
Make sure to check the box Reconnect at sign-in, so it will always be accessible when you sign in; then click Finish.
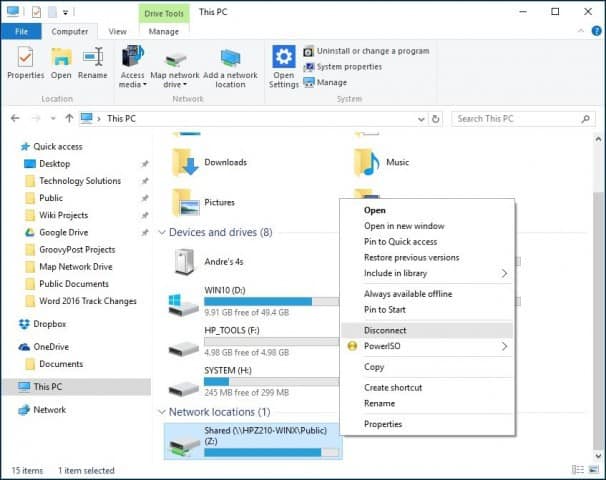
The Mapped Network Drive will then appear in This PC as a Network Location. If the drive is not available, you will see an X emblem on the icon. Anytime you want to remove it, just right-click the icon and click Disconnect.
If you’re running an older version of Windows, check out our article on mapping Network Drive using the command line.
How to Map a Network Drive in Windows 10
You can easily create a shortcut to another drive or folder shared on your network by mapping that location. When you map a network drive, it will show up as a new drive under This PC in File Explorer, so you can quickly access the shared files you need, just like you would your local hard drive. Here’s how to make that network drive shortcut in Windows 10.

How to Map a Network Drive in Windows 10
1. Open File Explorer and select This PC.
2. Click the Map network drive drop-down in the ribbon menu at the top, then select «Map network drive.» (This is under the Computer tab, which should open automatically when you go to This PC, as above.)
3. Select the drive letter you want to use for the network folder, then hit Browse.
4. If you receive an error message, then you’ll need to turn on network discovery. To do so, open the Control Panel, select Network and Sharing Center and choose Change advanced sharing settings from the top-left corner. From there, select Turn on network discovery. Save changes.
choose network folder
5. Navigate to the folder you want to map and hit OK after selecting it.
6. Confirm your selection and click Finish. You can choose to reconnect to the folder every time you sign in so it’s always available. You can even use a different user account to connect to the folder if needed.
7. When you’re done, you should see the new drive letter under This PC and will be able to access its contents like you would any other folder. If you want to disconnect the network drive, right-click on it and select Disconnect.
Winaero
At the edge of tweaking
How to Map Network Drive in Windows 10
Mapping a network drive in Windows is an essential task for those who have to refer to network resources many times a day. Once a network location is mapped to a network drive, it can be accessed like a local drive with File Explorer. There are a number of ways to do it. Let’s review them all.
When you click it, it opens the network location directly in File Explorer. Most third-party file managers support mapped drives as well. After a reboot, Windows has the ability to re-connect the mapped network drive automatically, so it saves your time. Tip: see what to do if Windows does not reconnect to mapped network drives. Before you continue, you might need to learn the username and password credentials for the network resource you are going to map.
To map a network drive in Windows 10, do the following.
- Open File Explorer.
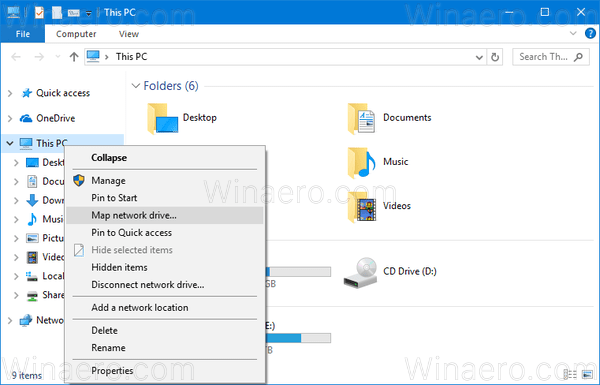
- Right click the This PC icon in the navigation pane and select «Map network drive. » from the context menu. See the following screenshot.
 Alternatively, you can open This PC and click the «Map network drive» icon on the Home tab in the Ribbon user interface.
 - The Map Network Drive wizard will appear on the screen. There, type the full path to the network share you want to map as a drive. You can browse for your share using the «Browse. » button. The path must be in UNC format: It must start with «\\», followed by the remote computer’s name, and then followed by «\» and the name of the share. For example, \\WinaeroPC\Share1.
- Enable the option Reconnect at sign-in to restore the mapped drive automatically at sign-in.
- Enable the option Connect using different credentials if required to access the share. Fill in the credentials in the Windows Security dialog if prompted.
- Click the Finish button and you are done.
 Alternatively, you can open This PC and click the «Map network drive» icon on the Home tab in the Ribbon user interface.
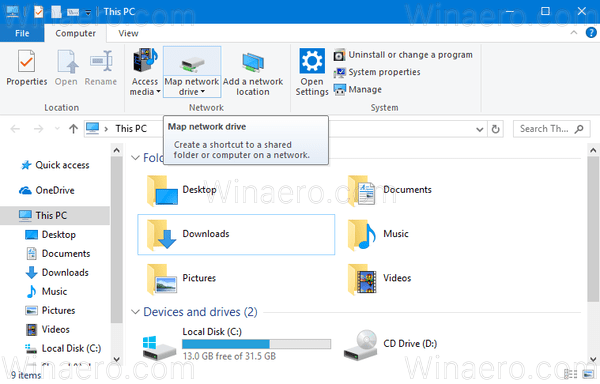
The mapped network drive will appear in This PC.
Alternatively, you can use one of the following methods to map a network drive in Windows 10.
- Open a new command prompt window and type or copy-paste the following command:
If you omit the /persistent:yes portion, or use the argument «/persistent:no» instead, the mapped drive will be removed after the next logon.
Open a new PowerShell instance and type or copy-paste the following command:
If you omit the -Persist portion, the mapped drive will be removed after the next logon.
Finally, to disconnect the mapped network drive, you can do the following.
- In the context menu of This PC, select the «Disconnect network drive. » command.In the next window, select a drive you want to disconnect and click OK.
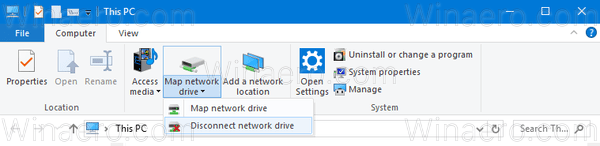
- The same command can be called from the Map network drive drop down menu. See the following screenshot.
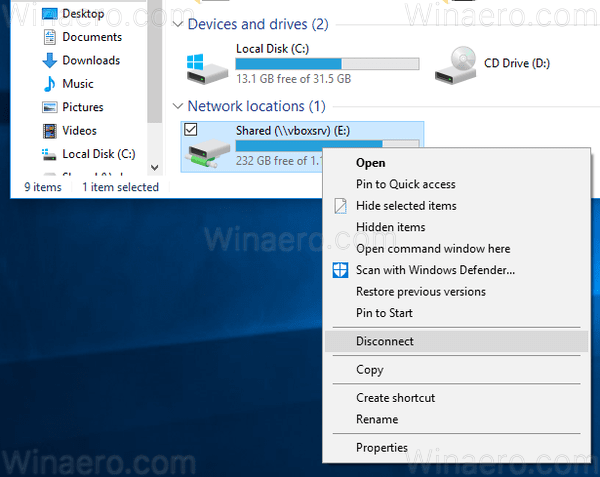
- You can right click the mapped network drive in This PC and select «Disconnnect» from the context menu.
- At the command prompt, type or copy-paste the following command:
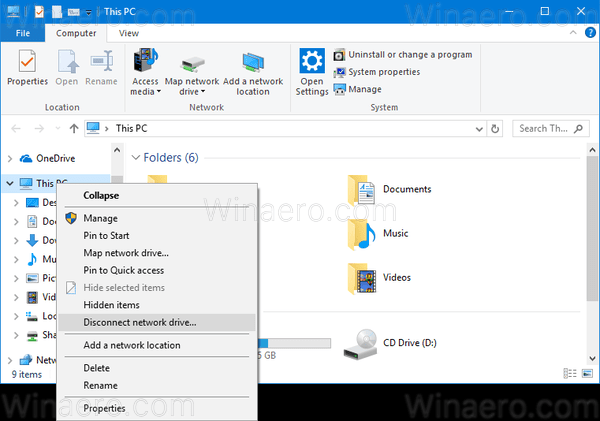 In the next window, select a drive you want to disconnect and click OK.
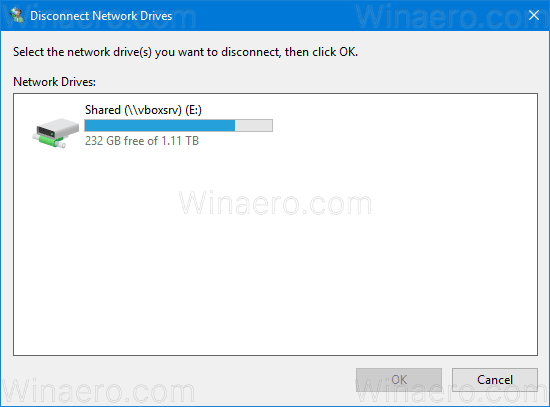
If you execute the net use command without other arguments, you’ll see the list of the available mapped drives.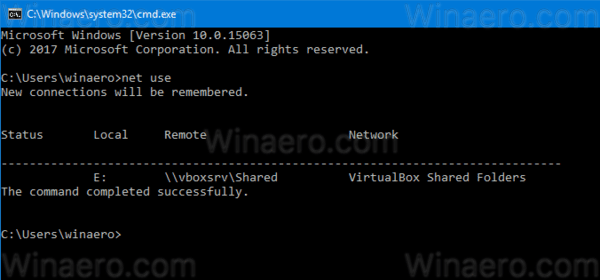
Winaero greatly relies on your support. You can help the site keep bringing you interesting and useful content and software by using these options: