Установка Os X Mountain Lion 10.8.3 на ESXi

Посмотрев как мои коллеги 3-й день ставят Os X Mountain Lion 10.8.3 на ESXi, решил вспомнить и записать свои шаги по развертыванию данного продукта.
1. Для начала необходимо скачать образ: Os X Mountain Lion 10.8.3 (Образ для VMware). Эта инсталляция была произведена с данного образа, хотя до этого тоже самое было сделано для другого, более легкого образа.
2. Распаковываем и все что есть в Os X Mountain Lion 10.8.3 заливаем на ESXi.
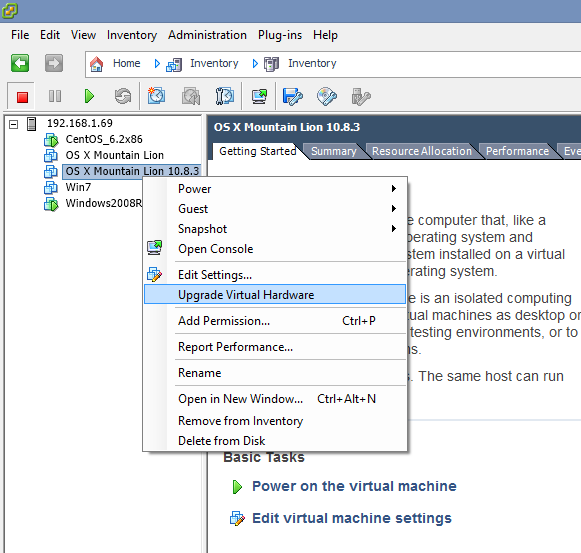
3. Делаем «Upgrade Virtual Hardware».
4. Запускаем виртуальную машину и сразу получаем ошибку:
«Unsupported or invalid disk type 7 „
Лечим ошибку методом конвертации диска как написано у меня в статье VMWare: Unsupported or invalid disk type 7.
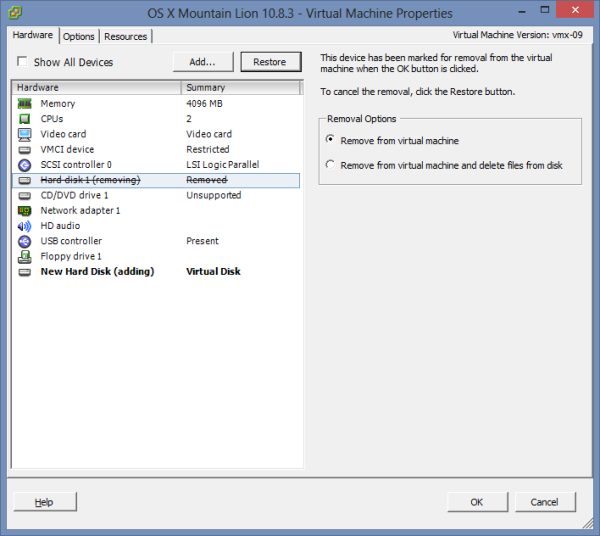
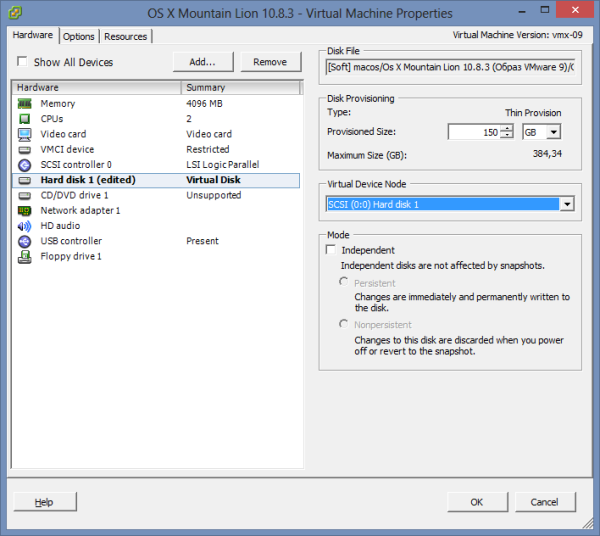
5. Делаем замену дисков.
Я на всякий случай посадил новый диск на тот же scsi lun.
6. Запускаем виртуалку.
MacOS успешно стартанула, и после ответа на стандартные вопросы (а их может и не быть, все зависит от образа), мы переходим к настройке. 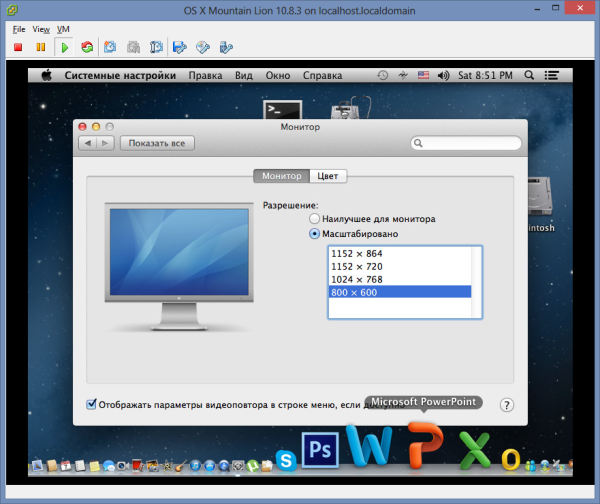
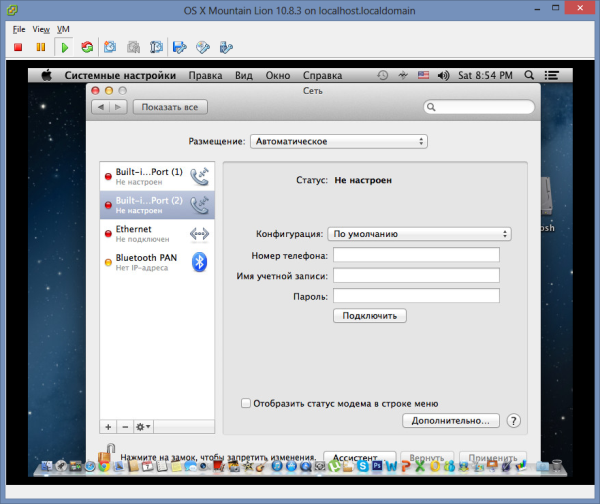
7. Первое, что бросается в глаза — не работающая сеть.
Все дело в нестандартной сетевой карте. Ставить “VMWare tools» смысла не имеет, т.к. на этом процессе виртуалка скорее всего зависнет. Поэтому поступим иначе.
Удаляем через сферу не работающий сетевой адаптер, добавляем стандартный E1000E (на всякий случай запоминаем его MAC адрес). 
Синхронно удаляем из Os X неработающий сетевой адаптер.
8. Отправляем MacOS в ребут.
После запуска, снова идем в «Системные настройки ->Сеть» и добавляем новый сетевой адаптер. 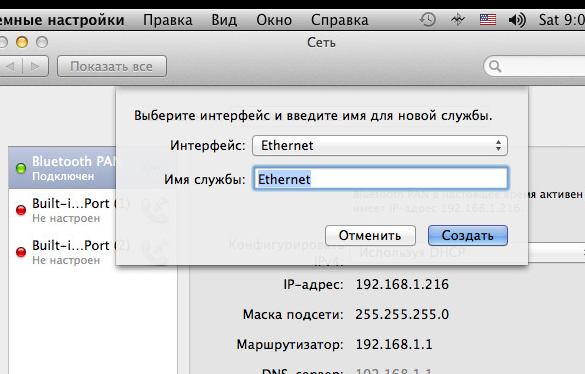
Через меню «дополнительно -> аппаратура», проверяем, что у сетевой карты именно тот MAC, что мы запомнили ранее.
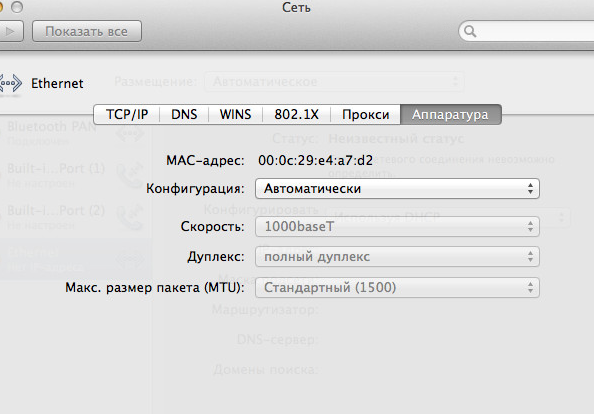
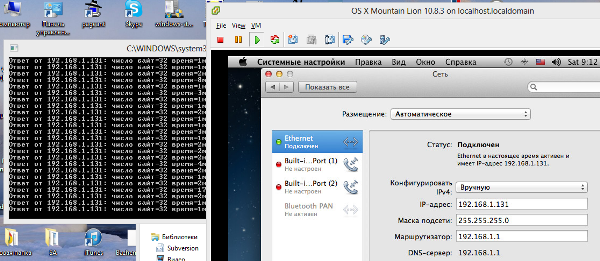
Нажимаем «применить», и если мы все правильно сделали, сеть должна появиться.
Мне несколько неудобно работать через vSphere Client, поэтому я активирую встроенный VNC сервер, для удаленной работы.
1. Чтобы включить VNC в Leopard или Snow Leopard жмем «Системные настройки -> Общий доступ» и ставим галку для службы «Общий экран». 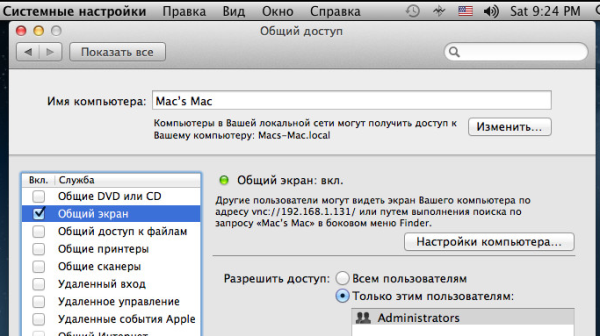
2. Нажимаем кнопку «Настройки компьютера».
Отмечаем пункт “Пользователи VNC могут получить управление экраном по паролю” и указываем пароль.
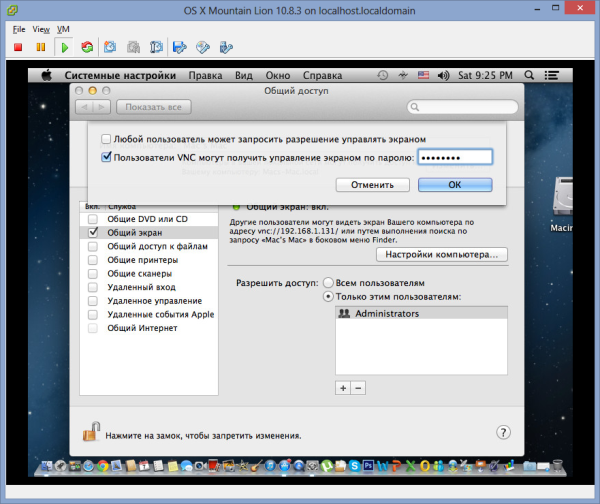
3. Если все сделано верно, то удаленный VNC клиентом, можно получить доступ к нашему образу MacOS. 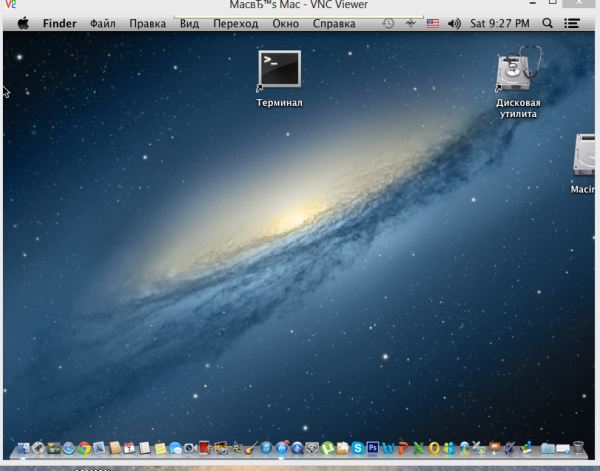
Если особо не отвлекаться, то весь процесс от скачивания образа, до самого последнего пункта занимает примерно 1,5-2 часа.
Create a macOS/OS X VM on VMware ESXi 6.5 & VMware Workstation 12.x
Create a macOS/OS X VM on VMware ESXi 6.5 & VMware Workstation 12.5.2 Pro
**NOTE: This is completely for experimental purposes and is unsupported by both Apple and VMware**
Running a MacOS/ OS X virtual machine is not anything new and has been supported for quite some time, as long as you are running said VM on a supported hypervisor with Apple Hardware. But many of the “Non-Apple” users in the world would not be able to take advantage of this without owning some type of Apple Computer. Luckily, there is an alternative method for running a Mac-based VM on non-apple hardware-based VMware ESXi and/or VMware Workstation for Windows! In this tutorial, I am going to show you just how to do so. Please keep in mind that the methods described in this article are not supported nor endorsed by Apple or VMware in any way, so please use at your own risk.
Before we can begin, there are a few tools required to ensure this works flawlessly.
- macOS Sierra installation media in .iso format (You can use an older OS as well but for this demo, I will be installing macOS Sierra 10.12.3)
- This media will have to be created as the OS comes as a .app by default.
- This link has a good tutorial for creating said media.
- Unlocker Utility
- Current Stable version 2.0.8 works up to OS X Yosemite on ESXi 6.0 and Workstation 11
- Version 2.0.9 RC adds support for macOS Sierra on ESXi 6.5 and Workstation 12.x
- Type 1 Hypervisor (ESXi) or a Type 2 Hypervisor (VMware Workstation)
Ready? Here we go! I’ll start by showing you how to create a macOS Sierra VM on VMware Workstation 12.5.2 Pro…
VMware Workstation 12.5.2 Pro
- Make sure that VMware Workstation is installed but not running.
- Extract the contents on the Unlockler 2.0.9RC.
- Open a command prompt and navigate to the extracted folder
- Run win-install.cmd. This will patch your VMware Workstation to unlock the capabilities to run a Mac OS. It will also download the latest VMware Tools (darwin.iso) for macOS into the extracted directory.


- Launch VMware Workstation and create the shell VM


- When choosing the hardware compatibility, you can optionally change this to version 10 so that you do not need to manually edit the .vmx file after the shell has been created.


- I am going to leave it at version 12 and manually edit the .vmx file afterwards. Continue creating your shell by following along…


- Now that we have the shell created, we still need to attach the ISO to the VM. Click on the CD/DVD (SATA) option on the left side in the Devices pane. Once in the settings, select the ISO image.


- Next, navigate to the directory that houses the virtual machine’s files. Edit the .vmx file with your preferred text editor. I personally love using NotePad++. Scroll to the bottom of the text and add the following line. This will enable the VM to boot up.
- If you opted to change the hardware version to version 10 in the earlier steps, disregard this and move on to the next step.


- At this point, the VM is ready to be powered on to install macOS Sierra. I will cover the installation steps further down in this tutorial, but first, let me cover the procedures for enabling this on ESXi. I will be showing how to do so on ESXi 6.5a (Build 48872370)

VMware ESXi 6.5a (Build 48872370)

- For ESXi we first need to copy the unlocker utility to a local or shared datastore. You can accomplish this by using vCenter, ESXi Host UI, or WinSCP. For simplicity, I opted to use WinSCP and copied the folder into a newly created “Tools” folder on a local datastore. You can also take this time to upload the .ISO to the local datastore for use later in this tutorial.


- Now that the files have been copied, open an SSH connection to your ESXi host, and navigate to the unlocker directory.


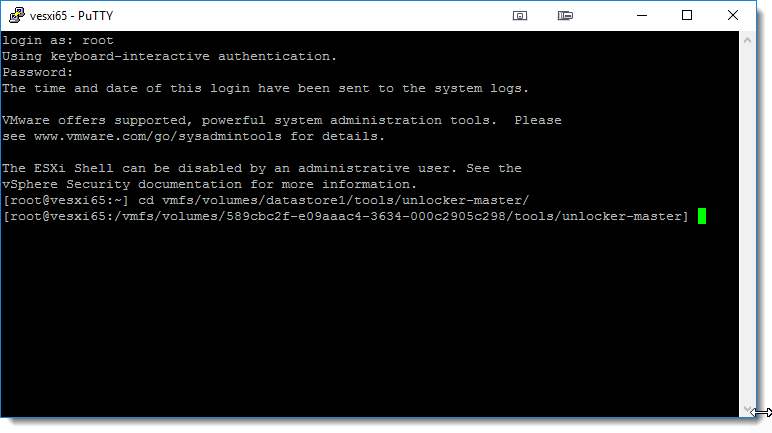
- We can then type “ls” to view the contents of the directory.

- Next, we must make the installation script executable. I also like to make the uninstallation script executable as well. Do so by running the following commands.


- Typing “ls” again will now display the (2) scripts in green text, indicating that they are now executable.

- Run the installer script by running the following command

- The script will only take a brief moment to run, afterward, a reboot is required. Once it has finished type

- After the ESXi host has restarted, connect to the ESXi Host UI and begin building the shell VM by following along.


- Now that the shell VM is created, we need to go back into the VM’s settings and attach the .ISO that you uploaded to the datastore in a previous step.


- At this point, the VM is ready to be powered on to install macOS Sierra! Unlike with the VMware Workstation instructions, there is no need to change the hardware version to version 10 or manually modify the .vmx file.

- In the next section, I will cover the installation steps for MacOS Sierra.
Installing macOS Sierra
**The following instructions apply to both an ESXi and Workstation built macOS VM**
- Start by powering on the virtual machine and opening the Remote Console view


- Once the VM has booted the .ISO, you will be presented with this screen. Click next and then go to the taskbar and open Disk Utility. We need to create a partition to install macOS onto.


- After the partition has been created, we can actually start the macOS installation.


- After the VM has rebooted, we can continue the installation/configuration of macOS.


- Finally, the macOS VM is ready to use! For the finishing touches, it is recommended to install VMware Tools on this VM. When we ran the installation script at the start of this procedure, it downloaded a “tools” folder inside of the unlocker tool folder and inside it contains the darwin.iso which is used to install VMware tools. This should be the latest release of VMware Tools 10.1.0. Optionally, you can always download the tools from VMware’s website.
- In order to install the VMware Tools, we first need to eject the mounted install media. Afterwards, connect the CD/DVD drive to the darwin.iso file.


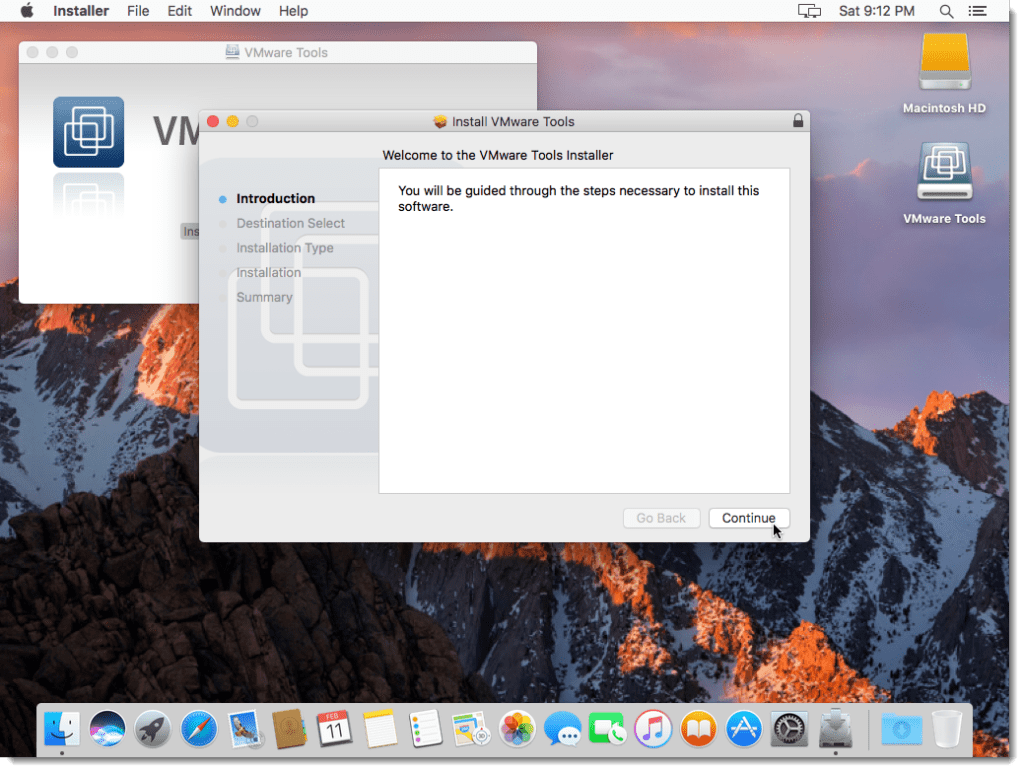
- Once the VMware Tools (darwin.iso) is mounted, double-click the “Install VMware Tools” package to begin the installation. After it completes, reboot the VM for the changes to take effect.


Optional Tweaks
Adjusting Screen Resolution
- By default, the macOS VM will only support (1) resolution natively, 1024 x 768.

- If you’d like to change this to support a higher resolution for say…a larger monitor, please download the following file on the macOS VM. Once the file has been downloaded to the “Downloads” folder in the VM. Open the “Terminal” application and navigate to the folder. We need to make the script executable, just as we did earlier with the unlocker scripts.


- Now we can run the script and specify the desired resolution. In this example, I am going to choose a 1440 x 900 resolution. Do so by running the following

- On the ESXi-based VM, I did notice that it does not set a resolution higher than 1176 x 885 while in the Remote Console. But, the VMware Workstation-based VM does indeed set the desired resolution.


Disable Beam Synchronization to Improve VM Performance
- Download the following application and place it in the “Applications” folder. Double-click it to launch the application. Afterwards, add it to the user’s “Logon Option” so it runs every time at login.


I hope that you’ve found this information useful. Please do leave comments below and subscribe to my blog! Thanks for stopping by!