Как установить IntelliJ IDEA в Linux
IntelliJ IDEA — это интегрированная среда разработки (IDE) на Java, созданная компанией JetBrains.
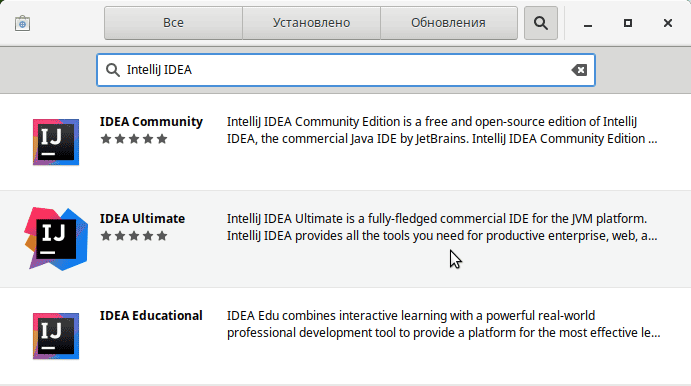
IntelliJ IDEA выпускается в следующих вариациях:
- IntelliJ IDEA Community Edition (бесплатная версия)
- IntelliJ IDEA Ultimate Edition (платная версия с дополнительными функциями)
- IntelliJ IDEA Educational (это та же Ultimate Edition, но бесплатная для студентов и преподавателей)
Установка IntelliJ IDEA
Способ 1. Установка IntelliJ IDEA из Центра программного обеспечения (Рекомендуется для Ubuntu)
Все варианты IntelliJ IDEA доступны в Центре программного обеспечения:
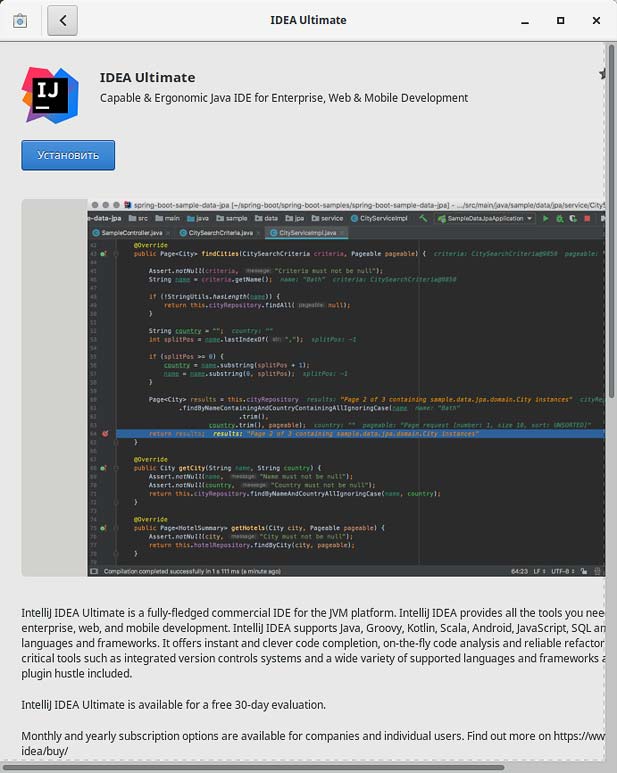
В следующем окне нажмите на кнопку «Установить»

Способ 2. Установка IntelliJ IDEA в Linux с помощью пакетов Snap
Пакеты Snap поддерживаются всеми основными дистрибутивами Linux.
Для версии Community Edition:
Для версии Ultimate Edition:
Для версии Educational:
Способ 3. Установка IntelliJ IDEA с использованием PPA (для Ubuntu)
Данный PPA разработан и поддерживается Марселем Капфером и доступен для Ubuntu 18.04, 16.04, 18.10, 19.04, а также все дистрибутивы Linux на их основе. Но через этот PPA можно установить только версию Ultimate Edition.
Для удаления IntelliJ IDEA Community Edition, установленную таким образом, воспользуйтесь командами:
Установка Intellij IDEA на ubuntu 18.04
IntelliJ IDEA — это интегрированная среда разработки на языке программирования Java. Программа разработана в компании JetBrains, той же самой компании, которая разработала лучшую среду для программирования на Python — PyCharm. Первая версия InteliJIDEA появилась еще в 2001 году и очень быстро завоевала высокую популярность среди программистов.
Сейчас среда поддерживает большое количество интересных функций, а также позволяет программировать не только на Java, но и на других популярных языках. В этой инструкции мы рассмотрим как выполняется установка IntelliJ IDEA на Ubuntu 18.04.
Особенности IntelliJ IDEA
Точно так же, как и PyCharm, IntelliJ IDEA распространяется в виде двух версий. Community Edition, бесплатная версия открытым исходным кодом под лицензией Apache 2.0. Свободная версия имеет всю базовую функциональность, поддержку Java и других языков, а также интеграцию с системами управления версиями. Вторая версия — Ultimate Edition, кроме всего прочего, поддерживает Java EE, построение UML диаграмм, и другие возможности.
Обе версии поддерживают все самые популярные языки программирования, среди которых: Java, JavaScript, CoffeeScript, HTML, CSS, YAML, MSXML, Python, Ruby, Scala, PHP, C, C++. Также можно добавить поддержку других языков через расширения от сторонних разработчиков.
Установка IntelliJ IDEA на Ubuntu 18.04
Перед тем, как перейти к самой установке IntelliJ IDEA, убедитесь, что на вашем компьютере уже установлена Java машина. Среда написана на Java и без нее Intelij IDEA работать не будет.

Если Java машина еще не установлена, то установите ее по этой инструкции. Также, важно заметить, что рекомендуется использовать проприетарную версию Java вместо OpenJDK.
Затем можно устанавливать. Мы можем выполнить установку тремя способами:
- Установка из snap пакета;
- Установить IntelliJ IDEA с помощью Ubuntu Make;
- Установка IntelliJ IDEA из бинарного файла.
Рассмотрим более подробно каждый путь.
Установка InteliJ IDEA из snap пакета
Для версии программы из snap пакета устанавливать java машину не нужно. Все необходимые компоненты уже поставляются внутри пакета. Для установки просто откройте терминал и выполните одну из команд. Для свободной весрии:
sudo snap install intellij-idea-community —classic —edge

Для коммерческой версии:
sudo snap install intellij-idea-ultimate —classic —edge
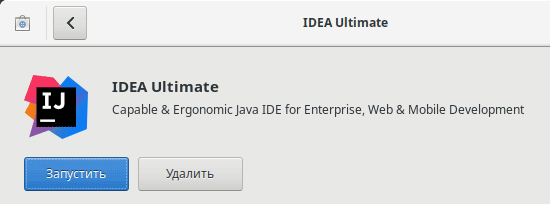
После завершения загрузки пакета, программа будет доступна из главного меню:

Установка IntelliJ IDEA с помощью Ubuntu Make
Ubuntu Make — это утилита командной строки для Ubuntu, которая позволяет устанавливать различные инструменты для разработки и среды программирования, такие как Eclipse, PyCharm, Ubuntu SDK, Android Studio и другие. IntelliJ IDEA тоже поддерживается.
Сначала нужно установить Ubuntu Make. Если вы используете Ubuntu 18.04, 16.04 или 18.10, то вам достаточно выполнить одну команду чтобы получить программу из официальных репозиториев:
sudo apt install ubuntu-make
Чтобы получить более новую версию ubuntu-make, вы можете использовать PPA репозиторий:
sudo add-apt-repository ppa:ubuntu-desktop/ubuntu-make
sudo apt update
sudo apt install ubuntu-make
После завершения установки ubuntu make достаточно выполнить команду, чтобы установить Intellij IDEA Ubuntu 18.04:

Вы также можете установить пробную версию платной редакции программы:
umake ide idea-ultimate
Загрузка и установка IntelliJ IDEA займет некоторое время, в зависимости от вашей скорости интернета и мощности компьютера. После завершения установки вы можете найти программу в меню Dash.

Удалить IntelliJ IDEA, установленную с помощью ubuntu-make тоже очень просто, для этого выполните:
umake -r ide idea
umake -r ide idea-ultimate
Установка из бинарного файла
На официальном сайте программы есть уже готовые, собранные бинарные файлы программы, со всеми зависимостями. Вы можете скачать пакет и установить его в своей системе.

Сначала загрузите файл архива tar.gz, по ссылке, приведенной выше, затем откройте терминал и перейдите в папку с архивом. Далее распакуйте архив командой:
tar -zxvf ideaIC-XX.Y.Z.tar.gz
Запустите скрипт idea.sh в папке с файлами распакованного архива:
Скрипт установит все необходимые компоненты, чтобы создать ярлык в главном меню откройте Tools и выберите Create Desktop Entry. Вы также можете создать утилиту для запуска из командной строки выбрав в меню Tools пункт Create Comand Line Launcher.
Выводы
В этой статье мы рассмотрели как выполняется установка IntelliJ IDEA на Ubuntu 16.04 или дистрибутив более новой версии. Как видите, есть достаточно способов получить эту отличную среду и все они не так сложны. Если у вас остались вопросы, спрашивайте в комментариях!
На завершение видео по теме:
Install IntelliJ IDEA
IntelliJ IDEA is a cross-platform IDE that provides consistent experience on the Windows, macOS, and Linux operating systems.
IntelliJ IDEA is available in the following editions:
Community Edition is free and open-source, licensed under Apache 2.0. It provides all the basic features for JVM and Android development.
IntelliJ IDEA Ultimate is commercial, distributed with a 30-day trial period. It provides additional tools and features for web and enterprise development.
For more information, see the comparison matrix.
System requirements
| Requirement | Minimum | Recommended |
|---|---|---|
| RAM | 2 GB of free RAM | 8 GB of total system RAM |
| Disk space | 2.5 GB and another 1 GB for caches | SSD drive with at least 5 GB of free space |
| Monitor resolution | 1024×768 | 1920×1080 |
| Operating system | Latest 64-bit version of Windows, macOS, or Linux (for example, Debian, Ubuntu, or RHEL) |
You do not need to install Java to run IntelliJ IDEA, because JetBrains Runtime is bundled with the IDE (based on JRE 11). However, to develop Java applications, a standalone JDK is required.
Install using the Toolbox App
The JetBrains Toolbox App is the recommended tool to install JetBrains products. Use it to install and maintain different products or several versions of the same product, including Early Access Program (EAP) releases, update and roll back when necessary, and easily remove any tool. The Toolbox App maintains a list of all your projects to quickly open any project in the right IDE and version.
Install the Toolbox App
Download the installer .exe from the Toolbox App web page.
Run the installer and follow the wizard steps.
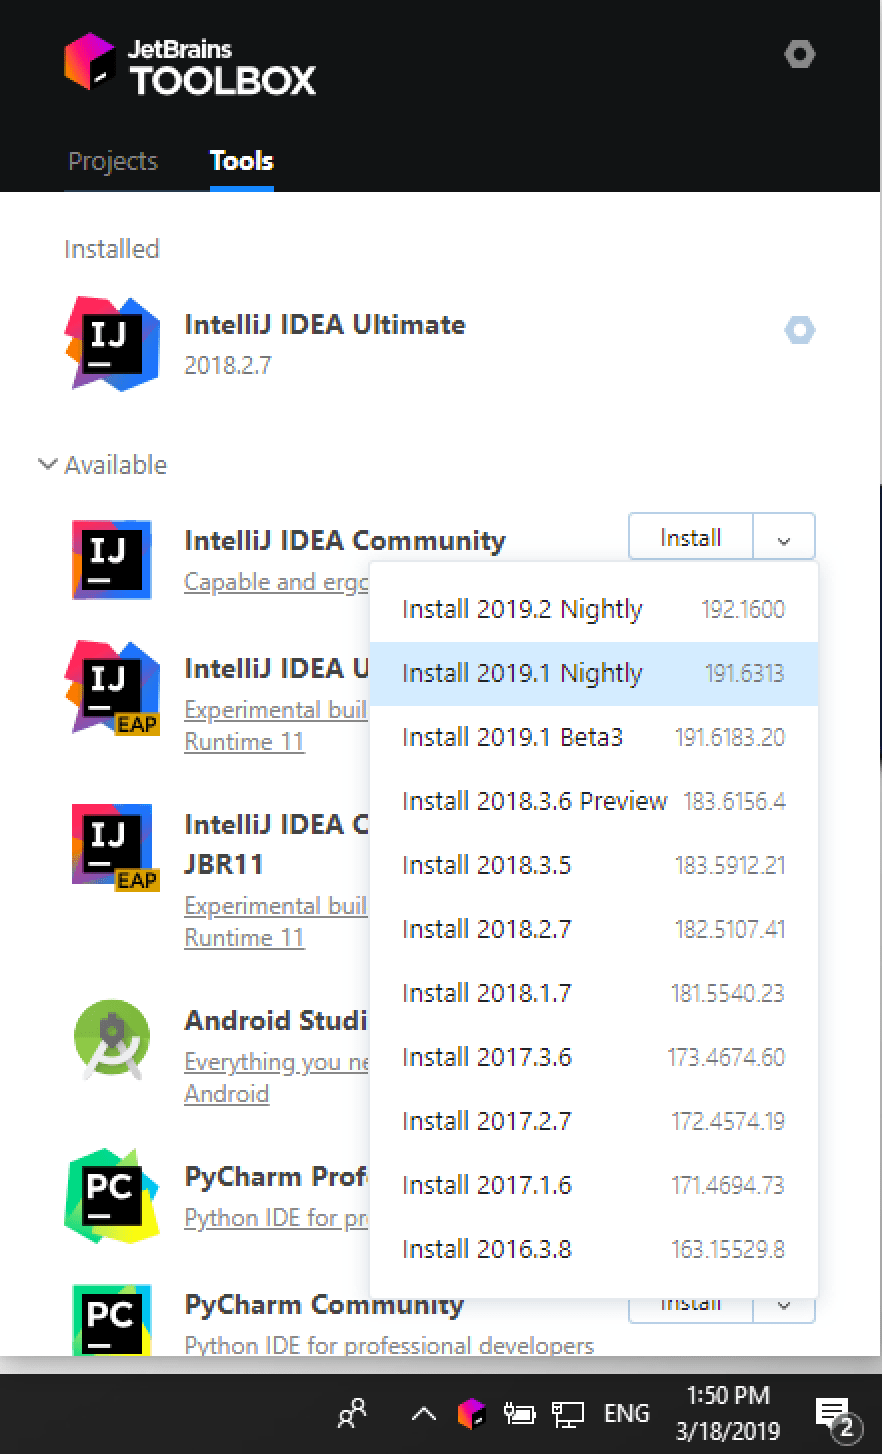
After you run the Toolbox App, click its icon in the notification area and select which product and version you want to install.
Log in to your JetBrains Account from the Toolbox App and it will automatically activate the available licenses for any IDE that you install.
Install the Toolbox App
Download the disk image .dmg from the Toolbox App web page.
Mount the image and drag the JetBrains Toolbox app to the Applications folder.
After you run the Toolbox App, click its icon in the main menu and select which product and version you want to install.

Log in to your JetBrains Account from the Toolbox App and it will automatically activate the available licenses for any IDE that you install.
Install the Toolbox App
Download the tarball .tar.gz from the Toolbox App web page.
Extract the tarball to a directory that supports file execution.
For example, if the downloaded version is 1.17.7391, you can extract it to the recommended /opt directory using the following command:
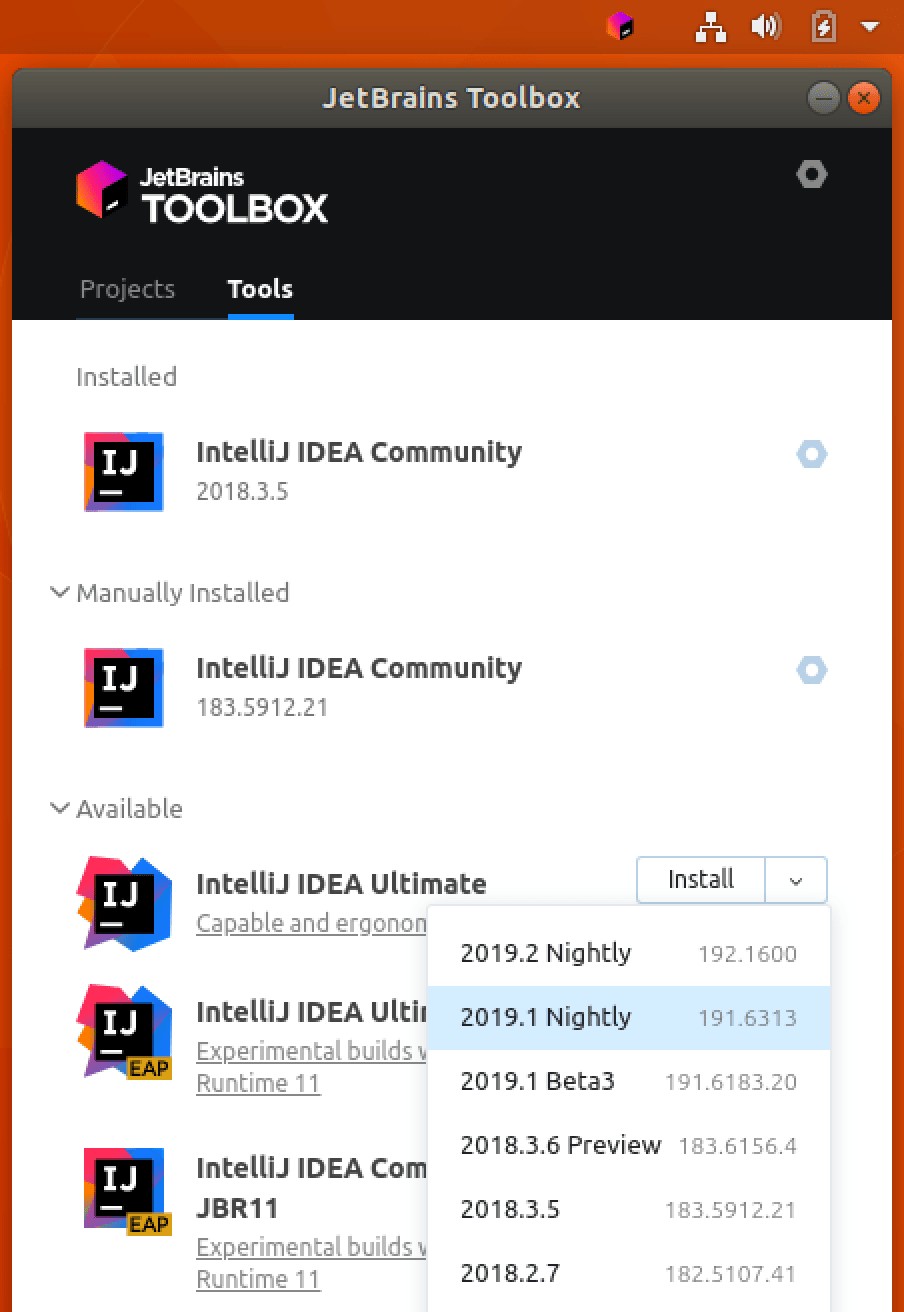
Execute the jetbrains-toolbox binary from the extracted directory to run the Toolbox App and select which product and version you want to install. After you run the Toolbox App for the first time, it will automatically add the Toolbox App icon to the main menu.
Log in to your JetBrains Account from the Toolbox App and it will automatically activate the available licenses for any IDE that you install.
You can use this shell script that automatically downloads the tarball with the latest version of the Toolbox App, extracts it to the recommended /opt directory, and creates a symbolic link in the /usr/local/bin directory.
Standalone installation
Install IntelliJ IDEA manually to manage the location of every instance and all the configuration files. For example, if you have a policy that requires specific install locations.
Run the installer and follow the wizard steps.
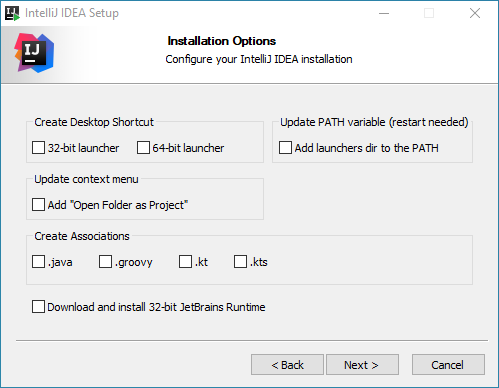
On the Installation Options step, you can configure the following:
Create a desktop shortcut for the launcher relevant to your operating system
Add the directory with IntelliJ IDEA command-line launchers to the PATH environment variable
Add an item Open Folder as Project to the system context menu (when you right-click a folder)
Associate specific file extensions with IntelliJ IDEA to open them with a double-click
Install the 32-bit version of JetBrains Runtime if you are running a 32-bit Windows version
Mount the image and drag the IntelliJ IDEA app to the Applications folder.
Extract the tarball to a directory that supports file execution.
For example, to extract it to the recommended /opt directory, run the following command:
Do not extract the tarball over an existing installation to avoid conflicts. Always extract it to a clean directory.
Execute the idea.sh script from the extracted directory to run IntelliJ IDEA.
To create a desktop entry, do one of the following:
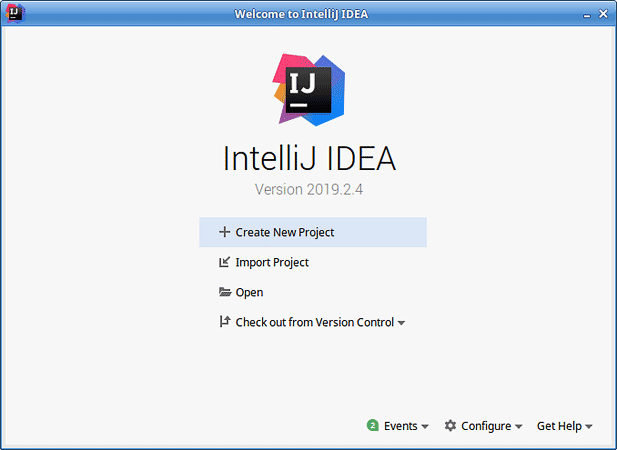
On the Welcome screen, click Configure | Create Desktop Entry
From the main menu, click Tools | Create Desktop Entry
When you run IntelliJ IDEA for the first time, some steps are required to complete the installation, customize your instance, and start working with the IDE.
Silent installation on Windows
Silent installation is performed without any user interface. It can be used by network administrators to install IntelliJ IDEA on a number of machines and avoid interrupting other users.
To perform silent install, run the installer with the following switches:
/S : Enable silent install
/CONFIG : Specify the path to the silent configuration file
/D : Specify the path to the installation directory
This parameter must be the last in the command line and it should not contain any quotes even if the path contains blank spaces.
To check for issues during the installation process, add the /LOG switch with the log file path and name between the /S and /D parameters. The installer will generate the specified log file. For example:
Silent configuration file
You can download the default silent configuration file for IntelliJ IDEA at https://download.jetbrains.com/idea/silent.config
The silent configuration file defines the options for installing IntelliJ IDEA. With the default options, silent installation is performed only for the current user: mode=user . If you want to install IntelliJ IDEA for all users, change the value of the installation mode option to mode=admin and run the installer as an administrator.
The default silent configuration file is unique for each JetBrains product. You can modify it to enable or disable various installation options as necessary.
Install as a snap package on Linux
You can install IntelliJ IDEA as a self-contained snap package. Since snaps update automatically, your IntelliJ IDEA installation will always be up to date.
To use snaps, install and run the snapd service as described in the installation guide.
On Ubuntu 16.04 LTS and later, this service is pre-installed.
IntelliJ IDEA is distributed via two channels:
The stable channel includes only stable versions. To install the latest stable release of IntelliJ IDEA, run the following command:
The —classic option is required because the IntelliJ IDEA snap requires full access to the system, like a traditionally packaged application.
The edge channel includes EAP builds. To install the latest EAP build of IntelliJ IDEA, run the following command:
When the snap is installed, you can launch it by running the intellij-idea-community , intellij-idea-ultimate , or intellij-idea-educational command.
To list all installed snaps, you can run sudo snap list . For information about other snap commands, see the Snapcraft documentation.