Установка и настройка Qt Creator
С каждым годом становится все больше операционных систем, и потому разработчикам все труднее удовлетворять потребности пользователей. Три самые популярные компьютерные платформы — Windows, Linux и Mac OS, а также три мобильные — Android, iOS и Windows Mobile — продолжают активно бороться между собой. А это значит, что качественное приложение должно работать на всех основных платформах.
Справиться с этой проблемой помогает кроссплатформенная разработка. Об одной из самых популярных кроссплатформенных сред разработки — Qt Creator — и пойдёт речь в этой статье. Мы рассмотрим как выполняется установка и настройка Qt Creator, а также как работать в Qt Creator.
Что такое Qt Creator
Qt Creator (не так давно имевший название Greenhouse) — это одна из самых распространенных кроссплатформенных IDE. Ее плюсы — удобство, быстрота работы, а также — свободность, так как это ПО с открытым исходным кодом. Поддерживаются такие языки, как C, С++, QML.
Программа была написана компанией под названием Trolltech, которая в полной мере выполнила цель создания среды — работу с графическим фреймворком Qt. Удобный графический интерфейс с поддержкой Qt Widgets и QML, а также большое число поддерживаемых компиляторов позволяют быстро и удобно создать свое кроссплатформенное приложение.
Главная задача этой IDE — обеспечить наиболее быструю кроссплатформенную разработку, используя собственный фреймворк. Благодаря этому разработчики получают прекрасную возможность не писать приложения нативно (т. е. отдельно под каждую платформу), а создать общий код, и, возможно, подогнать его под особенности используемых ОС.
Qt Creator также включает в себя утилиту Qt Designer, что позволяет обработать внешний вид окна приложения, добавляя и перетаскивая элементы (аналогично Windows Forms в Visual Studio). В качестве систем сборки используются qmake, cmake и autotools.
Установка Qt Creator
Итак, пора рассмотреть как установить Qt Creator. Если для Windows разработчики позаботились и сделали оффлайн-установщик, то в Linux 32-bit этой возможности не предусмотрено. Поэтому во время установки вам может потребоваться стабильное интернет-соединение (
20-30 минут). Для начала скачаем установщик:
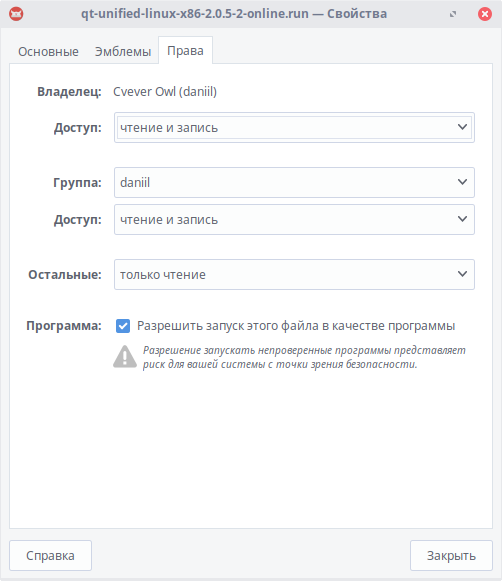
После окончания загрузки переходим в папку с файлом, нажимаем правой кнопкой мыши и выбираем пункт «Свойства».

Теперь перейдем на вкладку «Права» и поставим галочку «Разрешить запуск этого файла в качестве программы».
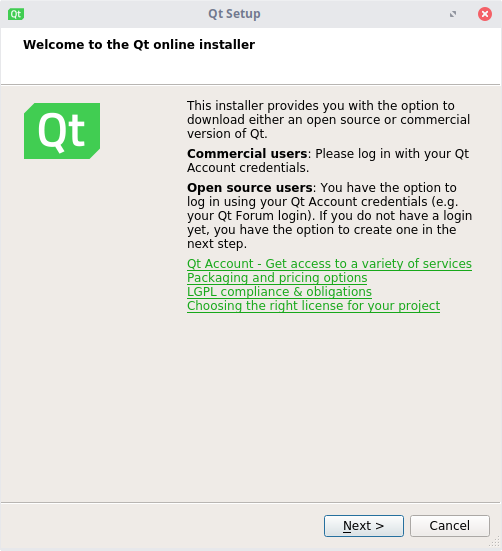
Теперь нажимаем «Next».
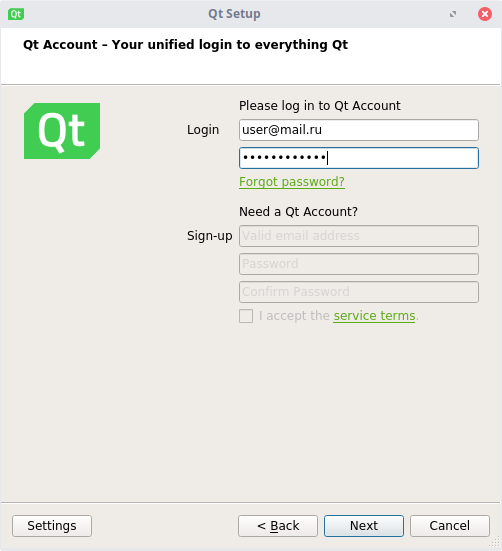
Здесь необходимо выбрать существующий аккаунт или создать его. Данное действие необходимо для проверки лицензии (коммерческой или некоммерческой).

Нажимаем «Next».
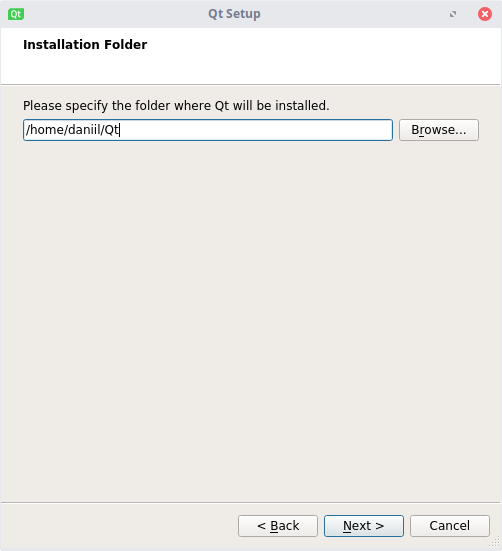
Выбираем директорию, в которой будет находиться Qt. Важно, чтобы в пути не было кириллицы и пробелов!
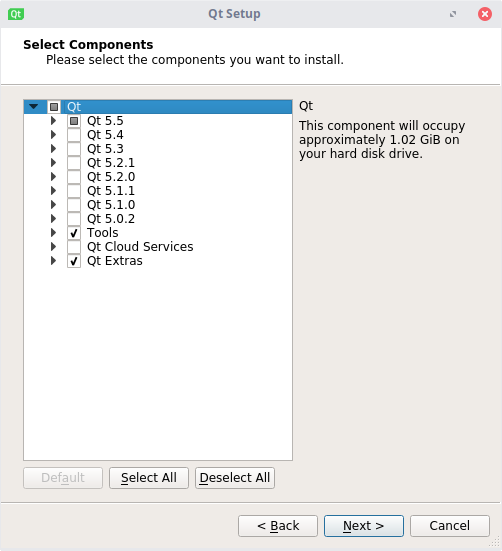
В этом меню находится выбор компонентов. К примеру, можно выбрать установку инструментов для разработки на Android, или же исходных компонентов (это нужно для статической сборки, если кому-то это нужно — напишите в комментариях, и я напишу отдельную статью). Если Вы не уверены, нужны Вам эти компоненты или нет, оставьте их пока так — даже после установки Qt будет возможным удаление и добавление элементов.
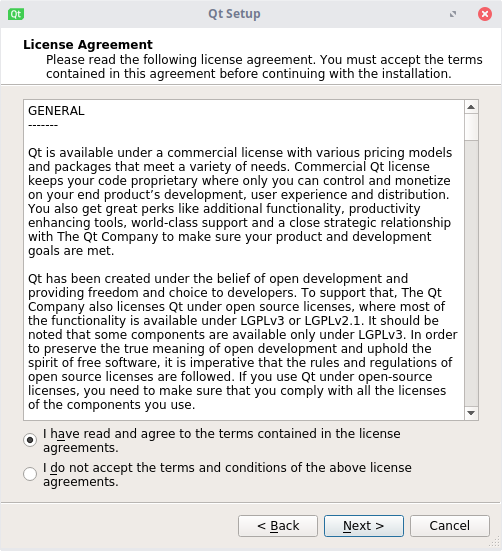
В этом окне принимаем лицензию. Жмем «Next».
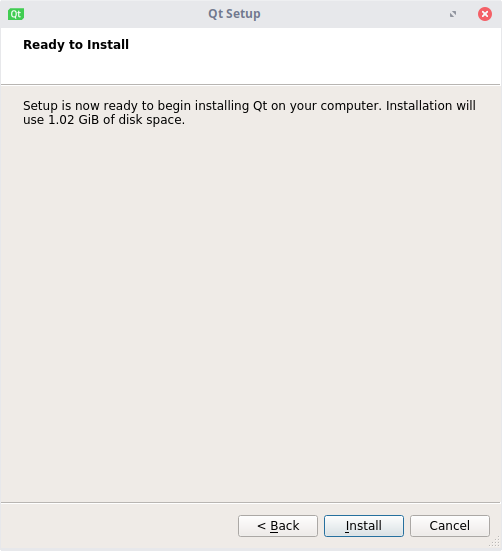
Если Вы готовы, начинайте установку. У Вас запросят пароль суперпользователя (sudo), после чего начнется скачивание и извлечение файлов. Альтернативный способ — установка через терминал. Для начала необходимо обновить список пакетов.
Скачиваем и устанавливаем Qt:
sudo apt install qt5-default
Теперь установка Qt Creator:
sudo apt install qtcreator
И, если нужно, исходники.
sudo apt install qtbase5-examples qtdeclarative5-examples
Настройка Qt Creator
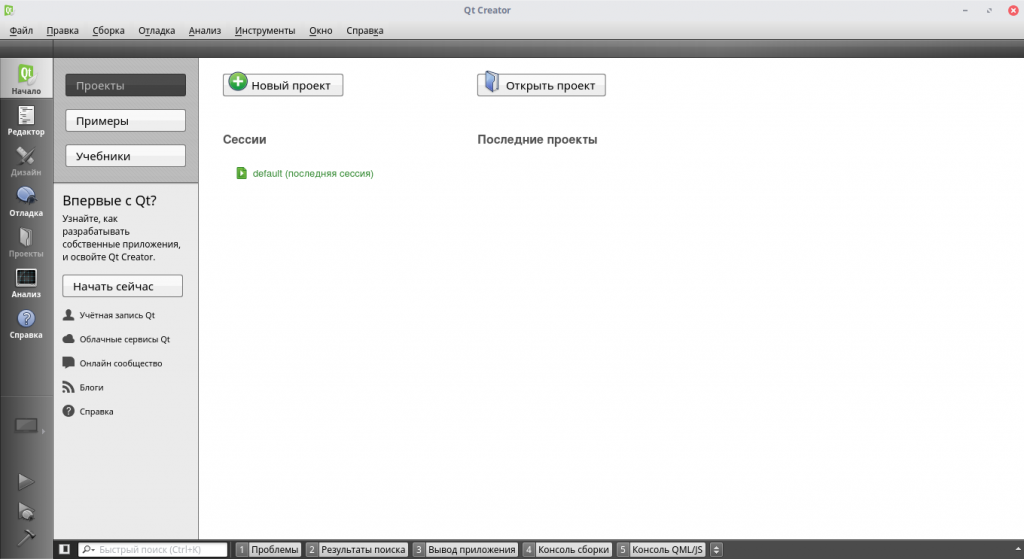
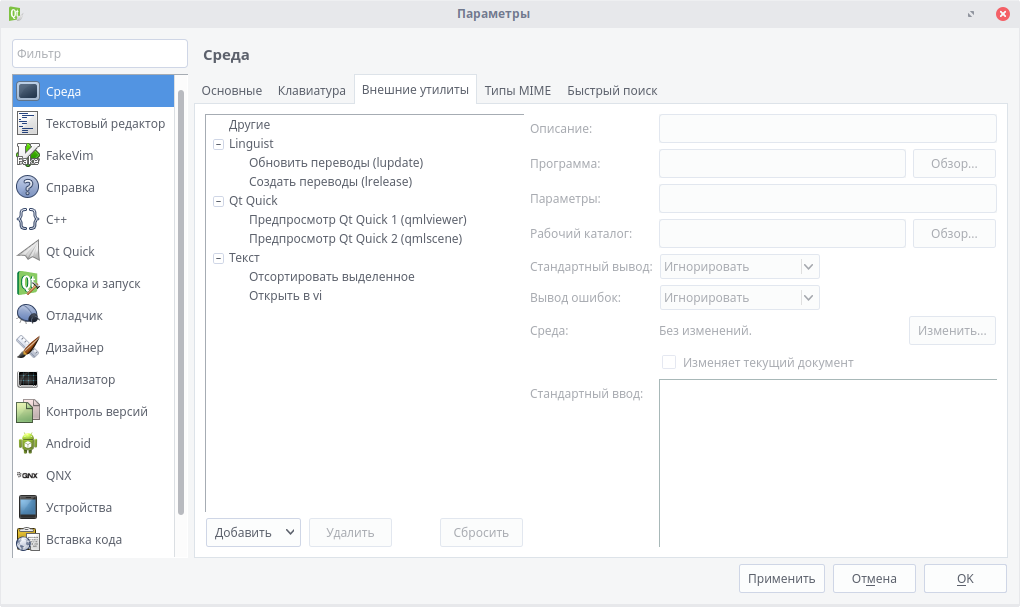
После окончания установки перезагрузите компьютер и запустите Qt Creator. Перейдите в меню «Инструменты» -> «Параметры».
Здесь следует рассмотреть несколько вкладок.
1. Среда — это настройка внешнего вида самой IDE, а также изменение сочетаний клавиш и управление внешними утилитами.
2. Текстовый редактор — здесь идет настройка внешнего вида, шрифтов и расцветки редактора.

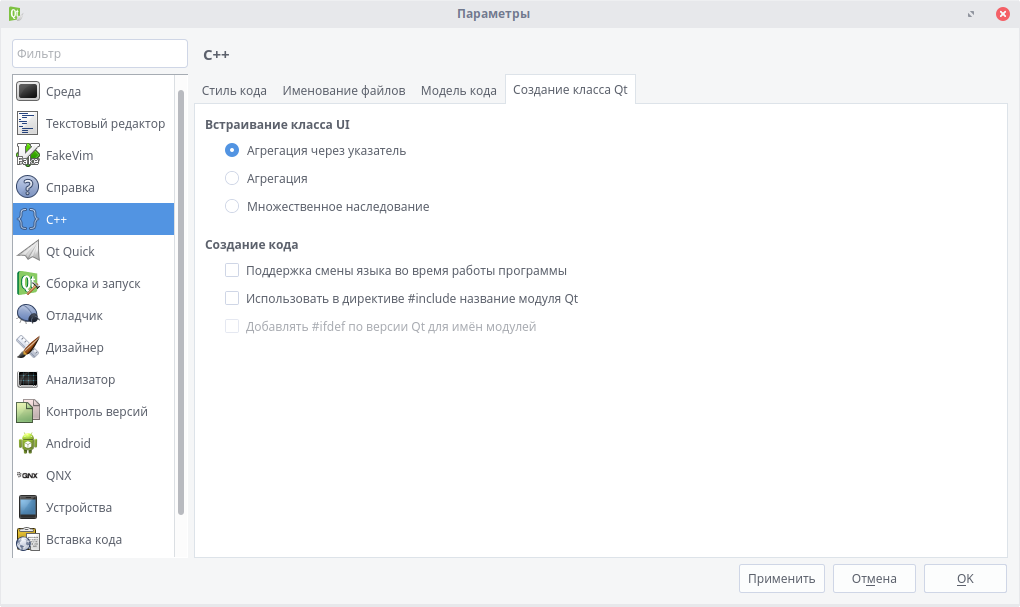
3. C++ — подсветка синтаксиса, работа с расширениями файлов и UI (т. е. формами).
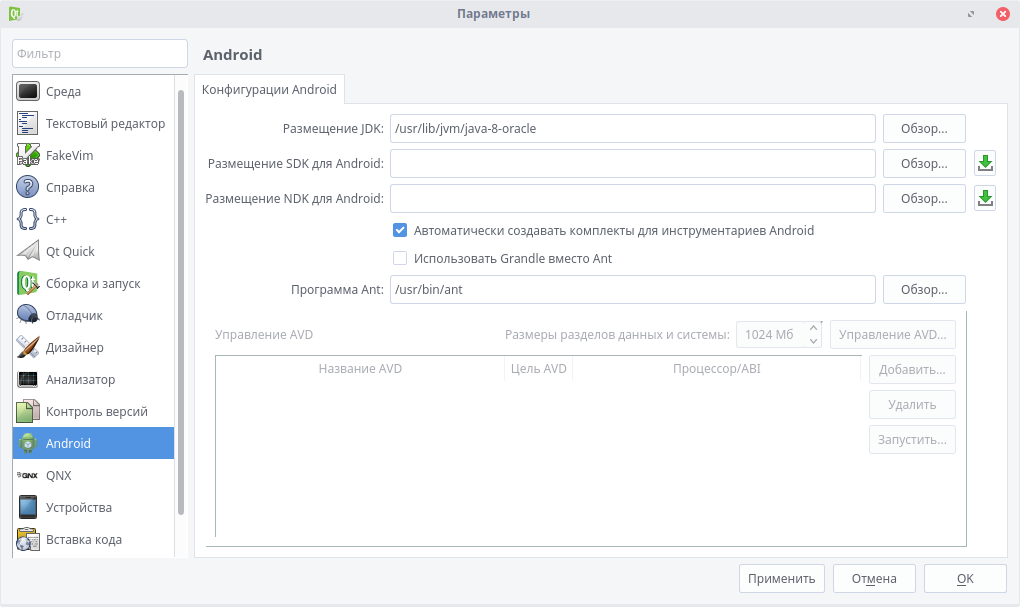
4. Android — здесь собраны пути к необходимым инструментам, а также в этом меню настраиваются подключаемые или виртуальные устройства.
Установка компонентов Qt Creator
Если вдруг так случилось, что Вы забыли установить какой-то компонент, или, наоборот, хотите его удалить, то на помощь придет Qt Maintenance Tool. Это инструмент, позволяющий управлять всеми компонентами Qt Creator.
Чтобы запустить его, перейдите в меню приложений, выберите пункт «Разработка» -> «Qt Maintenance Tool».
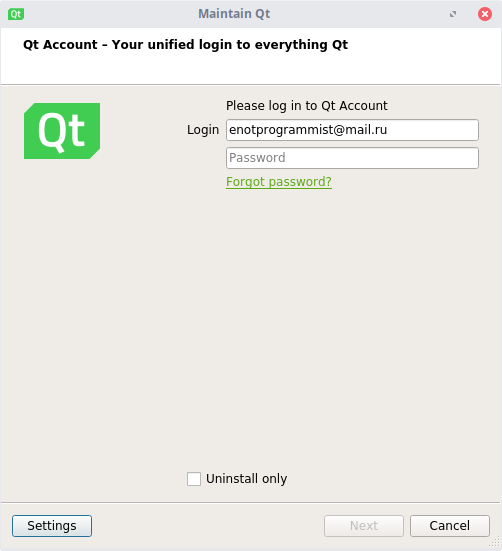
Выберите необходимый пункт (Удалить/добавить компоненты, обновить компоненты или удалить Qt). После выполните необходимые операции и закройте окно.
Работа с Qt Creator — первый проект
Ну что же, час пробил! Установка Qt Creator завершена. Пора сделать свое первое кроссплатформенное приложение на Linux, а затем скомпилировать его на Windows. Пусть это будет. программа, выводящая иконку Qt, кнопку и надпись, на которую по нажатию кнопки будет выводиться случайная фраза. Проект несложный, и, конечно же, кроссплатформенный!
Для начала откроем среду разработки. Нажмем «Файл» -> «Создать файл или проект. «. Выберем приложение Qt Widgets — его быстро и удобно сделать. А название ему — «Cross-Platphorm». Вот как!
Комплект — по умолчанию. Главное окно тоже оставляем без изменений. Создаем проект.
Для начала необходимо настроить форму — главное окно приложения. По умолчанию оно пустое, но это не останется надолго.
Перейдем в папку «Формы» -> «mainwindow.ui». Откроется окно Qt Designer:

Удаляем панель меню и панель инструментов на форму, нажав правой кнопкой мыши и выбрав соответствующий пункт. Теперь перетаскиваем элементы Graphics View, Push Button и Label таким образом:
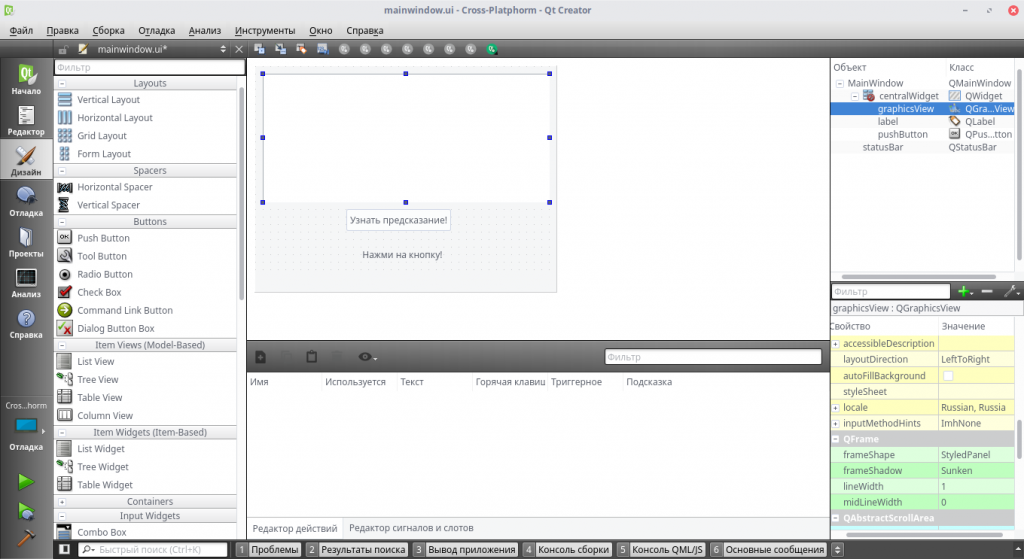
Чтобы изменить текст, дважды кликните по элементу. В свойствах Label (справа) выбираем расположение текста по вертикали и по горизонтали — вертикальное.
Теперь пора разобраться с выводом иконки. Перейдем в редактор, слева кликнем по любой папке правой кнопкой мыши и выберем «Добавить новый. «. Теперь нажимаем «Qt» -> «Qt Resource File». Имя — res. В открывшемся окне нажимаем «Добавить» -> «Добавить префикс», а после добавления — «Добавить файлы». Выбираем файл, а в появившемся окне «Неверное размещение файла» кликаем «Копировать».
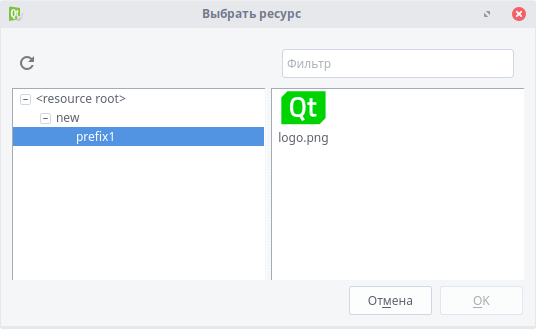
Получилось! Сохраняем все. Снова открываем форму. Кликаем правой кнопкой мыши по Graphics View, выбираем «styleSheet. » -> «Добавить ресурс» -> «background-image». В левой части появившегося окна выбираем prefix1, а в правой — нашу картинку. Нажимаем «ОК». Настраиваем длину и ширину.
Все! Теперь можно приступать к коду. Клик правой кнопкой мыши по кнопке открывает контекстное меню, теперь надо нажать «Перейти к слоту. » -> «clicked()». В окне набираем следующий код:
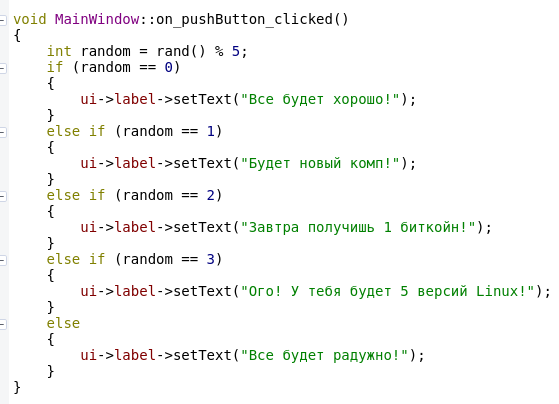
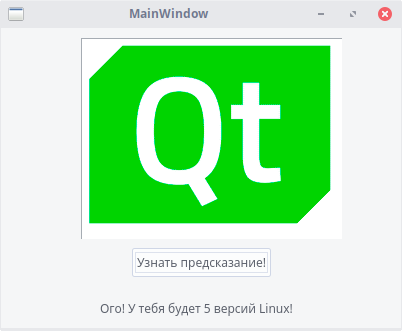
Или вы можете скачать полный проект на GitHub. Работа с Qt Creator завершена, нажимаем на значок зеленой стрелки слева, и ждем запуска программы (если стрелка серая, сначала нажмите на значок молотка). Запустилось! Ура!
Выводы
Установка и настройка Qt Creator завершена. Теперь вы сможете создавать свои программы под огромное число платформ, оставляя код нетронутым! Кстати, установив Qt на Windows, вы сможете скомпилировать этот проект и там. Удачи вам!
Qt Documentation
Contents
This page describes the required libraries and environment for Qt for Windows.
Libraries
The following third-party libraries may be used when running Qt 5 applications on Windows.
- OpenSSL Toolkit: Qt can make use of OpenSSL to support Secure Socket Layer (SSL) communication.
- ICU: Qt 5 can make use of the ICU library for enhanced UNICODE and Globalization support (see QTextCodec, QCollator::setNumericMode()).
At compile time, the include and lib folders of the ICU installation must be appended to the INCLUDE and LIB environment variables. At run-time, the ICU DLLs need to be found by copying the DLLs to the application folder or by adding the bin folder of the ICU installation to the PATH environment variable.
Support for Secure Sockets Layer (SSL) communication is provided by the OpenSSL Toolkit, which must be obtained separately. Download the latest version of the toolkit that is supported by Qt.
Qt can be configured to use OpenSSL in three ways:
- Qt Network loads OpenSSL libraries (DDLs) when first needed, at runtime. If not found, the application continues to run, but fails to handle SSL communication.
All official Qt binary builds use this configuration.
The OpenSSL libraries are looked up first in the directory of the executable, then in the Windows System directory (usually C:\Windows\system32 ), and finally in all directories listed in the PATH environment variable.
If you compile Qt yourself, you can configure how Qt uses OpenSSL by setting either the -openssl / -openssl-runtime or -openssl-linked configure flags.
If OpenSSL is not found in the normal compiler include and library directories, you can set either the OPENSSL_PREFIX , or OPENSSL_INCDIR and OPENSSL_LIBDIR configure arguments. If OPENSSL_PREFIX is set, OPENSSL_INCDIR defaults to OPENSSL_PREFIX/include and OPENSSL_LIBDIR to OPENSSL_PREFIX/lib .
The actual libraries to link to can be tweaked by setting the OPENSSL_LIBS , OPENSSL_LIBS_DEBUG , and OPENSSL_LIBS_RELEASE configure arguments.
- To load OpenSSL at runtime, set the -openssl-runtime configure argument. Qt will try to find openssl/ssl.h and openssl/opensslv.h in the default include path of the compiler. You can specify an additional include directory by setting OPENSSL_INCDIR .
See Secure Sockets Layer (SSL) Classes for further instructions on Qt with SSL support.
From Qt 5.3 and onwards, configure does not link Qt Core against ICU libraries anymore by default. This reduces the size of a self-contained application package considerably.
Letting Qt Core utilize the ICU libraries however has following advantages:
- Behavior matches other platforms more closely.
- Extended set of text codecs (see QTextCodec).
- QLocale::toUpper(), QLocale::toLower() always use case conversion rules specific to the locale.
- QCollator::setNumericMode() does work consistently on all Windows versions.
To explicitly enable the use of ICU in Qt Core, pass -icu to configure :
Graphics Drivers
For Qt Quick 2 to work, a graphics driver that provides OpenGL 2.1 or higher is required. The default driver from Windows is OpenGL 1.1. Qt includes a version of the ANGLE project which is included from the Windows Qt installers. ANGLE implements the OpenGL ES 2.0 API on top of DirectX 11 or DirectX 9.
ANGLE requires that the DirectX SDK is installed when building Qt. If MSVC is used, the DirectX SDK will be provided by the Windows SDK. In this case, you will need at least Windows SDK 10. For MinGW builds, you have to install the DirectX SDK provided by Microsoft.
ANGLE chooses the render backend depending on availability. DirectX 11 is usually preferable. However, some graphics cards may not fully support it. For these cases, the environment variable QT_ANGLE_PLATFORM (introduced in Qt 5.4) can be used to control the render backend. Possible values are d3d11 , d3d9 and warp .
To use a custom version of ANGLE, set the ANGLE_DIR environment variable to point to the ANGLE source tree before building Qt.
If you installed additional OpenGL drivers from your hardware vendor, then you may want to consider using this version of OpenGL instead of ANGLE. To use OpenGL, pass the command line options -opengl desktop to the configure script.
To use an OpenGL ES 2.0 emulator instead of ANGLE, use the configure options: -opengl es2 -no-angle .
Dynamically Loading Graphics Drivers
In addition to the build time configuration, Qt supports choosing and loading the OpenGL implementation at runtime. To use this mode, pass -opengl dynamic to the configure script.
Note: As of Qt 5.5 this is the configuration used by the official, pre-built binary packages of Qt. It is strongly recommended to use it also in custom builds, especially for Qt binaries that are deployed alongside applications.
Note: Combining -opengl dynamic with -static is also possible, but be aware that ANGLE will not be statically linked into the applications in this case, it will still be built as a shared library.
This configuration is the most flexible because no dependencies or assumptions are hardcoded about the OpenGL implementation during build time. It allows robust application deployment. When a given environment fails to provide a proper OpenGL 2.0 implementation, it will fall back automatically to ANGLE. This fallback will be completely transparent to the application, and will allow Qt Quick or other OpenGL code to function by translating to Direct3D. Such a fallback could, for example, take place on a Windows 7 PC with no additional graphics drivers installed. On other machines, where there is sufficient OpenGL support, the normal desktop OpenGL drivers will be used. Additionally, pure software-based OpenGL implementations may be available as additional fallbacks in the future, allowing running Qt Quick applications without a GPU.
When configured with -opengl dynamic , neither Qt nor the applications built using qmake will link to the opengl32 (standard desktop OpenGL) or QtANGLE libraries. Instead, the appropriate library is chosen at runtime. By default, Qt will determine whether the system’s opengl32.dll provides OpenGL 2 functions. If these are present, opengl32.dll is used, otherwise the ANGLE libraries (libEGL.dll and libGLESv2.dll) will be used. In case the ANGLE libraries are missing or initialization fails for some reason, an additional fallback is attempted by trying to load opengl32sw.dll . See below for details.
The loading mechanism can be configured through the QT_OPENGL environment variable and the following application attributes:
- Qt::AA_UseDesktopOpenGL Equivalent to setting QT_OPENGL to desktop .
- Qt::AA_UseOpenGLES Equivalent to setting QT_OPENGL to angle .
- Qt::AA_UseSoftwareOpenGL Equivalent to setting QT_OPENGL to software .
When a certain configuration is requested explicitly, no checks are done at application startup, that is, the system-provided opengl32.dll will not be examined.
The dynamic loading has a significant impact on applications that contain native OpenGL calls: they may fail to link since qmake no longer automatically adds opengl32.lib or libGLESv2.lib. Instead, applications are expected to use the OpenGL functions via the QOpenGLFunctions class. Thus the direct dependency on the OpenGL library is removed and all calls will be routed during runtime to the implementation chosen by Qt.
Applications that require a certain OpenGL implementation (for example, desktop OpenGL due to relying on features provided by OpenGL 3.0 or higher) should set the application attributes Qt::AA_UseOpenGLES or Qt::AA_UseDesktopOpenGL before instantiating QGuiApplication or QApplication. When these attributes are set, no other OpenGL implementations are considered. Additionally, if they wish to, such applications are free to make direct OpenGL function calls by adding opengl32.lib to their .pro project files: LIBS += opengl32.lib (Visual Studio) or LIBS += -lopengl32 (MinGW). The result is, from the application’s perspective, equivalent to the -opengl desktop build configuration of Qt.
Qt::AA_UseSoftwareOpenGL is special in the sense that it will try to load an OpenGL implementation with a non-standard name. The default name is opengl32sw.dll . This allows shipping a software-only OpenGL implementation, for example a build of Mesa with llvmpipe, under this name. If necessary, the filename can be overridden by setting the QT_OPENGL_DLL environment variable.
It is possible to provide a JSON-format configuration file specifying which OpenGL implementation to use depending on the graphics card and driver version. The location is given by the environment variable QT_OPENGL_BUGLIST . Relative paths are resolved using QLibraryInfo::SettingsPath or QStandardPaths::ConfigLocation . The file utilizes the format of the driver bug list used in The Chromium Projects. It consists of a list of entries each of which specifies a set of conditions and a list of feature keywords. Typically, device id and vendor id are used to match a specific graphics card. They can be found in the output of the qtdiag or dxdiag tool.
The following feature keywords are relevant for choosing the OpenGL implementation:
- disable_desktopgl — Disables OpenGL. This ensures that Qt does not attempt to use regular OpenGL (opengl32.dll), and that it starts with ANGLE right away. This is useful to prevent bad OpenGL drivers from crashing the application.
- disable_angle — Disables ANGLE. Ensures that Qt does not attempt to use ANGLE (and so Direct3D).
- disable_d3d11 — Disables the D3D11 rasterizer in ANGLE. Instead, the next D3D rendering option is tried first. The default order is: D3D11, D3D9, WARP, reference implementation.
- disable_d3d9 — Disables the D3D9 rasterizer in ANGLE
- disable_rotation — Forces the application to run in landscape orientation always. It applies to OpengGL only and has no effect when using ANGLE or Software OpenGL implementations. This is intended for drivers that have issues with rotation. This feature keyword was introduced in Qt 5.6.
- disable_program_cache — Disable storing shader program binaries on disk. This feature keyword was introduced in Qt 5.12.
A sample file looks like:
When QT_OPENGL_BUGLIST is not specified, a built-in list will be used. This typically includes some older, less-capable graphics cards with disable_desktopgl set, in order to prevent Qt from using their unstable desktop OpenGL implementations and instead fall back to ANGLE right away.
In practice the most common combinations are expected to be the following:
- disable_desktopgl — In case the system provides OpenGL 2.0 or newer, but the driver is known to be unstable and prone to crash.
- disable_desktopgl , disable_angle — When no accelerated path is desired. This ensures that the only option Qt tries is the sofware rasterizer (opengl32sw.dll). Can be useful in virtual machines and applications that are deployed on a wide range of old systems.
- disable_d3d11 , disable_d3d9 — When the accelerated D3D options are known to be unstable and WARP is desired (when available). Can be useful in virtual machines.
The supported keys for matching a given card or driver are the following. Note that some of these are specific to Qt.
- os.type — Operating system: win , linux , macosx , android
- os.version — Kernel version
- os.release — Specifies a list of operating system releases on Windows: xp , vista , 7 , 8 , 8.1 , 10 .
- vendor_id — Vendor from the adapter identifier
- device_id — List of PCI device IDs.
- driver_version — Driver version from the adapter identifier
- driver_description — Matches when the value is a substring of the driver description from the adapter identifier
- gl_vendor — Matches when the value is a substring of the GL_VENDOR string
To disable all blacklisting, set the environment variable QT_NO_OPENGL_BUGLIST to any value. This will skip reading any configuration files, and instead will assume that nothing is disabled, regardless of the driver or OS.
Note: While not typically needed, QT_NO_OPENGL_BUGLIST can become relevant in certain virtualized environments, with multiple, possibly virtual, graphics adapters present. If the logs from categories like qt.qpa.gl indicate that the detection of the driver and display adapter leads to incorrectly disabling OpenGL, it is then recommended to set this environment variable in order to enable the application to run normally. This environment variable was introduced in Qt 5.15.
Building from Source
These tools are not needed to run Qt 5 applications, but they are required for building Qt 5 from source.
- ActivePerl — Install a recent version of ActivePerl (download page) and add the installation location to your PATH .
- Python — Install Python from the here and add the installation location to your PATH .
Note: Please make sure that the perl executable from ActivePerl is found in the path before the perl executable provided by msysgit, since the latter is outdated.
ANGLE depends on these extra tools from the GnuWin32 and Win flex-bison projects, which are provided for your convenience in the gnuwin32/bin folder:
The gnuwin32/bin folder should be added to the PATH variable.
Note: If you are building qtbase outside of qt5.git, you will need to download win_bison and win_flex from the link above and rename them to bison and flex.
For instructions for building the Qt 5 source, read the Qt for Windows — Building from Source page.
Compilers
Visual Studio
Qt can be built with Visual Studio 2015 (Update 2), Visual Studio 2017, Visual Studio 2019 and Build Tools for Visual Studio 2017 and 2019 (see also Supported Platforms).
Intel C++ Compiler (Windows, Altix)
Qt has been tested successfully with:
- Windows — Intel(R) C++ Compiler for 32-bit applications, Version 9.1.040.
- Altix — Intel(R) C++ Itanium(R) Compiler for Itanium(R)-based applications Version 8.1 Build 20050406 Package ID: l_cc_pc_8.1.030
GCC (MinGW-builds)
The minimum version of MinGW-builds supported is GCC 5.1.0 (64bit, 32bit), available from its download page.
For more information about the MinGW builds, visit the Reference Configuration section of the supported platforms page.
Clang(clang-cl)
Qt has been tested successfully with Clang 3.8(llvm svn rev. 256453 and clang svn rev. 256453). Visual Studio 2015 Update 1 was used to build clang. Mkspec is using the clang-cl tool to build Qt. Clang 3.8 does not support precompiled headers.
Building Qt WebEngine
Qt WebEngine has additional build requirements which are listed in the Qt WebEngine Platform Notes.
QDoc Dependencies
Since version 5.11, QDoc uses Clang to parse C++ code. If you wish to build QDoc manually, refer to Installing Clang for QDoc for specific build requirements.
В© 2020 The Qt Company Ltd. Documentation contributions included herein are the copyrights of their respective owners. The documentation provided herein is licensed under the terms of the GNU Free Documentation License version 1.3 as published by the Free Software Foundation. Qt and respective logos are trademarks of The Qt Company Ltd. in Finland and/or other countries worldwide. All other trademarks are property of their respective owners.