Pxe boot server windows server 2012
![]()
Question
![]()
![]()
I thought that I would start a new thread since I couldn’t find a clear answer on the forum. I am trying to find the steps to verify that my Server 2012 R2 WDS server is capable of PXE booting both Legacy and UEFI computers. When I try to PXE boot a Dell E5440 in UEFI mode it will say «Start PXE over IPv4.» Something about the NBP file quickly pops up and disappears then the screen flashes and moves onto IPv6 despite that boot option being disabled in the BIOS. The UEFI network stack is enabled. I have both 32 and 64 bit LiteTouch WinPE images available through PXE.
Answers
![]()
![]()
Windows Server 2012 R2 should support PXE booting for uEFI and BIOS clients.
I have seen some problems for WDS Server boxes that were «upgraded» from previous versions of Windows Server and/or boot files were xcopy’ed to the WDS Server, rather than allowing the WDS tools to «import» the boot wim files.
Try fully updating the x86 and x64 boot files on the server, that should force an update of all the boot files.
All replies
![]()
![]()
Ideas? I m must not be the only one trying to PXE boot Legacy and UEFI computers.
Any help would be appreciated.
![]()
![]()
Windows Server 2012 R2 should support PXE booting for uEFI and BIOS clients.
I have seen some problems for WDS Server boxes that were «upgraded» from previous versions of Windows Server and/or boot files were xcopy’ed to the WDS Server, rather than allowing the WDS tools to «import» the boot wim files.
Try fully updating the x86 and x64 boot files on the server, that should force an update of all the boot files.
![]()
![]()
![]()
![]()
![]()
![]()
When you «import» a boot wim into WDS the WDS Service does more than just copy the wim file locally, it also extracts and prepares several other supporting files. That bin file that prompts for F12, and the file that bypasses the F12 prompt? yea both of those. Since your questions were directly related to the boot operation just *before* the WinPE Boot wim file is loaded, it would be a good to verify those files, hense my suggestion.
The fact that this is a clean installation is good news, although I’m still not clear as to how you added the WinPE images. WPEUtil.exe? Through the WDS console, or did you just copy the files locally via the windows explorer.
If you still have problems, I would suggest asking in the Windows Deployment forums, perhaps someone there can escalate to MSFT. Be prepared to provide WDS Logs.
SCCM 2012 — Настраиваем PXE для развёртывания ОС
 Небольшой скринкаст по включению Pre-Execution Environment (PXE) для инициализации процесса развёртывания ОС в System Center 2012 Configuration Manager (SCCM).
Как известно в новой версии SCCM механизм PXE является частью роли сервера точки распространения — Distribution Point
Открываем свойства точки распространения, для которой мы хотим включить PXE (Administration > Overview > Distribution Points). На соответствующей закладке PXE включаем опции:
- Enable PXE support for clients
- Allow this distribution point to respond to incoming PXE requests
- Enable unknown computer support
- Require a password when computers use PXE.
Здесь же задаём пароль, который будет запрашиваться после загрузки по PXE перед началом выполнения последовательности задач по установке ОС. 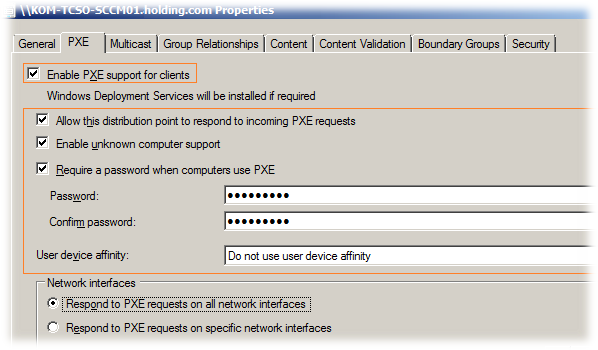
После сохранения настроек на сервере в фоновом режиме должна автоматически установиться роль Windows Deployment Services. Успешное окончание процесса установки этой роли можно отследить по эвент-логам Application и System, где будут фиксироваться события инициализации и запуска службы Windows Deployment Services Server. После этого в оснастке Server Manager должна появится информация о том, что данная роль установлена
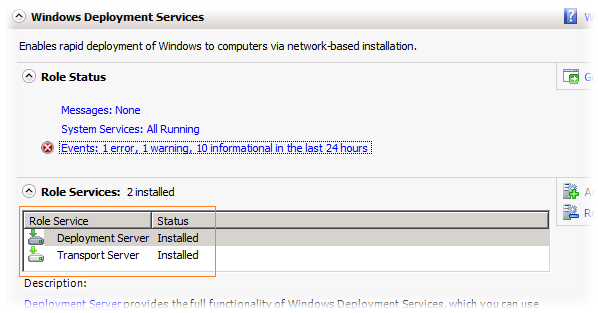
Ручной инициализации и настройки параметров WDS в его консоли не требуется. SCCM должен выполнить всю работу за нас автоматически.
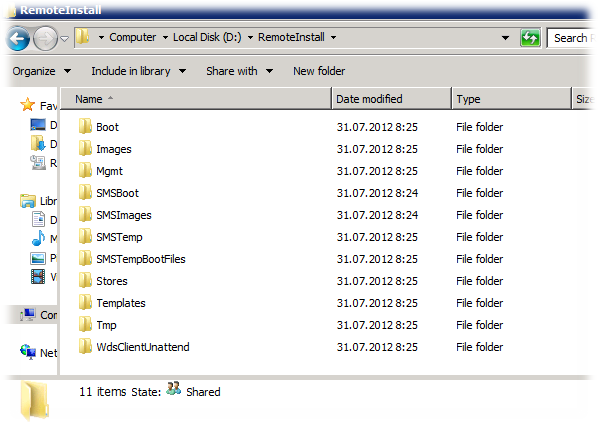
При этом на одном из логических дисков сервера должен появиться расшаренный каталог RemoteInstall с файлами WDS
В Windows Firewall должны появиться соответствующие правила разрешающие входящий трафик UDP для служб WDS

Теперь для того чтобы новые компьютеры в процессе развертывания ОС могли подключиться к ресурсам нашей точки распространения для скачивания образа ОС нам нужно настроить учетную запись Network Access Account в свойствах сайта (Administration > Site Configurations > Sites > Configure Site Components > Software Distribution)
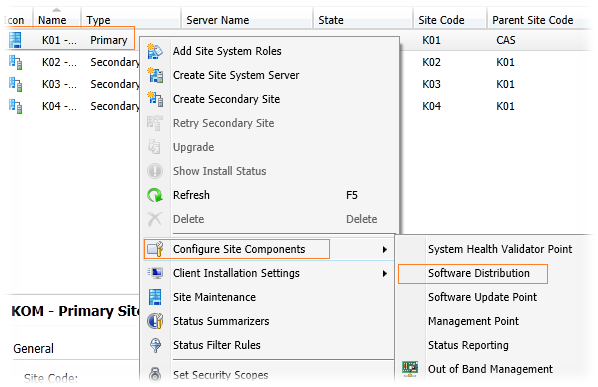
Здесь указываем специально созданную в домене учетную запись пользователя от имени которой будет выполняться доступ к содержимому точек распространения в процессе развёртывания ОС. Как правило для такой учетной записи достаточно членства в доменной группе Domain Users.
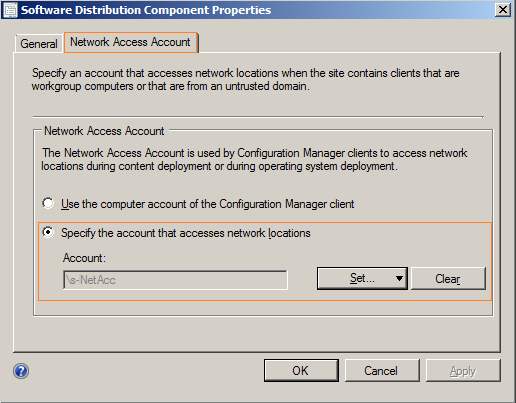
Обратите внимание на то что Network Access Account задаётся только на уровне первичного сайта.
Для того чтобы наши начальные загрузочные образы стали доступны через PXE включим в их свойствах (Software Library > Overview > Operating Systems > Boot Images) соответствующую опцию:
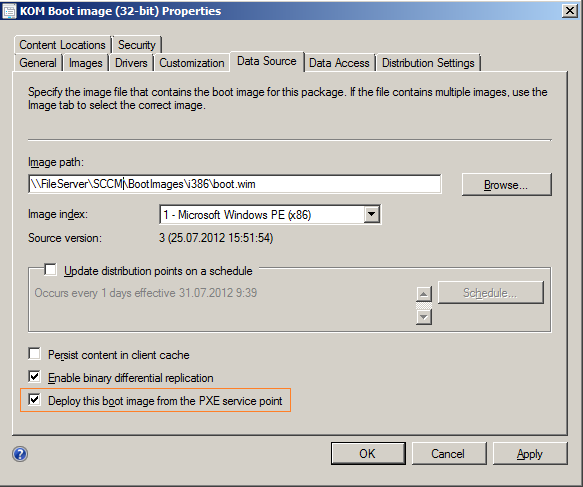
Также мы должны убедиться в том что все загрузочные образы, образы ОС, пакеты драйверов и приложения, которые устанавливаются в процессе выполнения последовательности задач при развёртывании ОС – распространены на все DP, на которых мы настраиваем PXE.
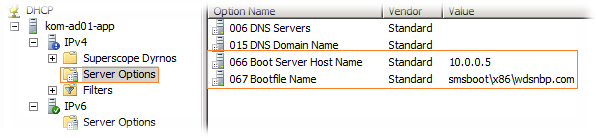
Теперь перейдём в консоль сервера DHCP (в нашем примере служба DHCP выполняется на отдельном сервере) и в параметрах сервера настроим два дополнительных параметра:
- 066 — Boot Server Host Name – укажем IP адрес сервера SCCM c PXE
- 067 — Bootfile Name – укажем значение smsboot\x86\wdsnbp.com
После этого в SCCM импортируем информацию о новом компьютере (имя будущего компьютера и MAC-адрес) в коллекцию на которую назначена последовательность задач по развертыванию ОС, а на самом клиентском компьютере в BIOS устанавливаем загрузку по сети и включаем его. Если всё сделано правильно начнётся загрузка образа WinPE через PXE

После чего среда WinPE будет загружена и нам будет предложено ввести пароль который мы задали на этапе включения PXE в свойствах точки распространения.
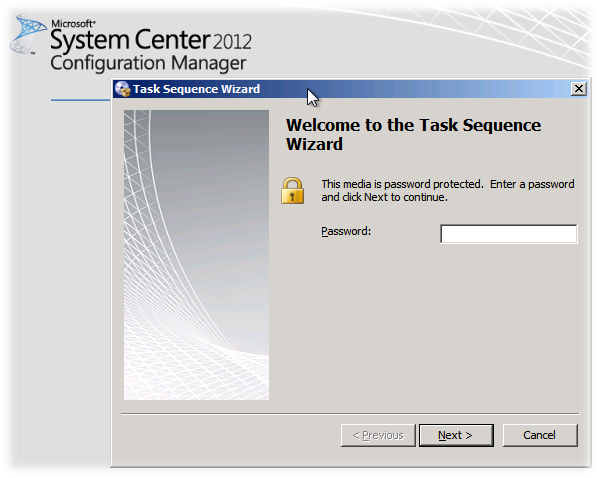
После ввода пароля стартует процедура обнаружения данного компьютера в SCCM и применения назначенной для него последовательности задач по непосредственной установке ОС.
Update 14.01.2016
С появлением новых клиентских комптютеров с UEFI при использовании вышеописанных опций DHCP (066, 067) появилась новая проблема. Опция 067 может принимать значение либо для загрузки компьютеров с Legacy BIOS ( wdsnbp.com ), либо для загрузки UEFI-комптьютеров ( wdsmgfw.efi ). Информацию об этом можно найти также в статье KB2602043 — Invalid Boot File Received Error Message When PXE booting from WDS . Это приводит к проблемам сосоуществования PXE для разных типов компьютеров. Чтобы избежать этой проблемы можно, как ранее справедливо в комментариях заметил Ievgen Liashov , можно отказаться от использования опций DHCP (нужно удалить их если они были сделаны ранее), а вместо этого на маршрутизируемом сетевом оборудовании прописать IP адрес нашего SCCM сервера с PXE в качестве дополнительного IP-Helper-a. Такая конфигурация позволит выполнять загрузку по PXE и для компьютеров с Legacy BIOS и для компьютеров с UEFI.
Дополнительная информация
Pxe boot server windows server 2012
This section explains the initial information you will need and provides the instructions you need to follow to install the Windows Server 2012 R2 operating system over an established PXE-based network using a customer-provided Windows Imaging Format (WIM) image.
Note that this procedure documents the initial steps to install Windows Server over the network using Windows Deployment Services (WDS). Specifically, it explains the steps for selecting the server PXE network interface card that will communicate with your WDS installation server. For further information about using WDS to install Windows Server 2012 R2, see Microsoft’s Windows Deployment Services documentation at https://technet.microsoft.com/en-us/library/jj648426.aspx.
To use PXE to boot the installation media over the network, you must:
Configure the network (NFS, TFTP, DHCP) server to export the installation tree.
Configure the files on the TFTP server that are necessary for PXE booting.
Configure the server’s MAC network port address to boot from the PXE configuration.
Configure Dynamic Host Configuration Protocol (DHCP).
To use WDS to perform the installation, you must:
Add the required system device drivers to the install.wim image and, if necessary, the boot.wim image.
For instructions for adding drivers to the WIM installation image(s), see the Microsoft Windows Deployment Services documentation.
Obtain the WIM Administrator password.
- Ensure that the PXE network environment is properly set up and the Windows installation media is available for PXE boot.
- Reset the server.
For example, to reset the server:
From the local server, press the Power button on the front panel of the server for approximately 1 second to power off the server, then press the Power button again to power on the server.
From the Oracle ILOM web interface, click Host Management → Power Control, select Reset from the Select Action list box, then click Save.
From the Oracle ILOM CLI, type: reset /System
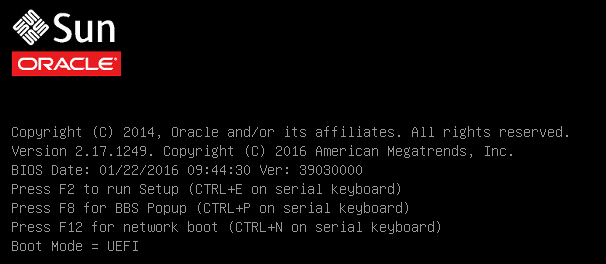
The server begins the boot process and the BIOS screen appears.
The BIOS Setup Utility appears.
Select Advanced in the top menu bar.
The BIOS Setup Utility Advanced screen appears.
Select Network Stack from the list of available options.
The BIOS Setup Utility Network Stack screen appears.

This causes the server to reset. After resetting, the BIOS screen appears again.
In the BIOS screen, press the F8 key to specify a temporary boot device or press F12 to network boot (PXE).
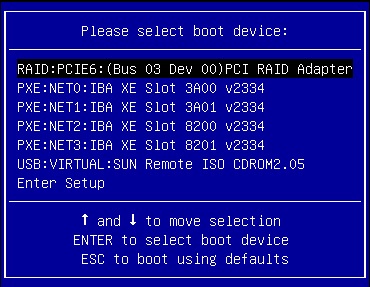
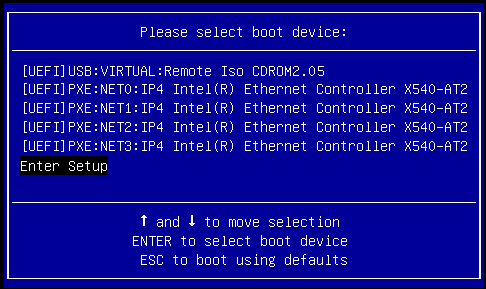
The Please Select Boot Device menu appears listing the available boot devices. The screen that appears will differ depending on whether you have BIOS configured for Legacy BIOS Boot Mode or UEFI Boot Mode.
For Legacy BIOS Boot Mode, a screen similar to the following appears:
For UEFI Boot Mode, a screen similar to the following appears:
The network bootloader loads and a boot prompt appears. After a few seconds the installation kernel will begin to load.
- ВКонтакте
- РћРТвЂВВВВВВВВнокласснРСвЂВВВВВВВВРєРСвЂВВВВВВВВ