Windows 10 Just a Moment Stuck? Use These Solutions to Fix It [MiniTool Tips]
By Stella | Follow | Last Updated October 16, 2020
Summary :

Windows 10 Just a moment stuck is not a rare issue and many users reflect they have encountered this issue when updating your Windows operating system or reinstalling Windows without an installation medium. Are you also looking for an effective method to get rid of this issue? You come to the right place. In this article, we will show you two available solutions.
Quick Navigation :
Are You Facing Windows 10 Just a Moment Issue?
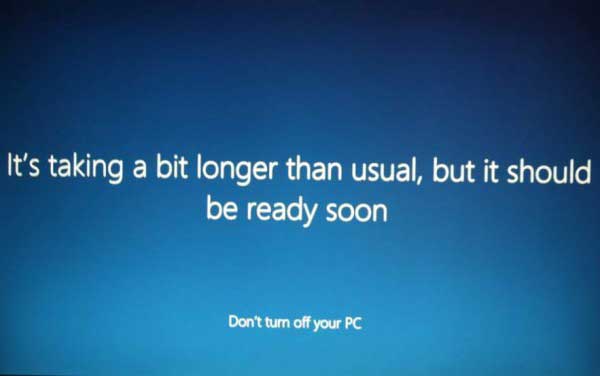
Sometimes, your computer may boot into a screen saying Just a moment. Yes, you just wait for centuries but only find Windows 10 Just a moment is stuck. This issue always happens when updating the system or reinstalling Windows 10 without an installation medium.

You are not alone. When you search for this issue on the internet, you will discover that many users are bothered by Windows 10 stuck on Just a moment and the phenomenon are various, such as Windows 10 Just a moment then black screen, Windows 10 Just a moment after update, and so forth.
Fortunately, it is possible to fix it. But firstly, let’s find out the causes of this issue.
Reasons for Windows 10 Stuck on Just a Moment
The speed of Windows 10 update and installation relies on the hardware specification, available disk space, hard drive read-write speeds, the speed of internet connection, and more. When the process lasts too long, you may see the following screen:
But, if there is something wrong with the hardware, hard disk, or the internet connection, Windows 10 stuck on Just a moment issue is likely to happen.
We have spent time looking for the available solutions and now we summarize them for you in this article.
Solution 1: Check Whether the PC Is Responding
If Your Computer Is Still Responding
You should first check whether your computer is still working. To do this job, you can go to check if the machine is making any noise. It is a clear sign of whether the processor is still at work. Of course, there is the other sigh: a flickering light.
When these two signs show that the processor is still at work, do not tinker with that process in progress. We have mentioned above: the process speed is possible decided by the internet connect condition, free disk space on your computer, etc. Wait and see.
If Your Computer Is Not Responding
If your computer has fallen into silent and stuck on the seemingly infinite loop: Just a moment, you can consider doing these things:
- Disable network devices, turn off Wi-Fi and unplug network cable if there is any.
- Remove any USB devices which are connected with the computer, including keyboard, mouse, printer, USB drive, AC adapter, and so on.
After that, reconnect the USB devices to your PC and then check whether the computer can run normally. If yes, you can re-establish the internet connectivity to see whether the update or installation process can run successfully.
However, if the above measure doesn’t work for your situation, you need to perform a hard restart of your computer: press and hold on the power button until your computer shuts down and then reboot it.
If Windows 10 Just a moment issue still persists, you need to try the next solution.
Solution 2: Clean Install Windows 10
When your computer is having performance and other issues, the most effective way to get rid of the issues is to perform a clean installation. This way will remove everything from the hard drive on your machine and start from scratch.
Thus, when you are bothered by Windows 10 stuck on Just a moment issue, you can clean install Windows 10 to have a try.
In the following guide, we will walk through the steps to clean install Windows 10 including these three parts:
- How to restore data from the unbootable PC before installation
- How to create a USB bootable media of Windows 10
- How to perform a clean installation of Windows 10
How to Restore Data from the Unbootable PC before Installation
The clean installation process will delete everything from your computer hard drive. So, we think you’d better restore your data to an external drive in advance. Here, you can use the professional data recovery software: MiniTool Power Data Recovery.
This software is specially designed to recover data from various types of data storage devices, including computer hard drives, USB flash drives, memory cards, SD cards, and more. These data can be both deleted and existing items.
If you want to restore files from a computer which is bothered by Windows 10 Just a moment issue, you need to use MiniTool Power Data Recovery Bootable Edition that should be built by a MiniTool Snap-in WinPE Bootable Builder.
However, only the Deluxe and above editions offer MiniTool Bootable Media Builder. You need to get one of these editions from the MiniTool official store according to your actual situation. If you are a personal user, the Personal Deluxe Edition can fully meet your need.
Get a normal working computer to obtain this software and then refer to the following guide to build a bootable medium and start the unbootable machine from it:
Then, it’s time to restore data from the computer with this software:
Step 1: Choose the target partition to scan
Choose the target partition you need to restore data from and click on the Scan button to start the scanning process.

Step 2: Choose the files you want to recover
When the scanning process ends, you can see the scan results which are classified by path. You can open each path to find the files you want to restore.

Usually, there are numerous files on your computer hard drive and it is usually difficult to find out the needed ones quickly. In this situation, you can try the Type and Find features of this software to locate your needed files easily.
Additionally, with the Bootable Edition, you can preview the image files and text files which are no larger than 20MB. That is to say, when you are not sure whether it is the image or text file you need to restore, you can use the Preview feature to identify.
Step 3: Save the selected files to the external drive
Connect an external drive which has enough space to store your needed files to your computer and then check the files you want to restore. After that, press the Save button to choose the inserted external drive to keep the selected items.

Now, your needed data is saved to a safe place. Next, you need to create a USB bootable medium. Go to the next part the get the steps.
How to Create a USB Bootable Medium of Windows 10
The direct way to create a USB bootable medium is to use the Media Creation Tool. Here, you need to prepare a USB flash drive of at least 8GB and a normal working computer.
After that, you can follow these steps to create a USB bootable medium:
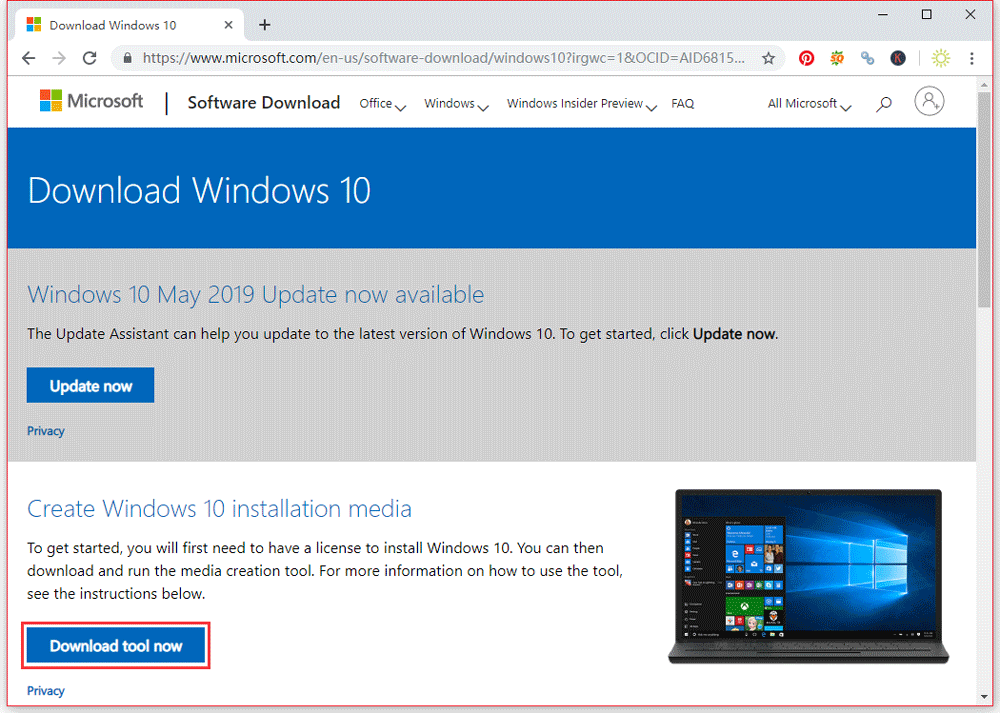
1. Go to the Windows 10 download page on the web browser.
2. Click the Download tool now button and save the file on your computer.
3. Find the downloaded file and then double-click on it to launch it.
4. Press the Accept button to agree to the Applicable notices and license terms.
5. Choose the Create installation media (USB flash drive, DVD, or ISO file) for another PC option and click on the Next button to continue.

6. In the following interface, you can select language, architecture, and edition you want to use. Since you are not going to clean install Windows 10 on this current working machine, you need to make sure that the Use the recommended options for this PC option IS NOT CHECKED.
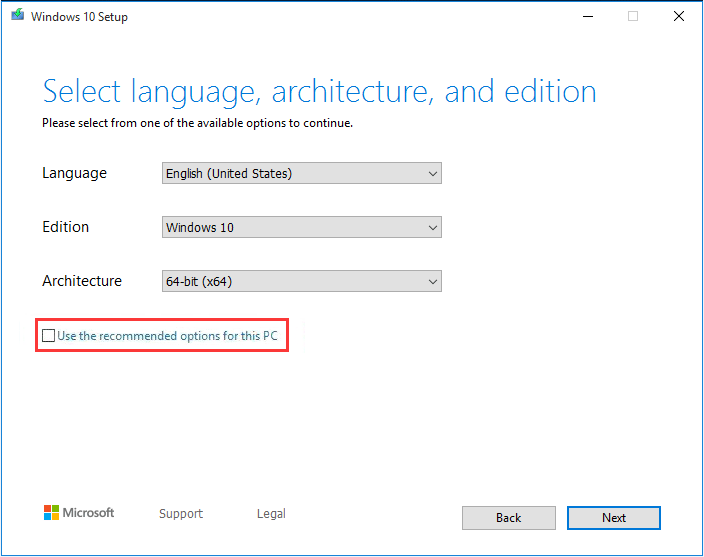
7. Click Next.
8. Select the USB flash drive option and click the Next button to continue.
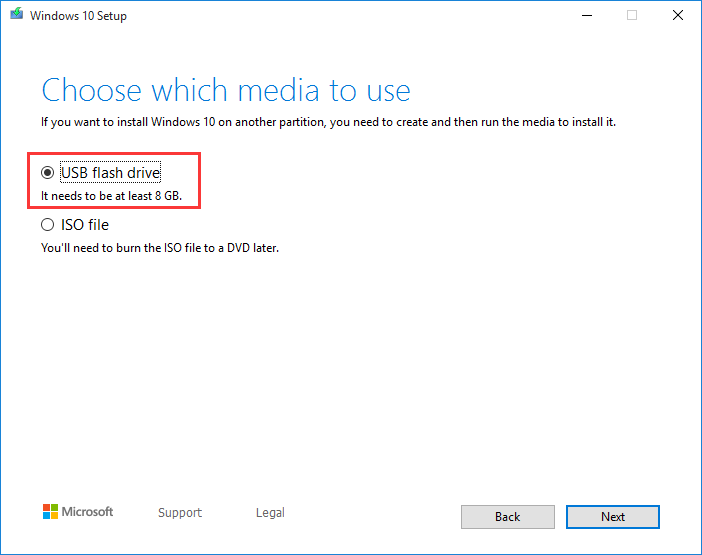
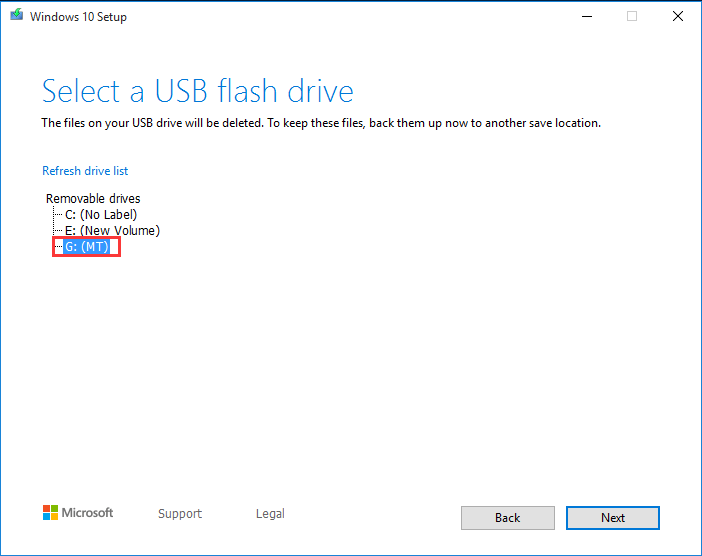
9. Click on the USB flash drive you want to make it bootable and click Next.
10. When you see the Your USB flash drive is ready interface, press the Finish button to end the process.
After these steps, you can use this USB flash drive to perform a clean install on the computer which is bothered by Windows 10 stuck on Just a moment issue.
How to Perform a Clean Installation of Windows 10
To perform a clean install of Windows 10 with the bootable USB flash drive, you need to follow these steps:
1. Set your computer to boot from the USB flash drive.
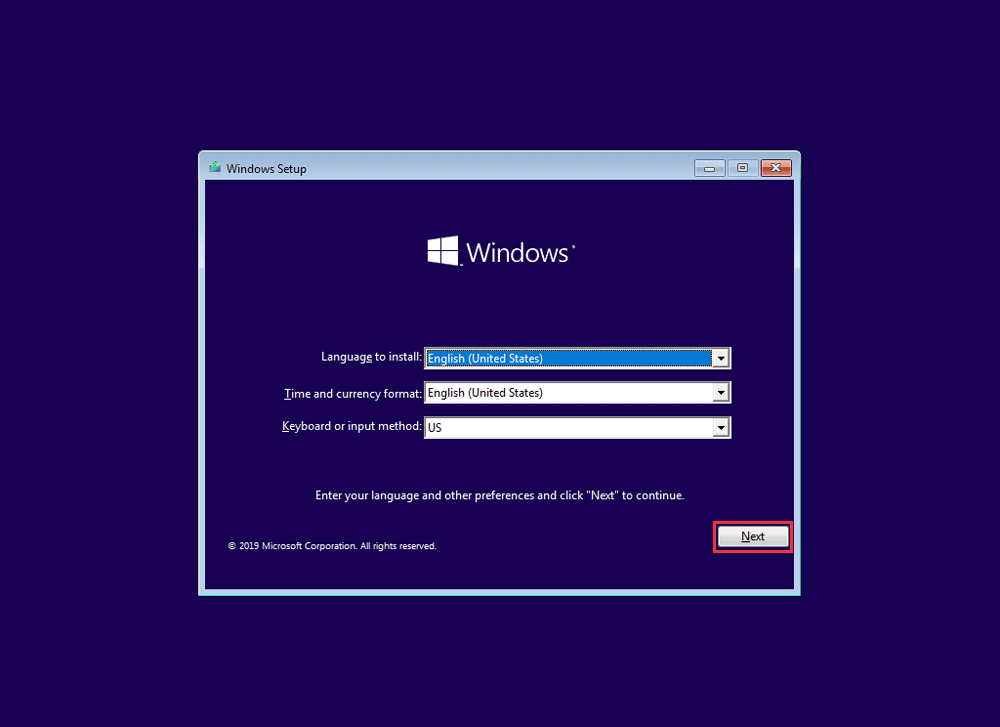
2. When entering the Windows setup interface, press the Next button to start the process.
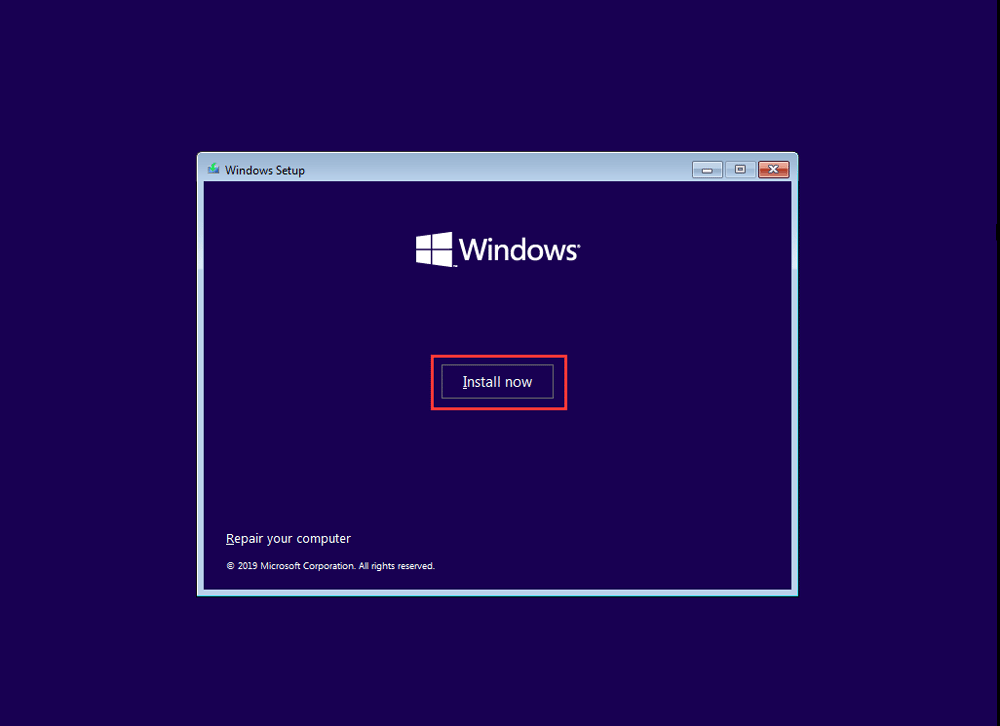
3. When entering the following interface, click the Install Now button to continue.
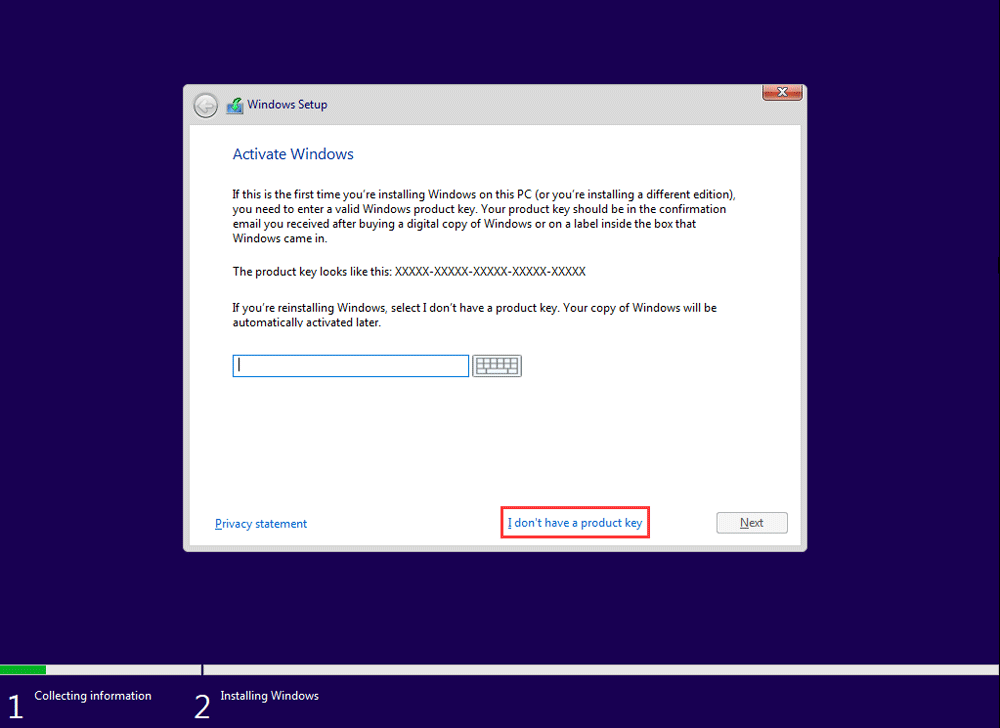
4. If you’re upgrading an old version, you must input a genuine product key. However, if you’re reinstalling Windows 10, you can press the I don’t have a product key option to continue if your computer has been activated.
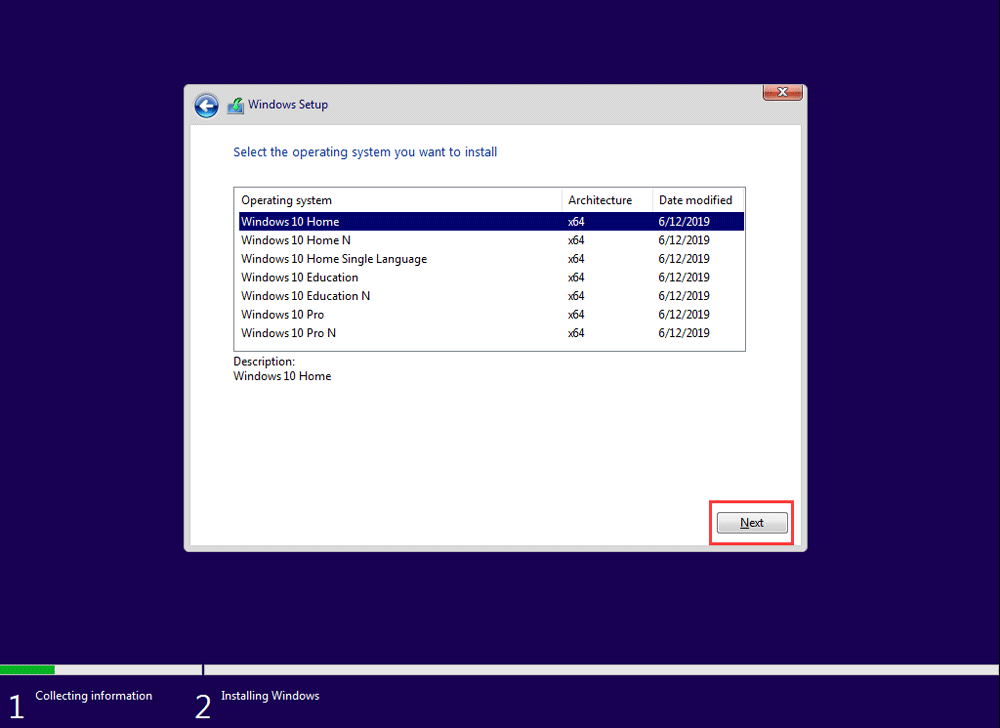
5. Choose a Windows 10 edition that must match your product key and press the Next button to continue.
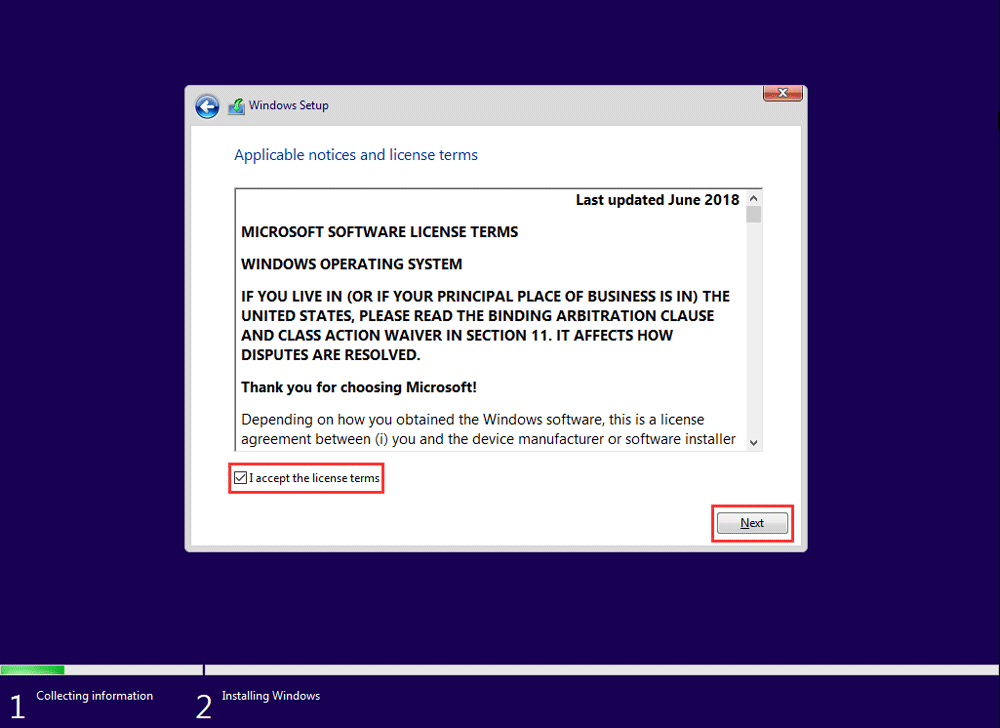
6. Check the I accept the license terms option and then press Next to continue.
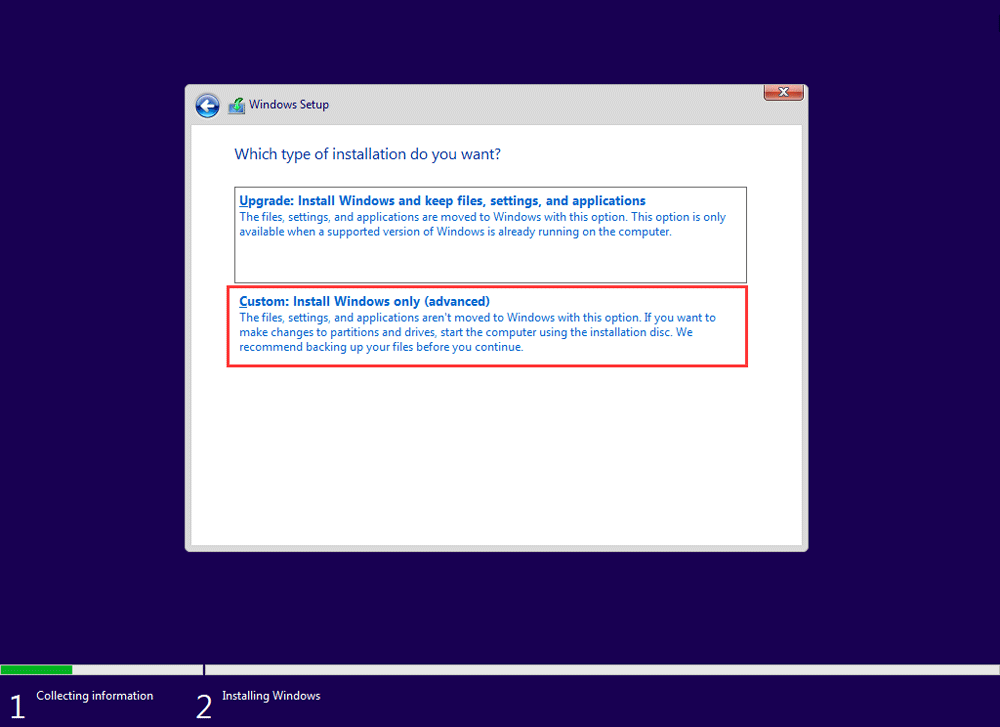
7. Choose the Custom: Install Windows only (Advanced) option to continue.
8. Then you need to choose where to install Windows 10. Usually, it is a partition on Drive 0 that contains the current installation of Windows. Then, press the Delete button to remove it from the hard drive.
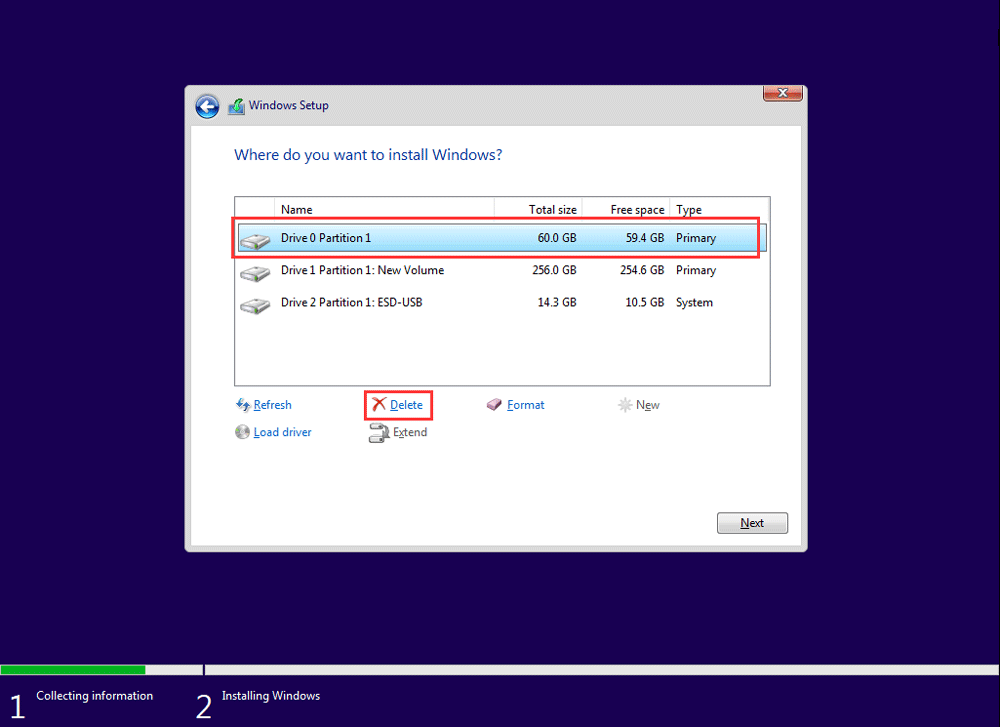
9. Click the OK button on the popup window to confirm the deletion.
10. Choose the empty partition and click on the Next button to start the installation process.
After the installation, you still need to customize the out-of-box experience to create a new account and set up your environment. Now, you can follow this post to do the job: How to Complete the Out of Box Experience (OOBE) in Windows 10.
After a clean install of Windows 10, we believe that you can use your computer as usual.
Windows 10 reset VS clean install VS fresh start, what’s the difference? Read this post to learn them and choose a proper one for OS reinstallation.
Bottom Line
When you are getting in the trouble of Windows 1 Just a moment loop, you can refer to these two solutions mentioned in this post to help you out.
If you are bothered by some other issues when dealing with this issue, you can just send an email to [email protected] or let us know in the comment. Of course, you can also share your opinions or suggestions here.
Windows 10 Reset stuck on «Just a moment»
I had an HP laptop lying around I hadn’t used in awhile. And decided to do a complete factory reset to start fresh and make sure my computer was as fast as it could be.
I restarted, pressed f11 to enter the advanced menu, and did a complete reset where I deleted everything. After a few hours, I’m greeted with the welcome screen with Cortana.
Most of the time, I get past where she asks about my country and keyboard layout, and then she says «now we have some important setup to do» and the system tells me to wait «just a moment» and it’s just an infinite loop of that screen. Other times, I’ll turn the laptop on and it won’t even get past the keyboard layout setup, it will just freeze there where I can’t even move the mouse.
I’ve read this could be an issue where a windows update screws with some kind of driver. I was wondering if I could get help with this issue so I can boot into windows and use my laptop.
I’ve shut it down via the power button a few times now and booted back up only to keep having these issues.
OS: Windows 10 (version unknown)
Replies (10)
![]()
Welcome to our community.
This is Leocadia, independent community expert, and I am glad to assist you today.
Sorry to hear about this inconvenience. Now, we would like to help you promptly.
It looks like the factory reset did not happen properly and not everything was deleted. Now the laptop keeps rebooting. Not worry, I’ll do my best to help you.
We recommend you to perform the following steps to isolate the issue and arrive at a fix:
Power off the laptop.
Remove the battery out. If the battery is integrated and does not have a latch to release it then leave the battery inside the laptop.
Disconnected AC adapter from the laptop.
Press and hold the power button for 15 seconds.
Reconnect the battery and plug the AC adapter.
Power ON the laptop.
Please perform a system recovery by following the steps mentioned below:
Turn off the computer.
Disconnect all connected devices and cables such as Personal Media Drives, USB drives, printers, and faxes. Remove media from internal drives, and remove any recently added internal hardware.
Do not disconnect the monitor, keyboard, mouse, or power cord.
Turn on the computer and repeatedly press the F11 key about once every second until the Choose and option screen is displayed, and then continue.
On the Choose an Option screen, click Troubleshoot.
Choose an option with Troubleshoot selected
On the Troubleshoot screen, click Recovery Manager.
Troubleshoot screen with Recovery Manager selected
Under Help, click System Recovery.
Recovery Manager with Help and System Recovery selected
When Recovery Manager prompts you to back up your files, select a backup option:
note: Depending on the version of Windows, the following screens might appear slightly different.
Follow the instructions to backup your files and recover the system.
If you have already backed up personal files or you do not want to back up personal files, select Recover without backing up your files, and then click Next. Continue to the next step.
If you want to back up your personal files, follow these steps to create a backup.
The Welcome to HP Recovery Manager screen is displayed. Read the on-screen information, and then disconnect any connected devices and cables, such as Personal Media Drives, USB drives, printers, and faxes.
Remove media from internal drives, and remove any recently added internal hardware.
Do not disconnect the monitor, keyboard, mouse, or power cord.
Click Next to continue.
note: This process can take as long as 30 to 45 minutes. Do not interrupt HP Recovery Manager during the recovery process.
When recovery preparation is complete, click Continue to proceed to the installation phase of the recovery process. The computer restarts several times during the recovery. This is normal. Do not close, shut down, or disconnect the computer while HP Recovery runs.
Recovery preparation is complete
After the system recovery is complete, click Finish to restart the computer. Complete the setup screens and wait until the computer finishes the setup.
Once the setup is complete, turn off the computer, reconnect all devices and cables, and then turn on the computer.
Before using the computer, update and protect your computer by reinstalling any virus and security software that was installed before the system recovery.
Reinstall any software programs that were added after purchasing the computer, as well as any files that were backed up.
I hope it helps, but let me know if you need further assistance.