5 Steps to Install Eclipse
We’ve recently introduced the Eclipse Installer, a new and more efficient way to install Eclipse. It is a proper installer (no zip files), with a self-extracting download that leads you through the installation process. For those who prefer not to use the Installer, the packages and zip files are still available on our package download page.
1. Download the Eclipse Installer
Eclipse is hosted on many mirrors around the world. Please select the one closest to you and start to download the Installer
2. Start the Eclipse Installer executable
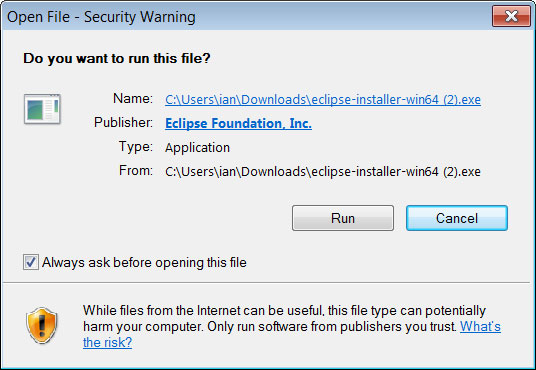
For Windows users, after the Eclipse Installer executable has finished downloading it should be available in your download directory. Start the Eclipse Installer executable. You may get a security warning to run this file. If the Eclipse Foundation is the Publisher, you are good to select Run.
For Mac and Linux users, you will still need to unzip the download to create the Installer. Start the Installer once it is available.
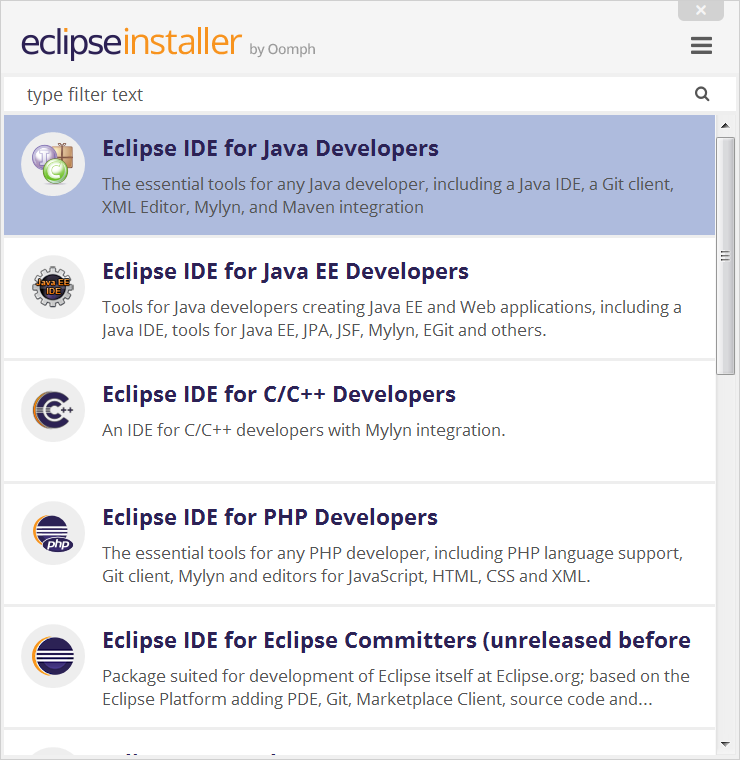
3. Select the package to install
The new Eclipse Installer shows the packages available to Eclipse users. You can search for the package you want to install or scroll through the list.
Select and click on the package you want to install.
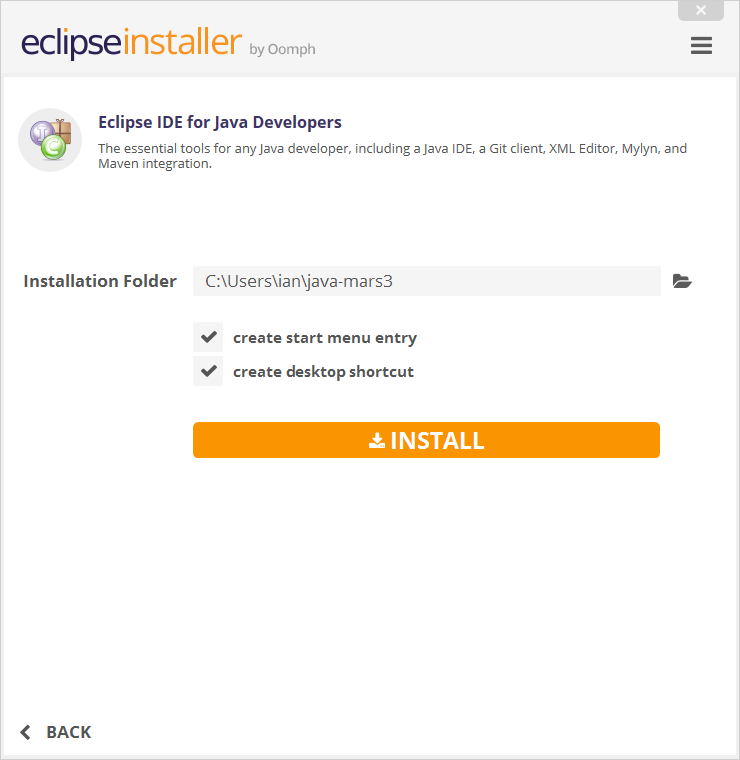
4. Select your installation folder
Specify the folder where you want Eclipse to be installed. The default folder will be in your User directory.
Select the ‘Install’ button to begin the installation.
5. Launch Eclipse
Once the installation is complete you can now launch Eclipse. The Eclipse Installer has done it’s work. Happy coding.
How to install Eclipse on Mac OS X
By Chaitanya Singh | Filed Under: Java Tutorials
In this tutorial, we will learn how to install eclipse IDE on Mac OS X. Eclipse IDE (Integrated development environment) is written in Java and mostly used for developing Java applications. In Eclipse IDE, you can write, compile and run your Java code.
Download and install Eclipse
1) To download Eclipse IDE, copy the link http://www.eclipse.org/downloads/ into you browser and hit enter.
2) Out of all the listed options, we need to install “Eclipse IDE for java developers”. Click the 64 bit download link as shown in the image below. 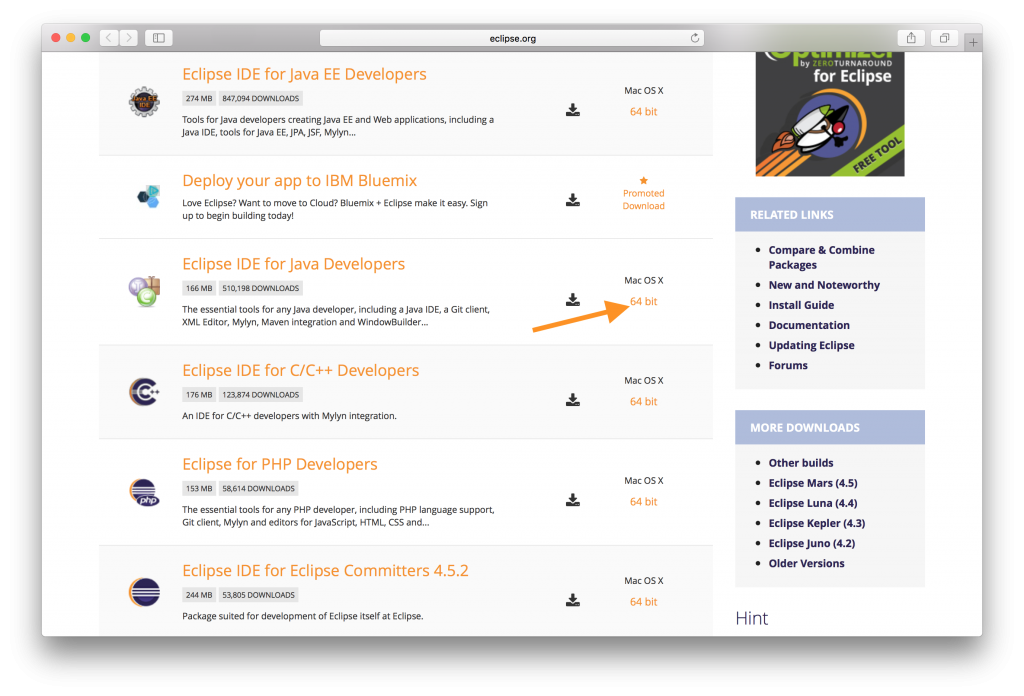
3) Upon clicking the 64 bit option, you would be redirected to a download page where you can choose the server nearest to you so that you can download faster. Simply click download button at the left panel as shown below. Your download will start automatically. 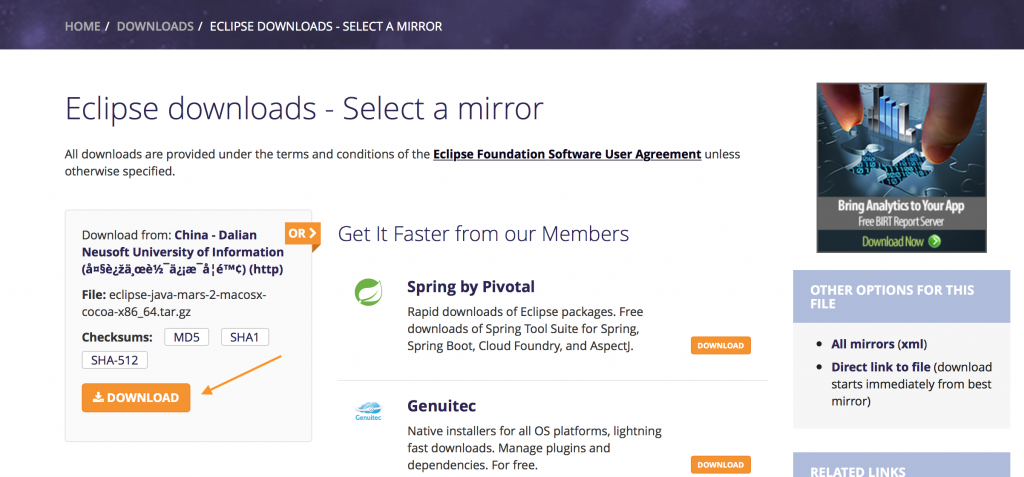
4) Once the download is done. Go to the download folder, you would find a file named “eclipse-java-mars-2-macosx-cocoa-x86_64.tar” (the file name may be different based on the version you download but it should be a tar file starting with word eclipse).
5) Drag the zipped file to the desktop and double click to open it. The file would be unzipped with default archive utility and you would find a eclipse icon on desktop. Open finder, select applications and then drag the eclipse icon from desktop the the application folder in finder.
6) Installation is done, you can now launch the eclipse by clicking the icon in applications. Alternatively, you can drag the icon from applications to the dock so that you can launch it directly from the desktop.
7) The first time you launch the application, you would get the following warning, just click “open”. 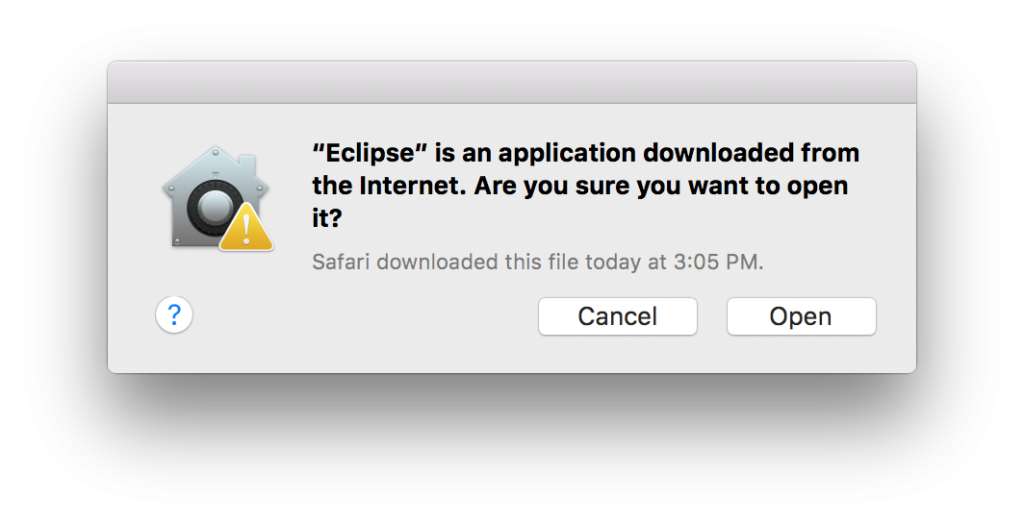
8) The next pop up would have a message “To open eclipse you need to install the legacy Java SE 6 runtime”. The pop up would look like this. Click ok. 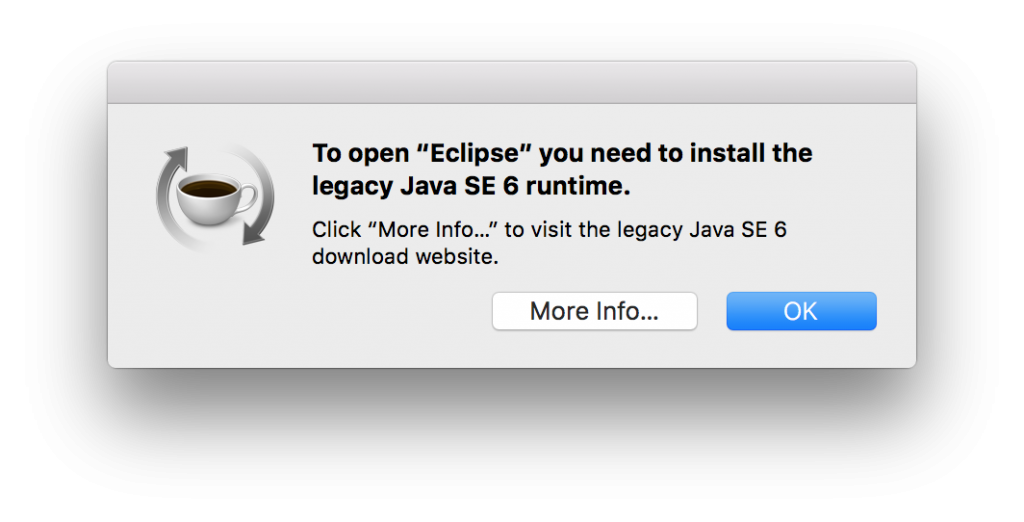
9) Go to the link http://www.oracle.com/technetwork/java/javase/downloads/jdk7-downloads-1880260.html the page would look like the below screenshot. Accept License Agreement and download the file mapped to Mac OS X x64. In my case it is “jdk-7u79-macosx-x64.dmg”, you may find it different based on the java version you are trying to install. 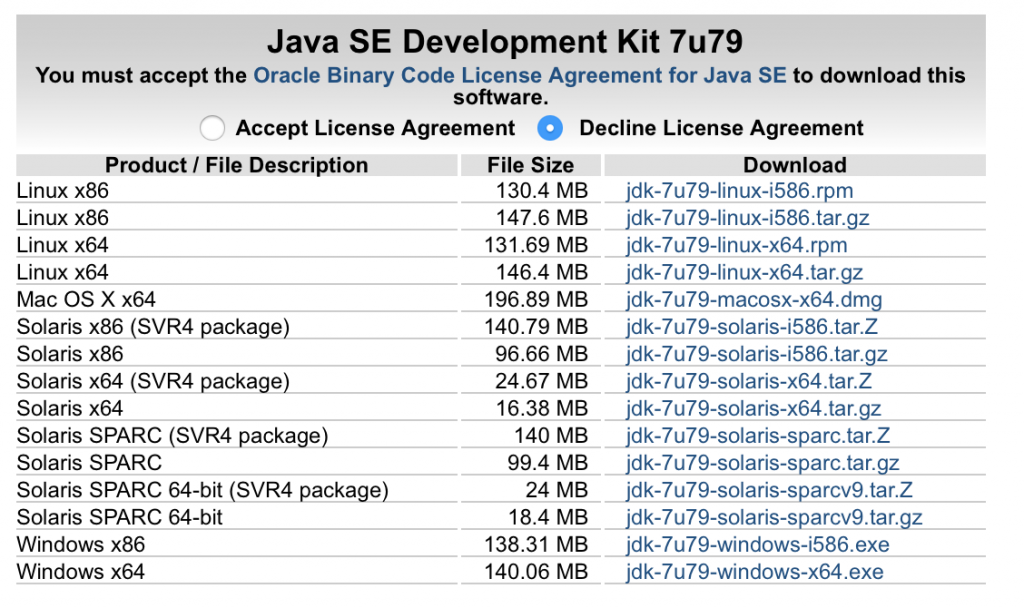
10) Once the download is complete, run the file and follow the installation instruction.
11) Once installation is done, open the Eclipse, it should run fine now. The welcome window would look similar to the one shown below. Click Workbench at the top right corner. 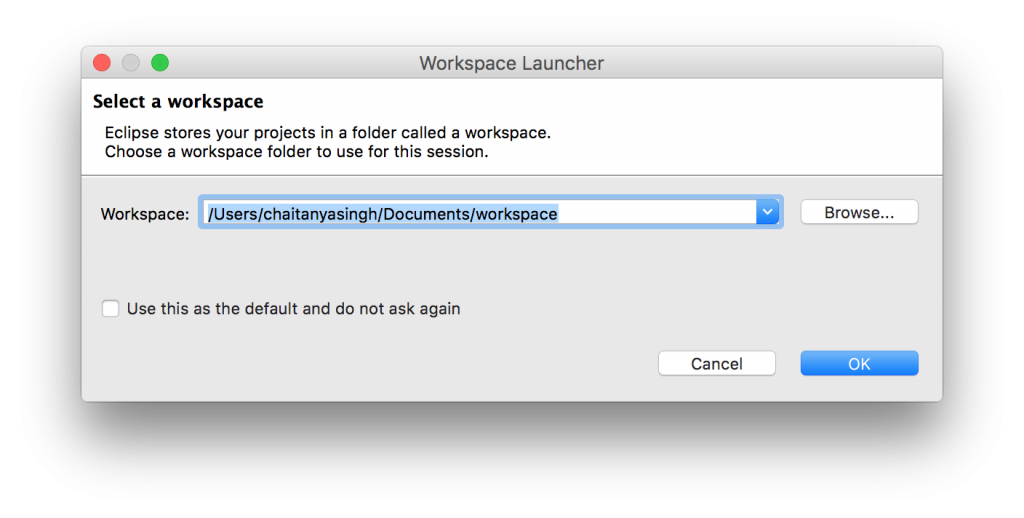
Download Eclipse Technology
that is right for you
Tool Platforms
The Eclipse Installer 2020‑09 R now includes a JRE for Mac OS X, Windows and Linux.
Get Eclipse IDE 2020‑09
Install your favorite desktop IDE packages.
Eclipse Che is a developer workspace server and cloud IDE.
Eclipse Che
Eclipse Che is a developer workspace server and cloud IDE.
A modern, open source software development environment that runs in the cloud.
Orion
A modern, open source software development environment that runs in the cloud.
Runtime Platforms
Eclipse GlassFish provides a complete application server which serves as the reference implementation for the Jakarta EE specification.
GlassFish
Eclipse GlassFish provides a complete application server which serves as the reference implementation for the Jakarta EE specification.
Eclipse Jetty provides a web server and javax.servlet container.
Jetty
Eclipse Jetty provides a web server and javax.servlet container.
Eclipse Equinox is an implementation of the OSGi core framework specification.
Equinox
Eclipse Equinox is an implementation of the OSGi core framework specification.
Eclipse Concierge is a small footprint implementation of the OSGi specification.
Concierge
Eclipse Concierge is a small footprint implementation of the OSGi specification.
Enabling modular business apps for desktop, browser and mobile.
Enabling modular business apps for desktop, browser and mobile.
Technology Communities
Open source technology for IoT solution developers.
Open source technology for IoT solution developers.
Open source solutions for systems engineering and embedded systems.
Systems Engineering
Open source solutions for systems engineering and embedded systems.
Open source solutions for geospatial applications.
LocationTech
Open source solutions for geospatial applications.
Eclipse Installer 2020-09 R
The Eclipse Installer 2020‑09 R now includes a JRE for Mac OS X, Windows and Linux.
Try the Eclipse Installer 2020‑09 R
The easiest way to install and update your Eclipse Development Environment.
Download
5 Steps to Install Eclipse
We’ve recently introduced the Eclipse Installer, a new and more efficient way to install Eclipse. It is a proper installer (no zip files), with a self-extracting download that leads you through the installation process. For those who prefer not to use the Installer, the packages and zip files are still available on our package download page.
1. Download the Eclipse Installer
Eclipse is hosted on many mirrors around the world. Please select the one closest to you and start to download the Installer
2. Start the Eclipse Installer executable
For Windows users, after the Eclipse Installer executable has finished downloading it should be available in your download directory. Start the Eclipse Installer executable. You may get a security warning to run this file. If the Eclipse Foundation is the Publisher, you are good to select Run.
For Mac and Linux users, you will still need to unzip the download to create the Installer. Start the Installer once it is available.
3. Select the package to install
The new Eclipse Installer shows the packages available to Eclipse users. You can search for the package you want to install or scroll through the list.
Select and click on the package you want to install.
4. Select your installation folder
Specify the folder where you want Eclipse to be installed. The default folder will be in your User directory.
Select the ‘Install’ button to begin the installation.
5. Launch Eclipse
Once the installation is complete you can now launch Eclipse. The Eclipse Installer has done it’s work. Happy coding.