Тема MacOS для Ubuntu 18.04
Вы устали от внешнего вида окружения рабочего стола Ubuntu и хотите попробовать что-то новое, например интерфейс MacOS? Многие пользователи хотят установить интерфейс MacOS из-за его уникального дизайна и элегантного внешнего вида. И вы можете сделать интерфейс Ubuntu похожим на MacOS с помощью темы Mac OS Ubuntu.
Уже создано множество тем, которые полностью изменят внешний вид вашей операционной системы. Это Linux и здесь вы можете сделать всё, что захотите. В сегодняшней статье мы разберём, как устанавливается тема Mac OS для Ubuntu 18.04.
Как сделать Ubuntu похожей на MacOS
В интернете доступны сотни тем, шрифтов, обоев и курсоров, которые помогут сделать Ubuntu похожей на Mac. Если на вашем компьютере уже установлен дистрибутив Ubuntu, вы можете найти в репозиториях несколько пакетов для этой цели, например: Macbuntu Transformation Pack, macOS Sierra и другие.
1. Выбор правильного окружения рабочего стола
В Ubuntu можно использовать несколько вариантов окружения рабочего стола, например Gnome, Unity, Cinnamon, KDE Plasma. Но чтобы Ubuntu выглядела как Mac, нам нужно установить Gnome. Именно для этого окружения созданы самые лучшие темы, имитирующие MacOS.
Последняя версия Ubuntu поставляется по умолчанию с оболочкой Gnome. Если у вас предыдущая версия с Unity или установлено другое окружение, используйте такую команду для установки Unity:
sudo apt install gnome-shell
Если система попросит выбрать менеджер входа, выберите lightdm. Затем вам необходимо установить утилиту Gnome Tweak Tool для выбора и настройки тем. Для этого выполните:
sudo apt update
sudo apt install gnome-tweak-tool
После завершения установки, выйдите из системы и войдите заново, или просто перезагрузите компьютер.
2. Установка темы Mac OSX Sierra Compact
Для оболочки Gnome существует несколько Mac-подобных тем в сети, но лучше всего будет установить тему Mac OSX Sierra Compact. Эта тема наиболее похожа на традиционную MacOS с её градиентами и визуальными эффектами. Скачать тему можно по ссылке.

Загрузите самую свежую версию темы на вкладке Files и распакуйте содержимое архива в папку
/.themes. Для этого можно использовать пункт контекстного меню Nautilus — Извлечь в. , где достаточно выбрать нужную папку:

Папка начинается с точки, и это значит, что она скрыта. Чтобы отображать скрытые файлы, нужно нажать сочетание клавиш Ctrl+H. Если такой папки не существует, вы можете её создать.

3. Установка темы Mac 11 GTK
Если вы хотите более современный плоский дизайн, вы можете установить тему MacOS 11 GTK+ and Shell theme. Нам понадобится два файла: macOS11-GTK.zip и macOS11-Shell.zip.

Скачайте их на вкладке Files и распакуйте содержимое в папку
/.themes, так же как и в предыдущем пункте. Должно получиться вот так:
4. Установка иконок MacOS
Иконки, стилизованные под MacOS X, можно скачать по этой ссылке.

Полученный файл надо распаковать в папку
/.icons в домашней директории:

5. Активация темы и иконок
Затем откройте Gnome Tweak Tool и на вкладке Внешний вид выберите тему для приложений и Shell MacOS 11 или Sierra Compact:

Иконки активируются на этой же вкладке, в строке Значки:

Если пункт выбора темы для Shell не активен, перейдите на вкладку расширения и включите там расширение User Themes.

Для полного применения темы необходимо перезагрузить компьютер.
После активации темы Sierra Compact ваше окружение будет выглядеть вот так:

5. Настройка док панели
Вы можете использовать боковую панель Ubuntu вместо док панели с помощью расширения Dash to Dock. Чтобы опустить панель вниз, активируйте расширение через Gnome Tweak Tool, а затем откройте контекстное меню на значке лаунчера, в нём выберите пункт Параметры Dash to Dock, а затем Расположение на экране — внизу:

Но наиболее похожей на интерфейс MacOS будет панель Plank. Она может использоваться как для запуска приложений, так и для переключения окон. Для установки Plank используйте команду:
sudo apt install plank
Установить тему MacOS для Plank можно из PPA-репозитория:
sudo add-apt-repository ppa:noobslab/macbuntu
sudo apt update
sudo apt install macbuntu-os-plank-theme-v9
Затем останется добавить панель Plank в автозагрузку, при старте она будет автоматически скрывать док панель по умолчанию.

6. Установка обоев рабочего стола
Последнее что необходимо сделать, чтобы ваша система выглядела как MacOS — установить правильные обои. Скачать обои MacOS от NoobsLab можно по ссылке. Архив надо распаковать, а дальше выбирайте, что нравится:

7. Установка шрифтов Mac
Системы MacOS известны своим красивым графическим интерфейсом с чистыми, красивыми шрифтами. Вы можете использовать OpenSource-версию шрифта Garuda или же использовать шрифты MacOS. Для их установки используйте команды:
wget -O mac-fonts.zip http://drive.noobslab.com/data/Mac/macfonts.zip
sudo unzip mac-fonts.zip -d /usr/share/fonts; rm mac-fonts.zip
sudo fc-cache -f -v
Выбрать шрифты для использования можно с помощью Gnome Tweak Tool:

Выводы
В этой небольшой статье мы рассмотрели, как устанавливается тема Mac Ubuntu 18.04, а также разобрали как настроить шрифты, фон рабочего стола и док-панель. Так что если вы хотите, чтобы ваша система выглядела как MacOS, вы уже знаете, что делать.
How to Make Debian 9 MATE Desktop Pretty (Themes, Icons, Fonts)
In this post I’d like to share with you the steps I took to make Debian 9 MATE desktop pretty. I will show you what GTK theme, icon theme, font and wallpaper I’m using. They are very easy to install and configure. You are also going to learn how to customize the login screen.
Enable sudo for Standard User Account
Some commands in this tutorial are prefixed with sudo . If your user account isn’t in the sudoer list, you can use the following command to switch to root user, assuming you know the root password.
If you want to add the standard user account into sudoer list, run the following command as root. Replace username with your actual username.
Then install sudo utility.
Log out and log back in for the change to take effect. From now on, the standard user can use sudo to manage the system.
Some packages will need to be downloaded from Launchpad. Generally speaking, Debian 9 is compatible with PPA packages made for Ubuntu 16.04 (Xenial).
Installing MATE Desktop Environment
MATE is a lightweight and fast desktop environment that preserves the traditional user interface of GNOME 2. To install MATE desktop on Debian 9, simply run the following commands in terminal.
Then log out and select MATE desktop at the login screen to log back in. You can change GTK theme, icon theme and font by going to System -> Preferences -> Look and Feel -> Appearance . Now let’s install some beautiful themes.
Top 5 Nice-Looking GTK themes
Arc GTK theme
This is a flat theme with transparent elements. Install it from Debian 9 repository.
Numix GTK theme
It’s a modern flat theme from the Numix project. You can install it from Debian 9 repository.
Paper GTK theme
Paper is a modern, flat desktop theme suite. Download deb package from launchpad and install it with dpkg .
Adapta GTK theme
Adapta is an adaptive Gtk+ theme based on Material Design Guidelines It supports Gtk 3.18.x, 3.20.x and 3.22.x. Download deb package from launchpad and install it with dpkg .
Flat Remix GTK theme
Flat Remix GTK theme is a pretty simple gtk window theme inspired on material design following a modern design using “flat” colors with high contrasts and sharp borders. Download deb package from launchpad and install it with dpkg .
Top 5 Nice-Looking Icon Themes
Before installing new icon themes, you may want to install the Gnome icon theme, which is required by some of the following icon themes.
Moka icon theme
Moka is a stylized Tango-esque Linux desktop icon set. You can install it from Debian 9 repository.
Numix icon theme
The Numix icon theme is designed to look fresh, swishy and modern using white symbols on vividly coloured background for applications and simplistic devices, toolbars and status icons. You can install it from Debian 9 repository.
Paper icon theme
Paper is simple and modern icon theme with material design influences. Download deb package from launchpad and install it with dpkg .
Papirus icon theme
Papirus is a SVG-based icon theme, drawing inspiration from Material Design and flat design. Download deb package from launchpad and install it with dpkg .
Flat Remix icon theme
Flat Remix is a pretty simple icon theme inspired on material design. Download deb package from launchpad and install it with dpkg .
Changing Themes on MATE Desktop
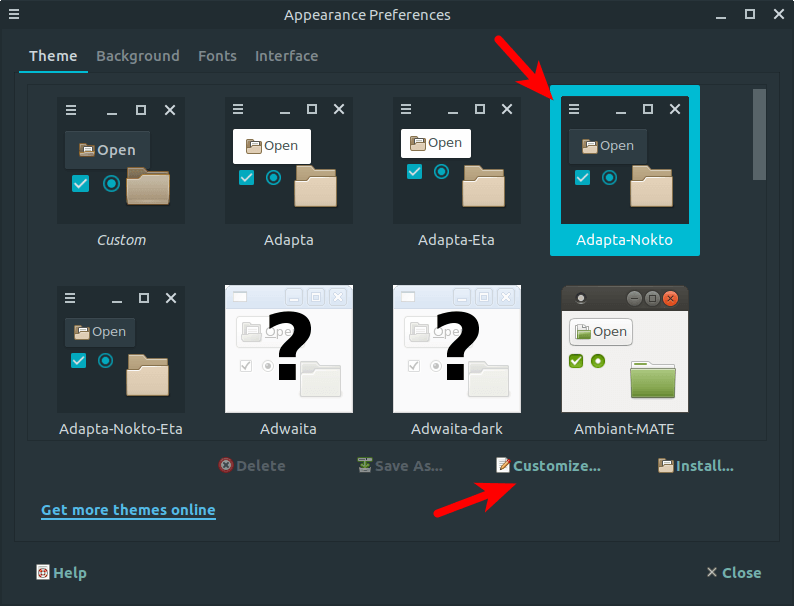
Once the above GTK themes and icon themes are installed, go to System -> Preferences -> Look and Feel -> Appearance . First, select your preferred GTK theme. For example, I like the Adapta Nokta theme.
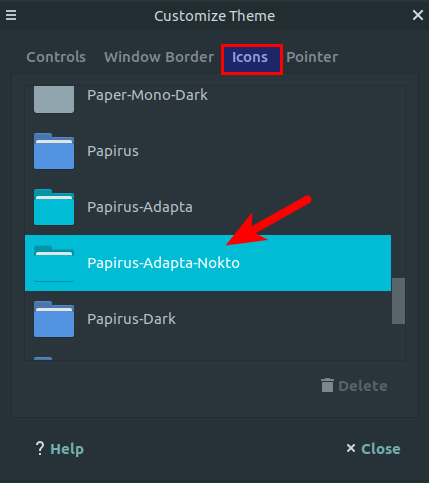
Then click Customize button and select Icons tab to choose your preferred icon theme. For instance, I choose Papirus-Adapta-Nokta .
Installing Ubuntu Font on Debian 9 Stretch
The Ubuntu font is my favorite font on Linux. Follow the steps below to make your Debian system look prettier.
Download ubuntu-font-family deb package from Ubuntu website. Or use wget to download it in terminal.
Then install it with dpkg .
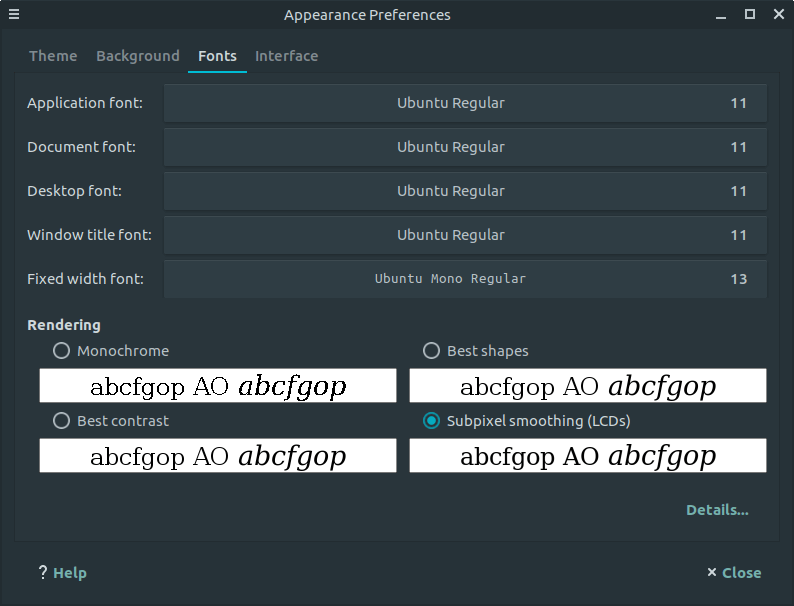
Then go to System > Preferences > Look and Feel > Appearance . In the Fonts tab, make changes as shown in the screenshot below. Choose Ubuntu Regular for the first four types of font and set the font size to 11 . Choose Ubuntu Mono Regular for the last type of font, which is used in terminal, and set the font size to 13 .
Installing a Wallpaper Changer
You can install the awesome variety wallpaper changer from Debian 9 repository.
Then start it from your application menu. It’s in the Accessories category. Click continue button on the first screen. Click No Thanks button on the second screen because VRTY.ORG has been shut down. Configure it to your liking. Then click the variety icon on the upper-right corner and click Next to choose your favorite wallpaper.
Terminal Prompt Color
By default, terminal prompt color is disabled on Debian 9, but some folks like to use it to quickly determine the beginning and end of terminal outputs. To enable colorful terminal prompt, open your .bashrc file.
In nano text editor, you can press Ctrl+W to search for strings. In this case, search for force_color_prompt . and uncomment force_color_prompt=yes .

Press Ctrl+O , then press Enter to save the file. Press Ctrl+ X to exit. Press Ctrl+D to exit the current terminal session and re-open a terminal window. Now you have enabled terminal prompt color.
Changing Main Menu Icon
Since we are using Debian, we like to see the Debian swirl logo on the main menu, right? But most themes ship with a different logo. It’s very easy to display the Debian swirl logo on the upper-left corner of your desktop.
Every icon theme comes with a file named start-here.svg . It’s this file that determines the icon used on the upper-left corner. You need to find this file and link it to a Debian swirl logo file. The gnome-icon-theme package installs the Debian swirl logo file at /usr/share/icons/gnome/scalable/places/debian-swirl.svg .
To find the start-here.svg file used by your icon theme, run the following command. Replace Papirus-Adapta-Nokto with the name of your icon theme.
Once you find that file, create a symbolic link pointing to the Debian swirl logo file like below.
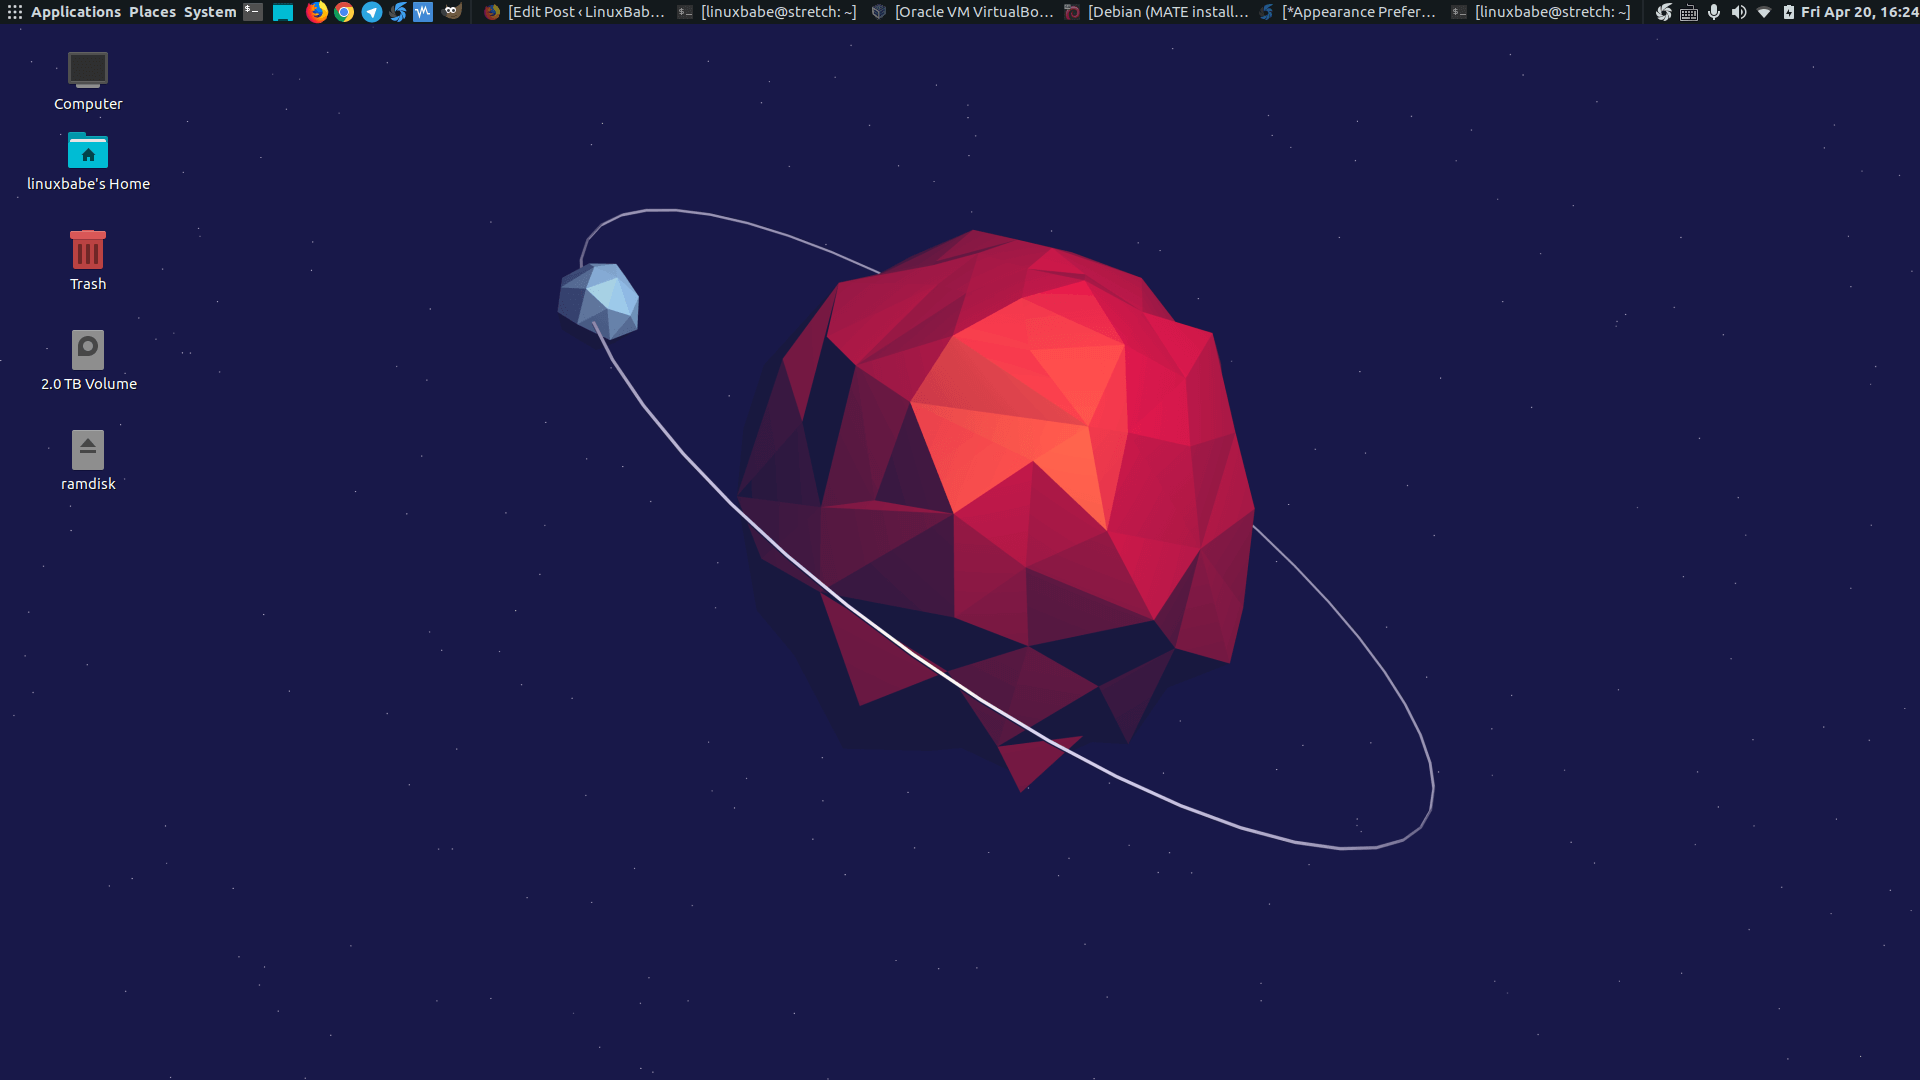
Log out and log back in, you should now see the Debian swirl logo at the upper left corner.
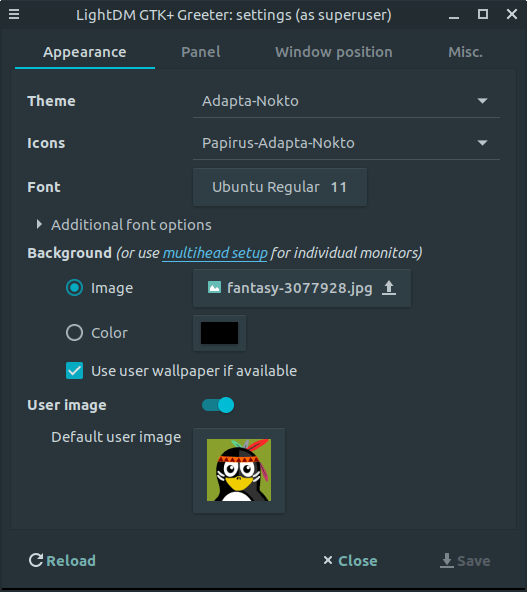
Customizing Login Screen
MATE desktop comes with lightDM display manager. You can make the login screen pretty with LightDM GTK+ Greeter.
Once it’s installed, go to System -> Control Center and search for LightDM GTK+ Greeter. You can choose a GTK theme, icon theme, font and background image for the login screen. Save your changes, then log out to view the result.
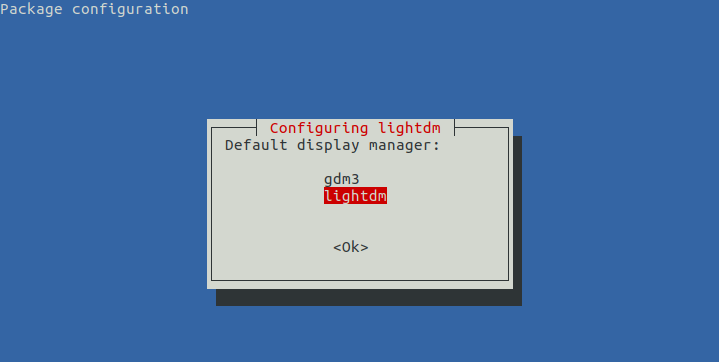
If previously you are using another desktop environment like GNOME, then lightDM will not be automatically installed when you install MATE desktop environment. In that case, you can install it with the following command.
It will ask you to choose a display manager. Press Enter.

Then select LightDM and press Enter.
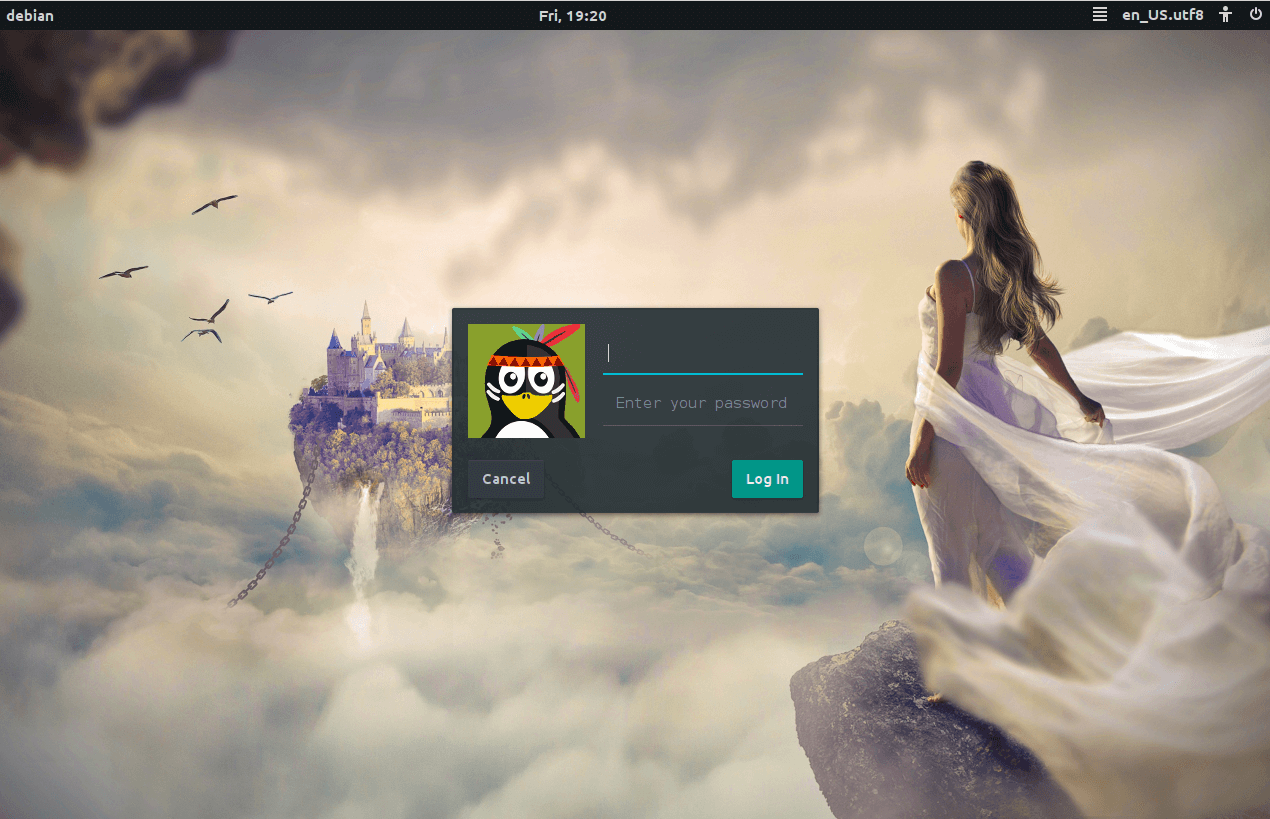
After it’s installed, configure login screen with LightDM GTK+ Greeter. Then restart your computer to see the result. You can choose which desktop environment to log into at the upper-right corner. Below is my Debian login screen. What do you think?
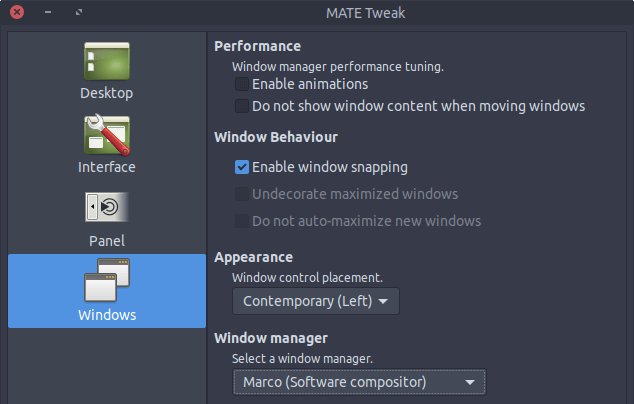
The last tool I’d like to share with you is mate-tweak .
Once installed, run
Using this tool, you can hide the default desktop icons, customize panels, move window control buttons to left or right, and so on.
I hope this post made it easy for you to use Debian 9 MATE desktop. As always, if you found this post useful, then subscribe to our free newsletter to get more tips and tricks. Take care.