Записки угрюмого поднимателя пингвинов.
*nix заметки на память
четверг, 15 сентября 2016 г.
LinuxMint/Ubuntu. Установка Citrix Receiver
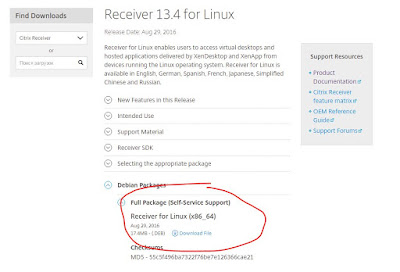
Скачиваем deb пакет Citrix Receiver нужной битности(у меня
x86_64) отсюда. На момент написания это версия 13.4.
Устанавливаем скачанный пакет с помощью команды gdebi.
# sudo gdebi icaclient_13.4.0.10109380_amd64.deb
В принципе всё, но при использовании собственных сертификатов возникает ошибка при попытке подключения — «Не удалось установить SSL-подключение к серверу, так как сертификат сервера не является достоверным.»

В логе Citrix Receiver(
.ICAClient/logs/AuthManager.latest) следуещее сообщение.
Time: Thu 15 Sep 2016 14:16:54 UTC
LocalTime: Thu 15 Sep 2016 14:16:54
Type: Warning
Module: Citrix Authentication Manager
Location: /opt/Citrix/ICAClient/AuthManagerDaemon
Version: 13.4.0.SF.10108934#379805#158852#68035#428764 (Release)
Platform: Linux
Description: There was a problem with the server’s certificate.
Exception type: Certificate exception
Detail: CheckedSendAndReceive(); m_Curlcode: 60; url: ‘https-url-withheld’
Context:
CAuthHttpRequestImpl::SendAndReceive
URLs have been stripped from this log message. To allow URLs in the log, set the logging mode to ‘verbose’.
В Windows экспортируем корневой сертификат в кодировке DER.

Перебрасываем сертификат в LinuxMint и конвертируем его в PEM с помощью команды.
# sudo openssl x509 -inform der -in certificate.cer -out certificate.pem
Полученный сертификат с расширением .pem перемещаем в директорию /opt/Citrix/ICAClient/keystore/cacerts/.
Перечитываем сертификаты с помощью команды ctx_rehash.

Запускаем Citrix Receiver, подключение проходит нормально.
Receiver 13.9.1 for Linux
Release Date: Mar 23, 2018
Receiver for Linux enables users to access virtual desktops and hosted applications delivered by XenDesktop and XenApp from devices running the Linux operating system. Receiver for Linux is available in English, German, Spanish, French, Japanese, Simplified Chinese and Russian.
Browser content redirection
Redirects the contents of a web browser to a client device and creates a corresponding browser embedded within Citrix Receiver. This feature offloads network usage, page processing, and graphics rendering to the endpoint. Doing so improves the user experience when browsing demanding webpages, especially webpages that incorporate HTML5 or Flash video. Browser content redirection is supported only on the x86 and x64 platforms.
For more information, see Browse content redirection and Browser content redirection policy settings in XenApp and XenDesktop documentation.
The retail build of standard Citrix Receiver for Linux can now generate and send logs through syslog. This feature allows the handling of messages to be controlled based on their level and origin. Retail logging support is being introduced for the Connection Sequence (WD, PD, TD, Proxy) and Printing components. This helps users troubleshoot, and — in cases of complicated issues — facilitate the support team’s job by using the detailed logs available. The log output is similar to the current debugging mode.
The logging parameters, log level, log file, log method (sequence, multi-sequential, cycle), and the module to be logged can be configured using configuration files. For information about enabling retail logging, see Enabling retail logging.
Support for Citrix Ready workspace hub
Citrix Ready workspace hub provides a secure connection to authorized apps and data. With this release, Citrix Receiver for Linux enhances the implementation for workspace hub plug-in, which enables support for the Citrix HDX RealTime Optimization Pack and dual monitors connected to a workspace hub.
This dot release includes the gstreamer1 files.
Install and set up
The following packages are available for Citrix Receiver for Linux. You can access the packages from the download section of the Citrix website.
| Package name | Contents |
|---|---|
| Debian packages (Ubuntu, Debian, Linux Mint etc.) | |
| icaclient_13.10.0.20_amd64.deb | Self-service support, 64-bit x86_64 |
| icaclient_13.10.0.20_i386.deb | Self-service support, 32-bit x86 |
| icaclient_13.10.0.20_armhf.deb | Self-service support, ARM HF |
| icaclientWeb_13.10.0.20_amd64.deb | Web Receiver only, 64-bit x86_64 |
| icaclientWeb_13.10.0.20_i386.deb | Web Receiver only, 32-bit x86 |
| icaclientWeb_13.10.0.20_armhf.deb | Web Receiver only, ARM HF |
| ctxusb_2.7.20_amd64.deb | USB package, 64-bit x86_64 |
| ctxusb_2.7.20_i386.deb | USB package, 32-bit x86 |
| ctxusb_2.7.20_armhf.deb | USB package, ARM HF |
| Redhat packages (Redhat, SUSE, Fedora etc.) | |
| ICAClient-rhel-13.10.0.20-0.x86_64.rpm | Self-service support, RedHat (including Linux VDA) based, 64-bit x86_64 |
| ICAClient-rhel-13.10.0.20-0.i386.rpm | Self-service support, RedHat based, 32-bit x86 |
| ICAClientWeb-rhel-13.10.0.20-0.x86_64.rpm | Web Receiver only, RedHat based, 64-bit x86_64 |
| ICAClientWeb-rhel-13.10.0.20-0.i386.rpm | Web Receiver only, RedHat based, 32-bit x86 |
| ICAClient-suse-13.10.0.20-0.x86_64.rpm | Self-service support, SUSE based, 64-bit x86_64 |
| ICAClient-suse-13.10.0.20-0.i386.rpm | Self-service support, SUSE based, 32-bit x86 |
| ICAClient-suse11sp3-13.10.0.20-0.x86_64.rpm | Self-service support, SUSE 11 sp3 (including Linux VDA) based, 64-bit x86_64 |
| ICAClient-suse11sp3-13.10.0.20-0.i386.rpm | Self-service support, SUSE 11 sp3 based, 32-bit x86 |
| ICAClientWeb-suse-13.10.0.20-0.x86_64.rpm | Web Receiver only, SUSE based, 64-bit x86_64 |
| ICAClientWeb-suse-13.10.0.20-0.i386.rpm | Web Receiver only, SUSE based, 32-bit x86 |
| ctxusb-2.7.20-1.x86_64.rpm | USB package, 64-bit x86_64 |
| ctxusb-2.7.20-1.i386.rpm | USB package, 32-bit x86 |
| Tarballs (Script install for any distribution) | |
| linuxx64-13.10.0.20.tar.gz | 64-bit Intel |
| linuxx86-13.10.0.20.tar.gz | 32-bit Intel |
| linuxarmhf-13.10.0.20.tar.gz | ARM HF |
The difference between packages that offer support for Web Receiver and those packages that support self-service is that the latter packages include dependencies required for self-service in addition to those needed for the Web Receiver. Dependencies for self-service are a superset of those required for Web Receiver, but the files installed are identical.
If you require only Web Receiver support, or your distribution doesn’t have the necessary packages to support self-service, install the Web Receiver only package.
If your distribution allows, install Citrix Receiver from the Debian package or RPM package. These files are easier to use because they automatically install any required packages. If you want to control the installation location, install Citrix Receiver from the tarball package.
Do not use both installation methods on the same machine. If you do, for example, if you install Citrix Receiver for Linux from a tarball package on a machine where Citrix Receiver for Linux was already installed from a Debian package, you are likely to see error messages and unwanted behaviors.
To install Citrix Receiver for Linux from a Debian package
If you are installing Receiver from the Debian package on Ubuntu, you might find it convenient to open the packages in the Ubuntu Software Center.
In the following instructions, replace packagename with the name of the package that you are installing.
This procedure uses a command line and the native package manager for Ubuntu/Debian/Mint. You can also install the package by double-clicking the downloaded .deb package in a file browser. This typically starts a package manager that downloads any missing required software. If no package manager is available, Citrix recommends gdebi, a command-line tool that performs this function.
To install the package using the command line
Log on as a privileged (root) user.
Open a terminal window.
Run the installation for the following three packages by typing gdebi packagename.deb. For example:
- gdebi icaclient_13.9.1.6_amd64.deb
- gdebi icaclientWeb_13.9.1.6_i386.deb
- gdebi ctxusb_2.7.6_amd64.deb
Note: To use dpkg in the above examples, replace “gdebi” with “dpkg -i.”
A user must install the icaclient package or the icaclientWeb package. The ctxusb package is optional to support Generic USB Redirection.
If using dpkg, install any missing dependencies by typing sudo apt-get -f install.
To install Citrix Receiver for Linux from an RPM package
If you are installing Citrix Receiver from the RPM package on SUSE, use the YaST or Zypper utility, not the RPM utility. The RPM utility does not download or install any necessary dependencies, it only installs the .rpm package. If the required dependencies are missing, you will receive an error.
Note: To follow an example of an installation using a RPM package, see the Citrix Blog article Installing Citrix Receiver for Linux 13.2.1 on SUSE Linux Enterprise Desktop.
In the following instructions, replace packagename with the name of the package that you are installing.
Note: If you receive an error indicating that the installation “… requires libwebkitgtk-1.0.so.0” on Red Hat based distributions (RHEL, CentOS, Fedora, etc.), add the EPEL repository (details can be found at https://fedoraproject.org/wiki/EPEL), which can provide the missing package, or switch to the Web variant of the package.
To set up the EPEL repository on Red Hat
Download the appropriate source RPM package from here:
For example, for Red Hat Enterprise 7.x:
yum localinstall epel-release-latest-7 .noarch.rpm
Tip: RPM Package Manager does not install any missing required software. To download and install the software, Citrix recommends using zypper install at a command line on OpenSUSE or yum localinstall on Fedora/Red Hat.
After setting up the EPEL repository, install Receiver from the RPM package
Log on as a privileged (root) user.
Run the installation for the following three packages by typing zypper in packagename.rpm.
Note: A user must install the icaclient package or the icaclientWeb package. The ctxusb package is an optional to support Generic USB Redirection.
Open a terminal window.
For SUSE installations:
zypper in ICAClient-suse-13.9.1.6-0.x86_64.rpm
zypper in ICAClient-suse-13.9.1.6-0.i386.rpm
zypper in ctxusb-2.7.6-1.x86_64.rpm
For Red Hat installations:
yum localinstall ICAClient-rhel-13.9.1.6-0.i386.rpm
yum localinstall ICAClientWeb-rhel-13.9.1.6-0.i386.rpm
yum localinstall ctxusb-2.7.6-1.i386.rpm
To install Citrix Receiver for Linux from a tarball package
Note: The tarball package does not do dependency checking or installation of dependencies. All system dependencies must be resolved separately.
- Open a terminal window.
- Decompress the .tar.gz file and extract the contents into an empty directory. For example, type: tar xvfz packagename.tar.gz.
- Type ./setupwfc and then press Enter to run the setup program.
- Accept the default of 1 (to install the Receiver) and press Enter.
Type the path and name of the required installation directory and then press Enter, or press Enter to install Receiver in the default location.
The default directory for privileged (root) user installations is /opt/Citrix/ICAClient.
The default directory for non-privileged user installations is $HOME/ICAClient/platform. Platform is a system-generated identifier for the installed operating system. For example, $HOME/ICAClient/linuxx86 for the Linux/x86 platform).
Note: If you specify a non-default location, set it in $ICAROOT in $HOME/.profile or $HOME/.bash_profile.
When prompted to proceed, type y and then press Enter.
You can choose whether to integrate Receiver into your desktop environment. The installation creates a menu option from which users can start Receiver. Type y at the prompt to enable the integration.
If you have previously installed GStreamer, you can choose whether to integrate GStreamer with Receiver and so support HDX Mediastream Multimedia Acceleration. To integrate Receiver with GStreamer, type y at the prompt.
Note: On some platforms, installing the client from a tarball distribution may cause the system to hang after prompting you to integrate with KDE and GNOME. This issue occurs with the first time initialization of gstreamer-0.10. If you encounter this issue, terminate the installation process (using ctrl+c) and run the command gst-inspect-0.10 – gst-disable-registry-fork –version. After executing this command, you can rerun the tarball setup without experiencing a system hang.
If you log on as a privileged user (root), choose to install USB support for XenDesktop and XenApp published VDI applications. Type y at the prompt to install USB support.
Note: If you are not logged on as a privileged user (root), the following warning appears: “USB support cannot be installed by non-root users. Run the installer as root to access this install option.”