Как установить Anaconda на macOS

Anaconda можно установить с помощью программы установки с интерфейсом (автоматически) или через командную строку (вручную). Если не уверены, какой способ выбрать, лучше воспользоваться инсталлятором.
Графическая установка на macOS
- Загрузите графический установщик Anaconda на macOS для своей версии Python.
- РЕКОМЕНДУЕТСЯ: проверить целостность данных с SHA-256. Чтобы узнать больше о хешах, почитайте статью «Как насчет криптографической проверки хешей?»
- Дважды кликните по загруженному файлу и нажмите «Продолжить» (continue) для начала установки.
- Подтвердите запросы на страницах Introduction, Read Me и Licence.
- Нажмите на кнопку «Установить» (Install), чтобы установить Anaconda в домашний каталог (рекомендуется):
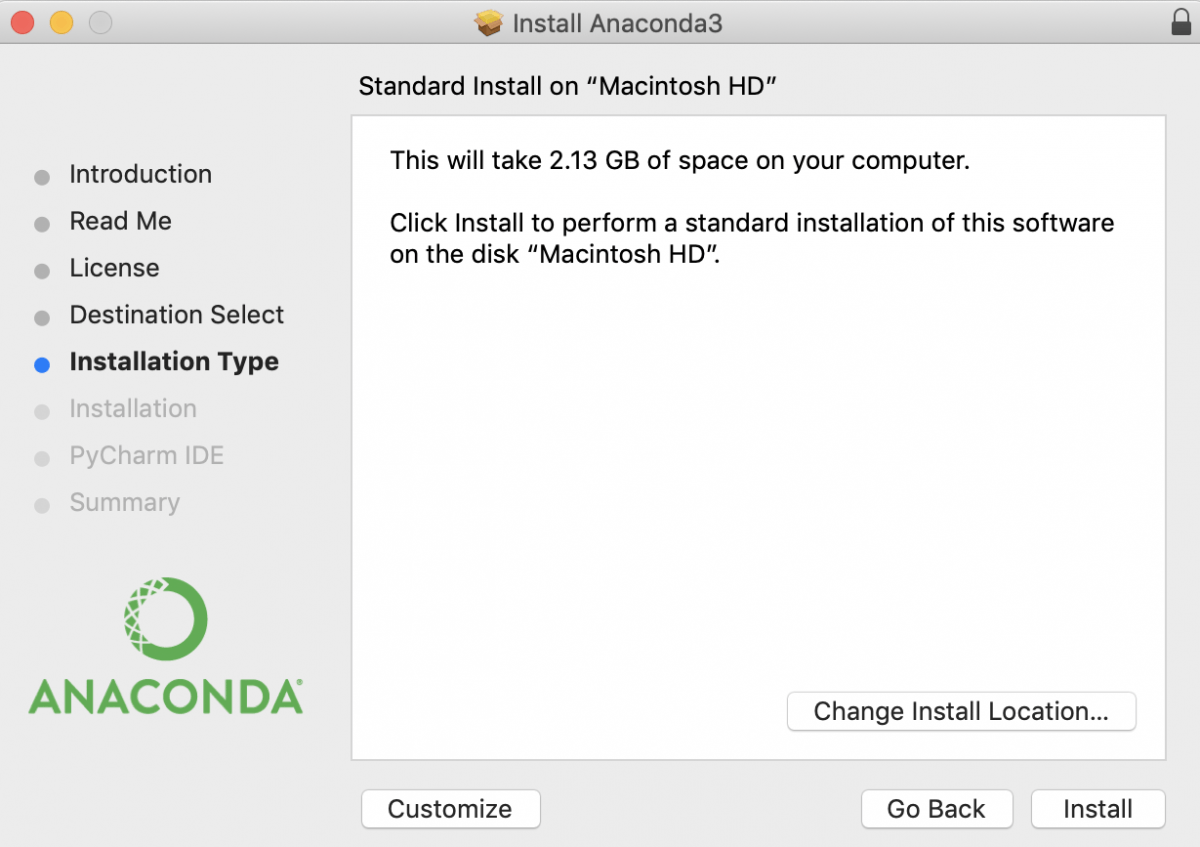
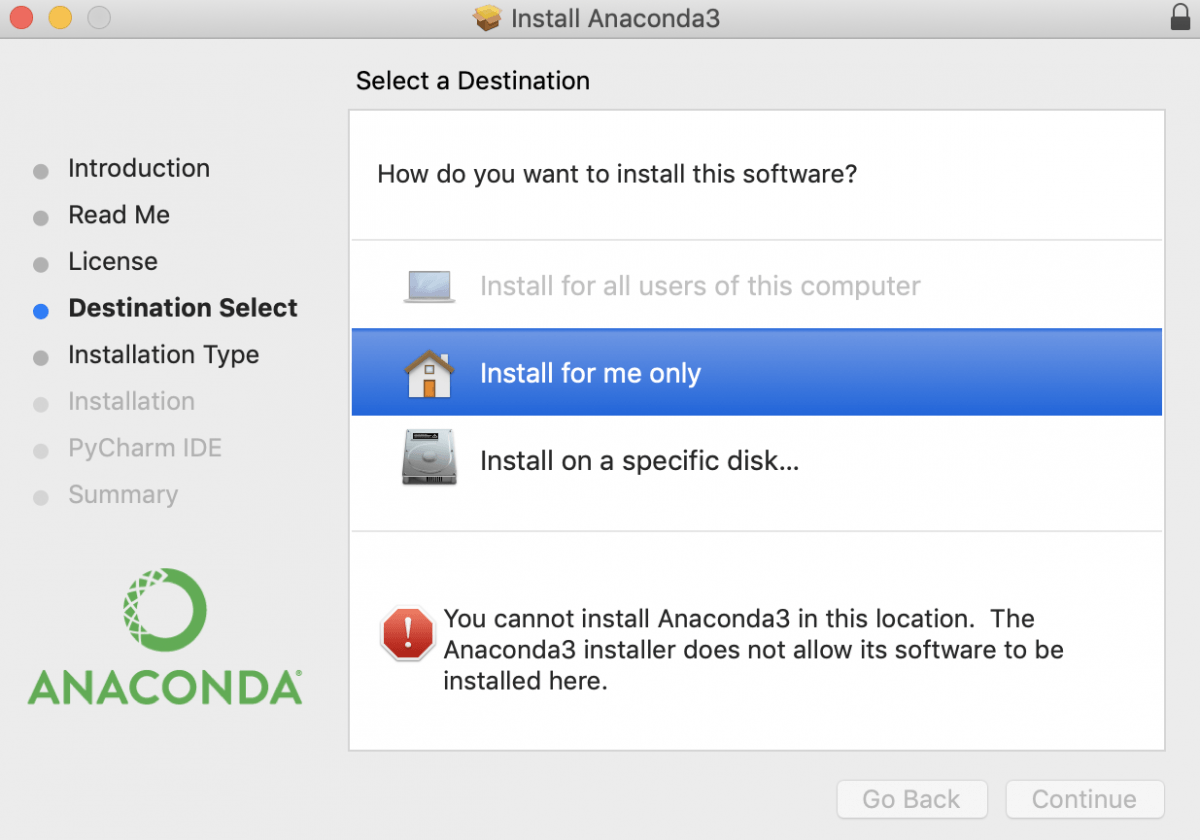
ИЛИ нажмите «Изменить место установки» (Change Install Location), чтобы установить в другое место (не рекомендуется). На экране Destination Select выберите «Установить только для меня» (Install for me only).
Если получаете сообщение об ошибке «Вы не можете установить Anaconda в этом месте» (You cannot install Anaconda in this location), снова выберите «Установить только для меня» (Install for me only)
С помощью командной строки
Используйте этот способ, если предпочитаете терминал.
- Загрузите программу установки на macOS для командной строки, выбрав свою систему.
- РЕКОМЕНДУЕТСЯ: проверить целостность данных с SHA-256.
- Откройте терминал и запустите следующее:
- Установите для Python 3.7 или 2.7:
- Для Python 3.7 введите следующее
- Для Python 2.7 откройте приложение терминала Terminal.app или iTerm2 и введите следующее:
Пишите команду bash вне зависимости от того, используете ли вы оболочку Bash
/Downloads на свой путь установки, а Anaconda3-2019.07-MacOSX-x86_64.sh именем загруженного файла.
Рекомендуется выбирать местоположение по умолчанию. Не выбирайте место как /usr для установки Anaconda/Miniconda.
Если выбрать «нет» (no), тогда conda не изменит скрипты оболочки. Для ее запуска уже после установки, сначала введите sourse /bin/activate , а только потом conda init .
conda init доступна в версиях conda 4.6.12 и старше.
Your data science toolkit
With over 20 million users worldwide, the open-source Individual Edition (Distribution) is the easiest way to perform Python/R data science and machine learning on a single machine. Developed for solo practitioners, it is the toolkit that equips you to work with thousands of open-source packages and libraries.
Anaconda Individual Edition is the world’s most popular Python distribution platform with over 20 million users worldwide. You can trust in our long-term commitment to supporting the Anaconda open-source ecosystem, the platform of choice for Python data science.
Search our cloud-based repository to find and install over 7,500 data science and machine learning packages. With the conda-install command, you can start using thousands of open-source Conda, R, Python and many other packages.
Individual Edition is an open source, flexible solution that provides the utilities to build, distribute, install, update, and manage software in a cross-platform manner. Conda makes it easy to manage multiple data environments that can be maintained and run separately without interference from each other.
Build machine learning models
Build and train machine learning models using the best Python packages built by the open-source community, including scikit-learn, TensorFlow, and PyTorch.

The open-source community at your fingertips
With Anaconda Individual Edition, the open-source world is your oyster. From robotics to data visualization, you can access the open-source software you need for projects in any field.
User interface makes learning easier
Anaconda Navigator is a desktop GUI that comes with Anaconda Individual Edition. It makes it easy to launch applications and manage packages and environments without using command-line commands.
Expedite your data science journey with easy access to training materials, documentation, and community resources including Anaconda.org.
Anaconda for the enterprise
With Anaconda’s Team and Enterprise Editions, our stack can handle the most advanced enterprise data science requirements.
Installing on macOS
You can install Anaconda using either the graphical installer (“wizard”) or the command line (“manual”) instructions below. If you are unsure, choose the graphical install.
macOS graphical install
Download the graphical macOS installer for your version of Python.
Double-click the downloaded file and click continue to start the installation.
Answer the prompts on the Introduction, Read Me, and License screens.
Click the Install button to install Anaconda in your
/opt directory (recommended):
OR, click the Change Install Location button to install in another location (not recommended).
On the Destination Select screen, select Install for me only.
If you get the error message “You cannot install Anaconda in this location,” reselect Install for me only.
Click the continue button.
Optional: To install PyCharm for Anaconda, click on the link to https://www.anaconda.com/pycharm.
Or to install Anaconda without PyCharm, click the Continue button.
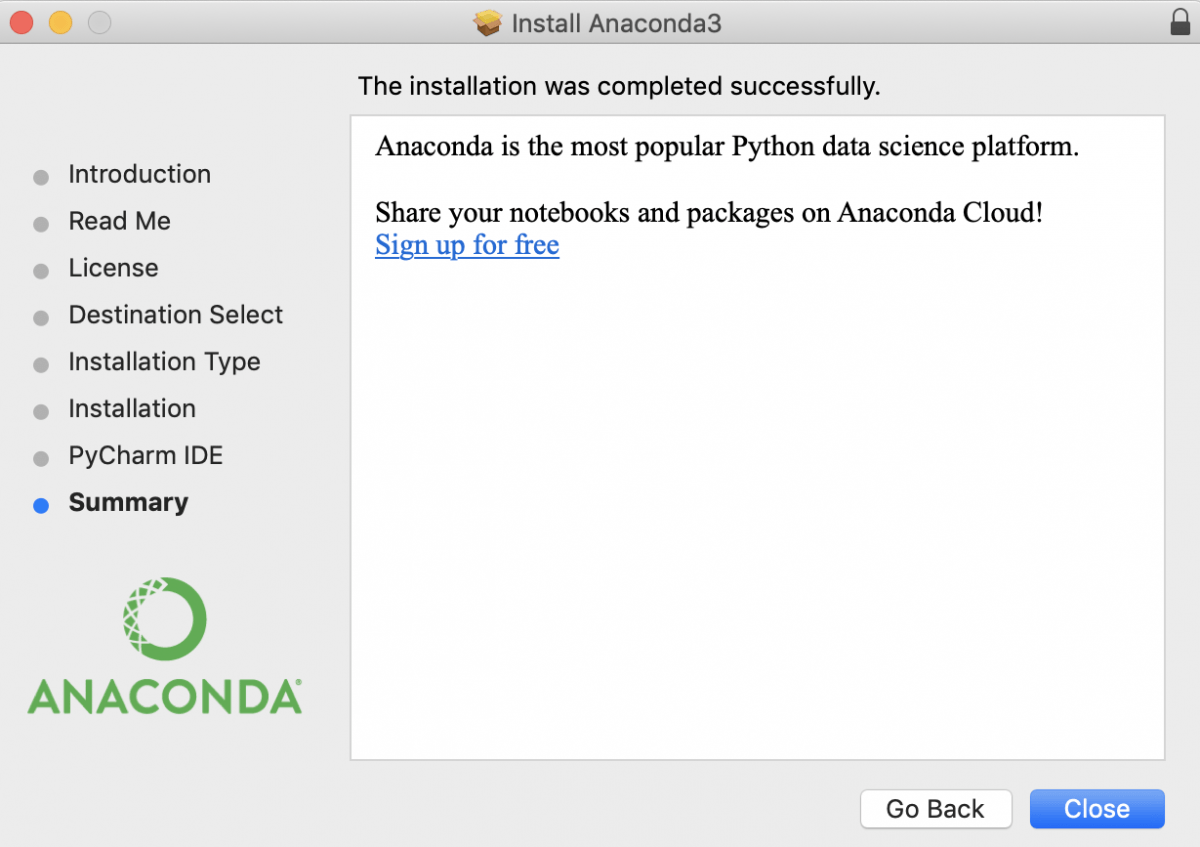
A successful installation displays the following screen:
Using the command-line install
Use this method if you prefer to use a terminal window.
In your browser, download the command-line version of the macOS installer for your system.
RECOMMENDED: Verify data integrity with SHA-256 . For more information on hash verification, see cryptographic hash validation.
Open a terminal and run the following:
Replace /path/filename with your installation’s path and filename.
Install for Python 3.7 or 2.7:
For Python 3.7 enter the following:
For Python 2.7, open the Terminal.app or iTerm2 terminal application and then enter the following:
Include the bash command regardless of whether or not you are using the Bash shell.
/Downloads with your actual path and Anaconda3-2020.02-MacOSX-x86_64.sh with actual name of the file you downloaded.
The installer prompts “In order to continue the installation process, please review the license agreement.” Click Enter to view the license terms.
Scroll to the bottom of the license terms and enter yes to agree to them.
The installer prompts you to Press Enter to confirm the location, Press CTRL-C to cancel the installation or specify an alternate installation directory. If you confirm the default location, it will display PREFIX=/home/ /anaconda or 3> and continue the installation.
Unlike the graphical install, installing the shell file will place it in
/anaconda by default, not
/opt. This is due to limitations with installing .pkg files on macOS Catalina.
Installation may take a few minutes to complete.
We recommend you accept the default install location. Do not choose the path as /usr for the Anaconda/Miniconda installation.
The installer prompts “Do you wish the installer to initialize Anaconda3 by running conda init?” We recommend “yes”.
If you enter “no”, then conda will not modify your shell scripts at all. In order to initialize after the installation process is done, first run source
to conda>/bin/activate and then run conda init .
If you are on macOS Catalina, the new default shell is zsh. You will instead need to run source
to conda>/bin/activate followed by conda init zsh .
The installer displays “Thank you for installing Anaconda!”
Optional: The installer describes the partnership between Anaconda and JetBrains and provides a link to install PyCharm for Anaconda at https://www.anaconda.com/pycharm.
Close and open your terminal window for the Anaconda installation to take effect.
To control whether or not each shell session has the base environment activated or not, run conda config —set auto_activate_base False or True . To run conda from anywhere without having the base environment activated by default, use conda config —set auto_activate_base False . This only works if you have run conda init first.
conda init is available in conda versions 4.6.12 and later.


