How do I create a Bash alias?
I’m on OSX and I need to put something like this, alias blah=»/usr/bin/blah» in a config file but I don’t know where the config file is.

/.bash_profile to my bash_profile and then I source it and run addAlias hi ‘echo «hi» ‘ . Source bash profile and type hi to see it. – devssh Jan 23 ’18 at 7:35
15 Answers 15
You can add an alias or a function in your startup script file. Usually this is .bashrc , .bash_login or .profile file in your home directory.
Since these files are hidden you will have to do an ls -a to list them. If you don’t have one you can create one.
If I remember correctly, when I had bought my Mac, the .bash_login file wasn’t there. I had to create it for myself so that I could put prompt info , alias , functions , etc. in it.
Here are the steps if you would like to create one:
- Start up Terminal
- Type cd
/ to go to your home folder
I just open zshrc with sublime, and edit it.
And add this on sublime:
Run this in terminal:
On OS X you want to use
/.bash_profile. This is because by default Terminal.app opens a login shell for each new window.
See more about the different configuration files and when they are used here: What’s the difference between .bashrc, .bash_profile, and .environment?
In my .bashrc file the following lines were there by default:
Hence, in my platform .bash_aliases is the file used for aliases by default (and the one I use). I’m not an OS X user, but I guess that if you open your .bashrc file, you’ll be able to identify what’s the file commonly used for aliases in your platform.
Add the following like:
Finally restart Terminal.
/.bash_profile (command which activates/ reloads the bash aliases) – UIResponder Jul 10 ’17 at 13:01
It works for me on macOS Majave
You can do a few simple steps:
2) sudo nano /.bash_profile
3) add your aliases, as example:
4) source /.bash_profile
Done. Use and enjoy!

The config file for scripts and programs is
/.bashrc and the config file that gets loaded when you use Terminal is
I think the best way is to just have everything in
For your specific question just enter (this will overwrite any existing
into the Terminal and a
/.bashrc file will be created with your new alises. After that just edit the file to add new aliases, functions, settings etc.
Create alias at bottom of the file
Open terminal (Ctrl+Alt+T) & type cdDesktop & press enter

MacOS Catalina and Above
Apple switched their default shell to zsh, so the config files include
/.zshrc . This is just like
/.bashrc , but for zsh. Just edit the file and add what you need; it should be sourced every time you open a new terminal window:
/.zshenv alias py=python
Then do ctrl+x, y, then enter to save.
This file seems to be executed no matter what (login, non-login, or script), so seems better than the
High Sierra and earlier
The default shell is bash, and you can edit the file
/.bash_profile and add aliases:
/.bash_profile alias py=python
Then ctrl+x, y, and enter to save. See this post for more on these configs. It’s a little better to set it up with your alias in
/.bashrc , then source
/.bash_profile it would then look like:

If you put blah=»/usr/bin/blah» in your
/.bashrc then you can use $blah in your login shell as a substitute for typing /usr/bin/blah
You probably want to edit the .bashrc file in your home directory.
create a bash_profile at your user root — ex
add alias as ex. (save and exit)
in new terminal just type mydir — it should open
I think it’s proper way:
1) Go to teminal. open
/.bashrc . Add if not exists
/.bash_aliases . If not exists: touch
3) To add new alias rather
— edit .bash_aliases file and restart terminal or print source
/.bash_aliases
— print echo «alias clr=’clear'» >>
/.bash_aliases where your alias is alias clr=’clear’ .
/.bash_profile file. It needs to load aliases in each init of terminal.

For macOS Catalina Users:
Step 1: create or update .zshrc file
Step 2: Add your alias line
Step 3: Source .zshrc
Step 4: Check you’re alias, by typing alias on the command prompt

To create a permanent alias shortcut, put it in .bash_profile file and point .bashrc file to .bash_profile file. Follow these steps (I am creating an alias command called bnode to run babel transpiler on ES6 code):
- Go to terminal command prompt and type “cd” (this will take you to the home directory. Note: even though your programming files may be located on your “D: drive”, your “.bash” files may be located on your “C: drive” )
- To see the location of the home directory, type “pwd” (this will show you the home directory path and where the .bash files are probably located)
- To see all dot «.» files in the home directory, type “ls -la” (this will show ALL files including hidden dot «.» files)
- You will see 2 files: “.bash_profile” and “.bashrc”
- Open .bashrc file in VS Code Editor or your IDE and enter “source
Coolest Guides On The Planet
To make aliases of macOS Unix commands in your bash or zsh shell on macOS and earlier versions, it is done via your .bash_profile or .zsh file which lives in your home account directory, if the file does not already exist, just create one.
Launch Terminal from the /Application/Utilities folder
Go to your home directory by just entering cd followed by the ‘return’ key to enter the command:
List your home directory contents including invisible files to see if the file already exists, use:
Create the .bash_profile or .zsh file using the command line program called ‘nano’ if it doesn’t exist:
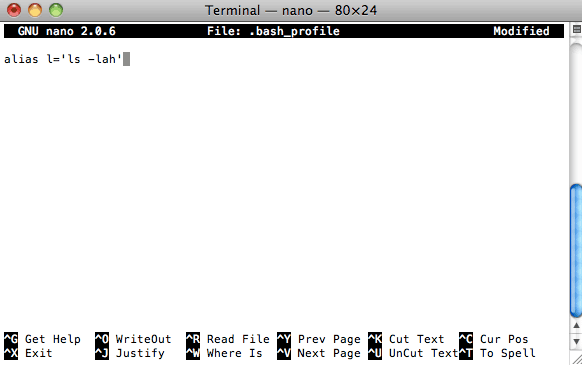
When the .bash_profile or .zsh file is created you are ready to enter your alias commands.
So here I am using the alias ‘l’ to alias the command ‘ls -lah’
In nano ‘control+o’ to write the file out and ‘control+x’ to exit the file.
Refresh the shell environment by entering the command below:
That’s it, now the alias will take effect.
To add other aliases just start a new line, and apply the same formatting.
irazasyed / bash_profile.md
Mac OS X Terminal Aliases & How-To
Collection of some of my fav terminal aliases that i use often & collected from the web. This file will be updated with more aliases as i find more. Feel free to comment and share your fav aliases you use 🙂
###Follow these simple steps to add the following aliases:###
Type i and then paste the following at the top of the file:
alias art=’php artisan’
Open file with Sublime Text 2 $ st /folder/example.php
alias st=’open -a «Sublime Text 2″‘
Jump back n directories at a time
Flush DNS (Mac OS X Moutain Lion or Lion)
alias dnsflush=’sudo killall -HUP mDNSResponder’
This helps me edit files that my user isn’t the owner of
alias edit=’SUDO_EDITOR=»open -FWne» sudo -e’
The alias that takes me here — to editing these very aliases
alias edit_profile=’open -e
I do a lot of web development, so I need to edit these non-owned files fairly often
alias edit_hosts=’edit /etc/hosts’ alias edit_httpd=’edit /etc/apache2/httpd.conf’ alias edit_php=’edit /etc/php.ini’ alias edit_vhosts=’edit /etc/apache2/extra/httpd-vhosts.conf’
Some of my goto commands, including one to open the php extension folder for when I need to install custom extensions
/Sites’ alias goto_phpext=’sudo open /usr/lib/php/extensions/no-debug-non-zts-20100525′
alias goto_htdocs=’cd /Applications/MAMP/htdocs’
This alias recursively destroys all .DS_Store files in the folder I am currently in
alias killDS=’find . -name *.DS_Store -type f -delete’
An alias to start my custom MySQL installation instead of the default one
alias mysql=’/usr/local/mysql-5.5.25-osx10.6-x86_64/bin/mysql -u root’
This alias reloads this file
Mac get stuck very often and are extremely slow and unstable on shutdowns. This forces a shutdown.
alias poweroff=’sudo /sbin/shutdown -h now’
alias ls=’ls -aFhlG’ alias ll=’ls -l’ alias search=grep alias ports=’sudo lsof -iTCP -sTCP:LISTEN -P’
Run second instance of Skype (Good for using multiple accounts)
alias ss=’sudo /Applications/Skype.app/Contents/MacOS/Skype /secondary’
Get OS X Software Updates, update Homebrew itself, and upgrade installed Homebrew packages
alias update=»sudo softwareupdate -i -a; brew update; brew upgrade»
Speed-up Terminal load time by clearing system logs
alias speedup=»sudo rm -rf /private/var/log/asl/*»
Empty the Trash on all mounted volumes and the main HDD
Also, clear Apple’s System Logs to improve shell startup speed
alias emptytrash=»sudo rm -rfv /Volumes/*/.Trashes; sudo rm -rfv
To get my external IP
alias myip=’curl icanhazip.com’
alias ip=»dig +short myip.opendns.com @resolver1.opendns.com» alias localip=»ifconfig en0 inet | grep ‘inet ‘ | awk ‘ < print $2 >‘» alias ips=»ifconfig -a | perl -nle’/(\d+.\d+.\d+.\d+)/ && print $1′»
Enhanced WHOIS lookups
alias whois=»whois -h whois-servers.net»
Show Hidden files in Finder
alias finder_s=’defaults write com.apple.Finder AppleShowAllFiles TRUE; killAll Finder’
Hide Hidden files in Finder
alias finder_h=’defaults write com.apple.Finder AppleShowAllFiles FALSE; killAll Finder’
Hit ESC , Type :wq , and hit Enter
Reload the bash profile, In Terminal, run:
And we’re done! If everything went good, you should be able to start using those aliases right away 🙂